The following post contains affiliate links. Read my full disclosure here.
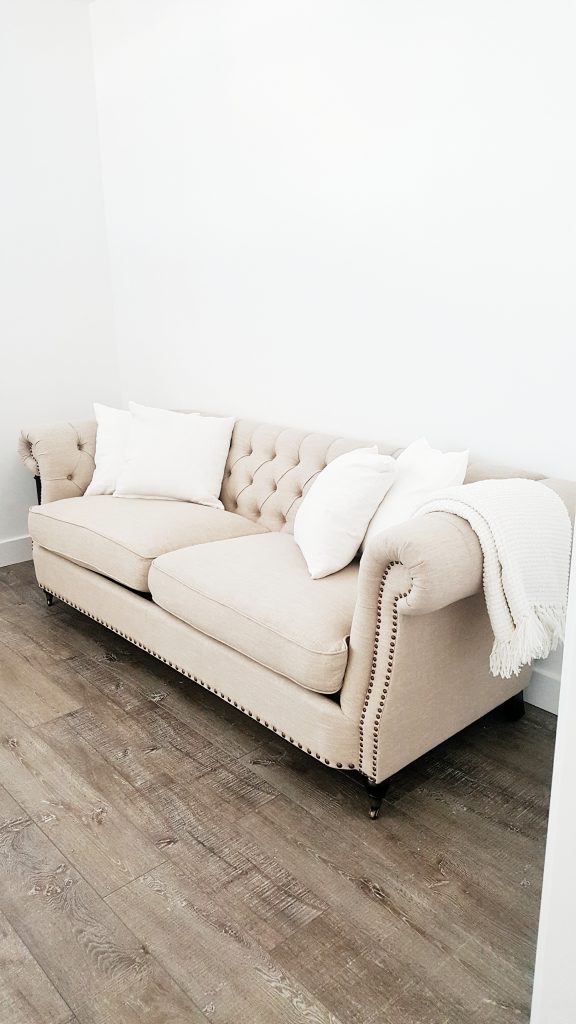
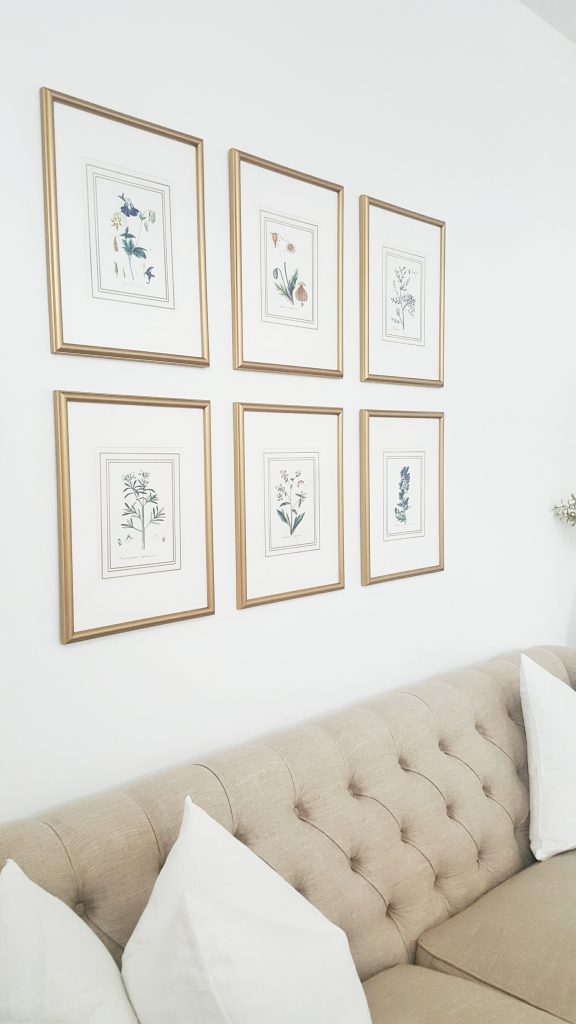
Once upon a time, I had a lot of plans for a new house. Then we moved into the house. The projects were everywhere. It took a lot longer to get them done than I thought. For instance, this gallery wall. I knew I wanted to hang a grouping of botanical prints in my front living room. However, It took me forever to find the right frames and actually hang them.
My front room looked like a blank canvas for a long time. I didn’t mind because I like clean and simple. Over time, I knew I had to get something on the walls. When I was working on my son’s Star Wars room, I came across Home James Art. She had the perfect patent prints for his bedroom. When I came to pick them up, Jo also has some lovely botanical prints. I knew they were perfect for my front room.
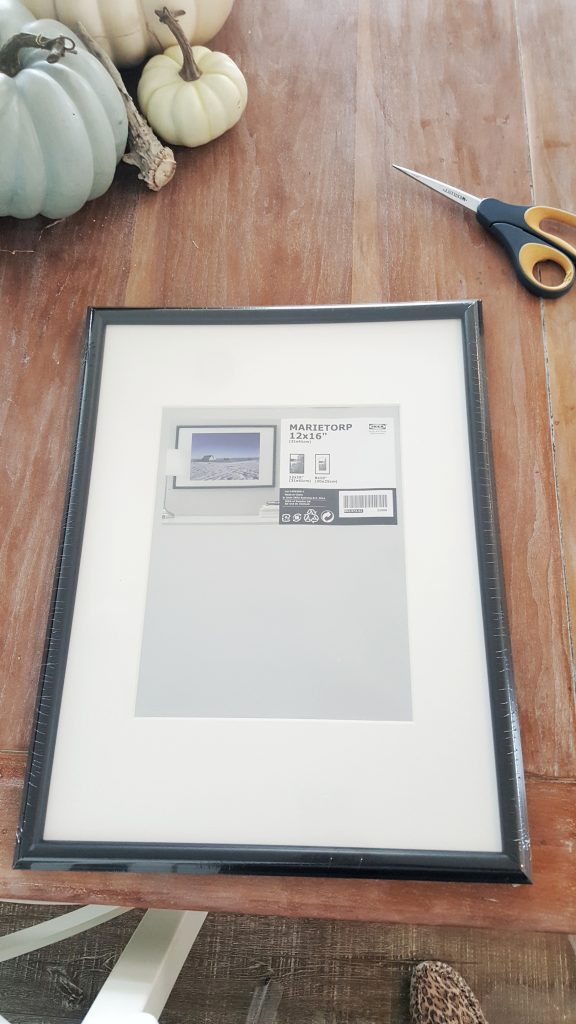
I now had the perfect prints and no frames. I started to look everywhere for something brass or gold. I needed six of the frames. Everything was getting really pricey and over budget. I then decided I would have to find something in any color and just spray paint them. IKEA always has affordable frames. I wanted the frame to be thinner and dainty for an elegant look. I found thesein black and knew I could make them work. The best part of all, they were only $4.99 each. Yes, those are pumpkins on the table all the way back from the fall (told you this took forever to complete). Those are also my super trendy mom leopard house shoes. Be jealous people, be very jealous of this mom uniform.
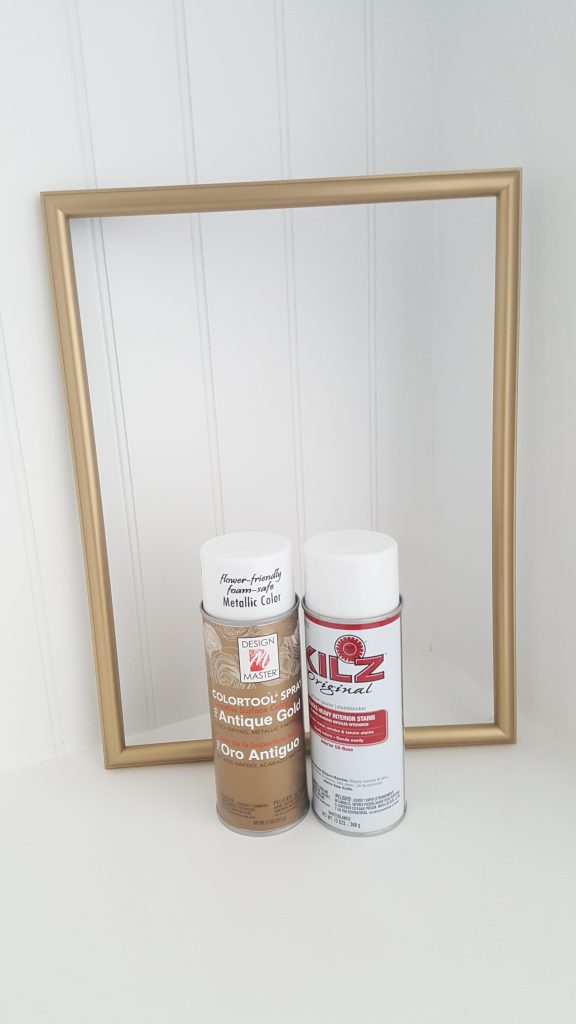
When I got them home, I went straight to priming the frames with my KILZprimer. You can see my full spray painting tutorial here. I made sure to let them dry for a couple hours. Then, I used my favorite brass spray paint. I have used this color all over my house. It really is the perfect brassy gold color.
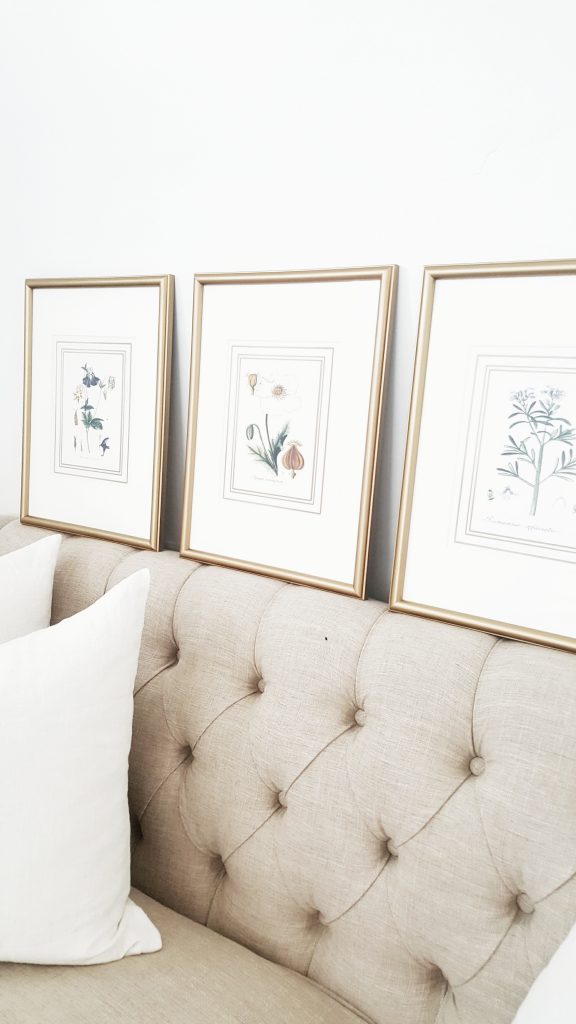
I put my new botanical prints back in the frames, once they had dried. Then, I sat them on the couch, right below where they would be hung. That is where they sat for months, months people! I don’t know why I never got around to hanging them sooner. They were done enough and I had a million other things to do, apparently.
Then my son got his tonsils out. I was home playing nurse for weeks. In between taking care of him, I was finally able to get these hung. I guess the trick is being stuck inside, for days at a time, to get anything done around here. I really like how they look, especially for the price. No more blank wall in this room. However, the other side of this room still needs chairs and a rug. I hope to show you more at the Joyful Spring Home Tour in March!
Christmas is in less than two weeks. I am still working on getting a few final gifts. However, I got most of my shopping done before Black Friday. I thought I would put together a list of last-minute gift ideas that include a few of my go-to gifts.
You can never go wrong with a pedicure or massage for the ladies in your life. Some people think it is impersonal and not very thoughtful. Are you kidding me? I would take pedicure or massage any day and twice on Sunday. Come on! Trust me, it is the perfect relaxing gift for the ladies in your life. In fact, my toes look scary right now. Santa- I need a pedicure!
My next last-minute gift is movie tickets. Who doesn’t love the movies? Every time Mr. Whitelane and I go, it seems to get more expensive. It is always nice to have a gift card or tickets to use. It makes a great date night for couples. If you want to go the extra mile, wrap the tickets up with a refillable mug from the theater and some candy.
Have you heard of the Dollar Shave Club? It is seriously so cool. You can get your first set of razors for just $1. That includes 4 cartridges and a handle that ships all free. After that first month, it is only a few bucks a month. You can cancel or pause your service at any time. This is not just for men. Ladies shave too. You can pick which blade you like best along with any grooming products as well. It is all delivered to your front door each month.
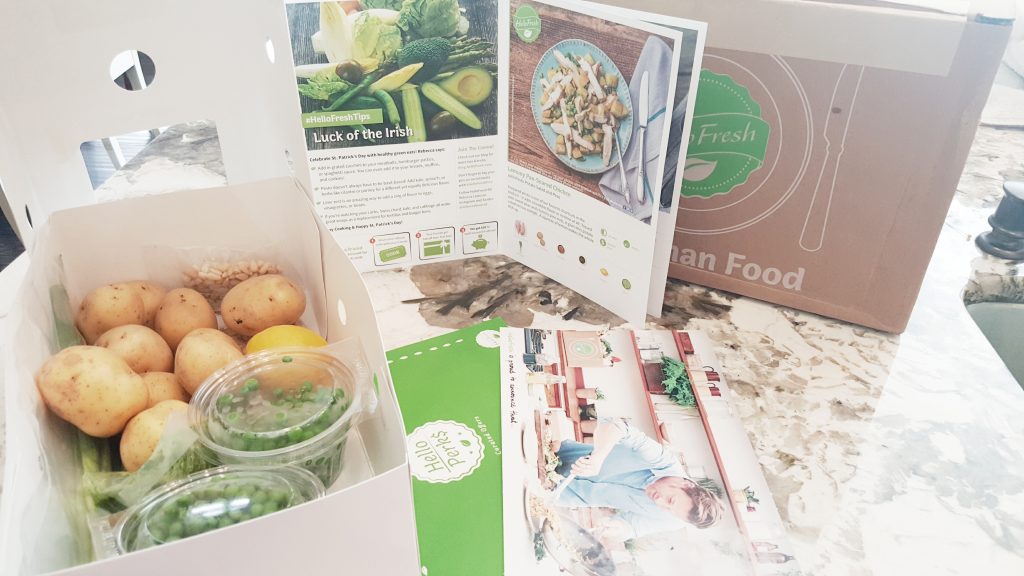
I have talked about Hello Fresh beforeand have used their services many times. I think it is so convenient and I love not having to think about meal planning. You pick how many people are in your family along with vegan or meat options. Hello Fresh then sends you meals for as many days as you chose that week. No measuring or shopping. Everything delivered cold in pre- measured packages to your front door. All you do is follow the included recipe with the ingredients provided. We have really liked every meal. Some meals are stuff we would never have tried and ended up loving. The best part is that we have the recipe to make it again anytime we want. Dinner delivered to your front door with fresh ingredients? Sounds like a great gift to me!
Finally, I think Amazon Echo makes a great gift for anyone in your life. Echo connects to the Alexa Voice Service to provide a wide variety of hands-free operations. This device can play music, read news, tell you the weather, sports scores, read audio books and much more. It can even be programmed to adjust lights in your house as well as thermostats. Turn any house into a smart house. I really want one for myself! Santa, if you are reading this…
Hopefully, this gives you some ideas for those last minute gifts on your list. Now hurry and get to shopping before Santa comes!
A lot of people want to know the easiest way to update their house without spending a lot of money. I am going to let you in on a little secret. Paint and light fixtures. You would be surprised how much these two simple fixes can change the look of a room.
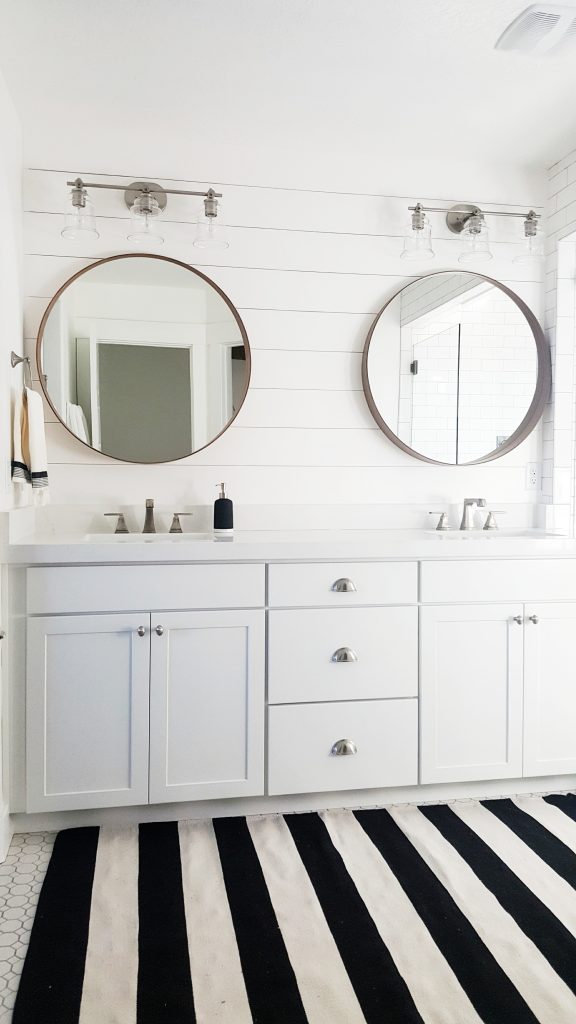
Although we built a new house, we chose to leave some things builder basic. Two of those things were the bathroom light fixtures and ceiling fans. I knew I wanted to swap them out after we moved in. The builder did not have an option that I loved. I also knew I could find some cheaper options after we got into the house. I like to look online for sales as well as local lighting stores. If you change your address through the local post office (or online), you can sign up for coupons to be sent to your new address or email. Home Depot or Lowe’s are always one of those coupons (along with a lot of other good coupons). I was able to use my coupon at Lowe’s to get some simple inexpensive vanity lights for our master bathroom. I am not an electrician and I do not recommend trying to change a light fixture without professional help. However, I have been changing light fixtures in our houses since we got married (after a lot of coaching from an expert). I am so glad I learned the proper way to change electrical fixtures. It has saved us a lot of money and made a big design impact.
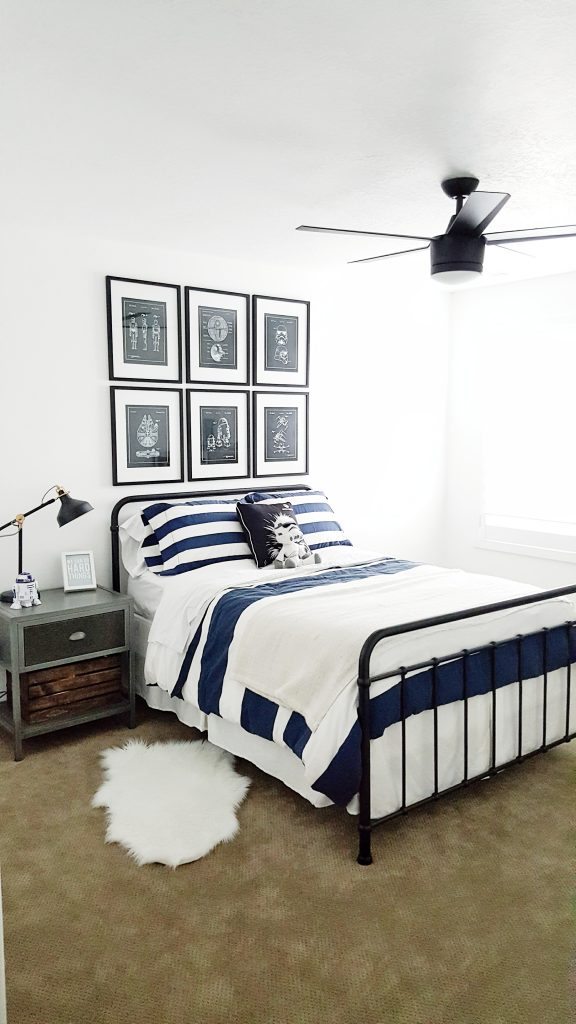
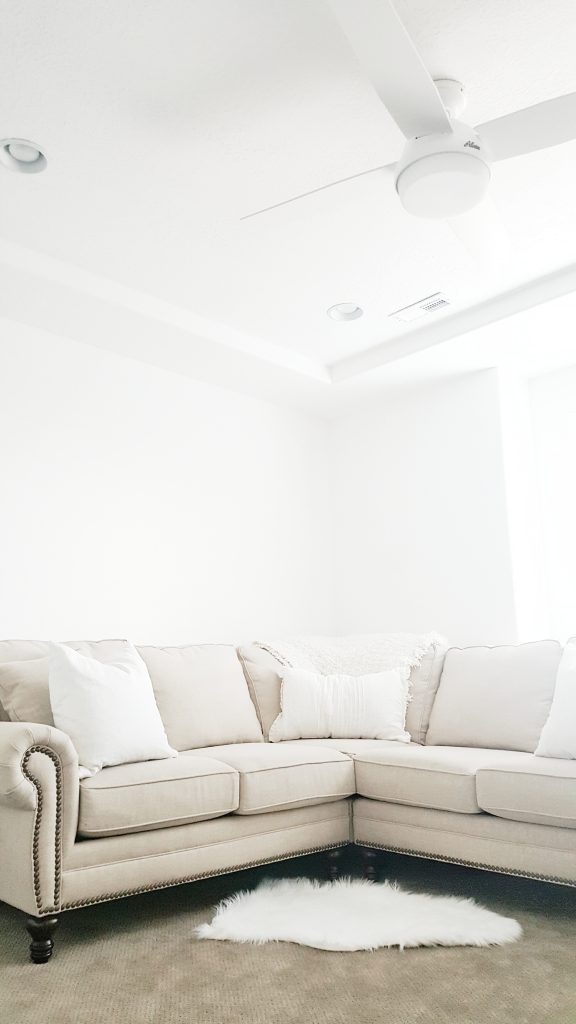
I also found these ceiling fans to put in all the bedrooms and living areas. Ceiling fans are a little harder to swap out. However, I think it is well worth the time and work. This ceiling fan totally transformed my son’s room. The builder basic fans were not cutting it in our house. I love how this swap made such a big impact. Most of the time, you can sell the old fans or lights on a local yardsale page or Craigslist. It is a better option than throwing them out. You can also make a little money to put towards the new fixtures.
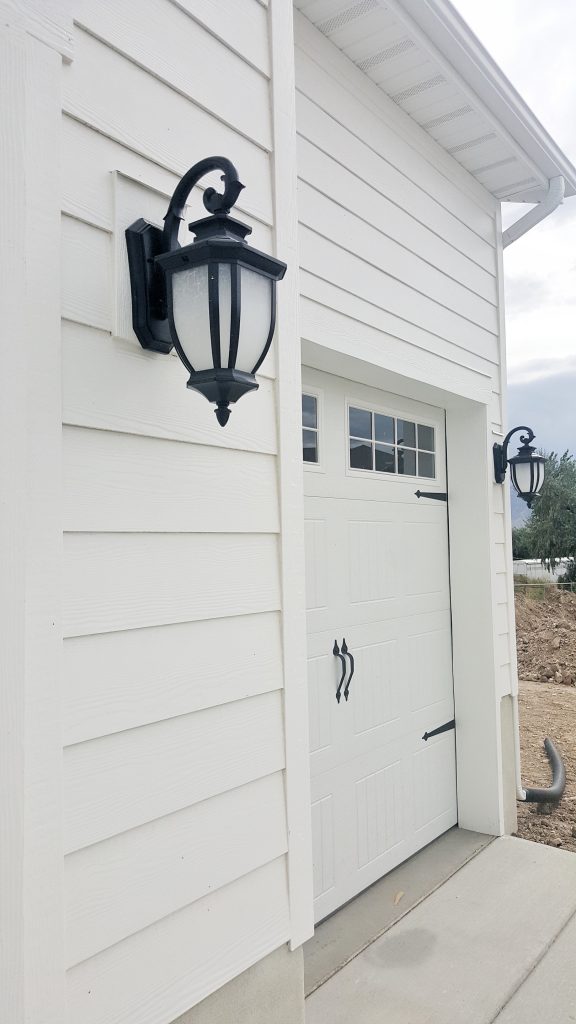
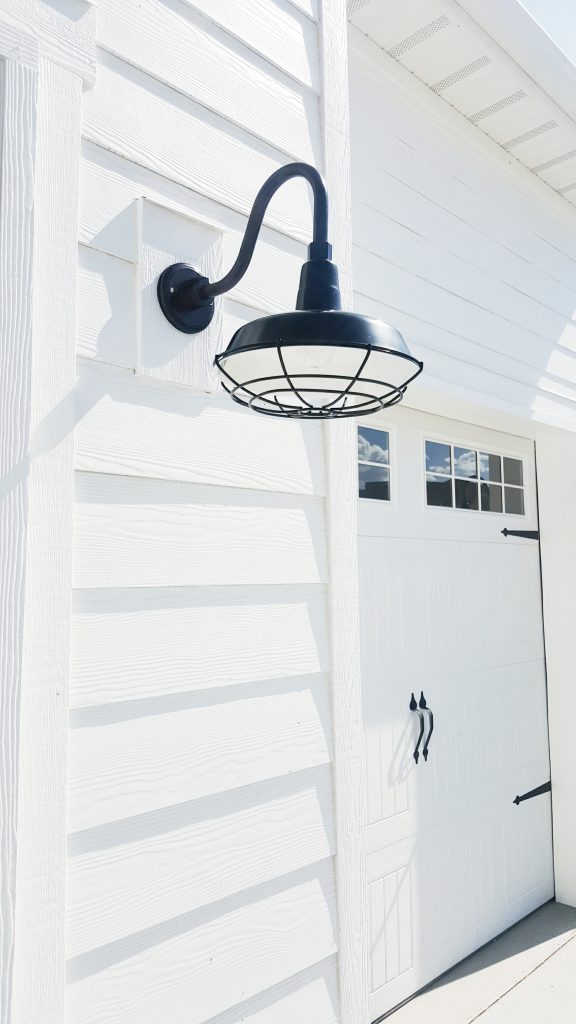
We left the builder basic lights on the front of our garage too. I knew I wanted some goose neck farm lights for the garage. I searched and searched for a good deal and finally came across these. I really like the new look it gave the front of our garage. Again, easy swap with a big impact.
Paint, paint, paint. True story: one time we bought a house and painted the entire inside. We had a painting party and invited our friends and family. We provided all the paint, rollers, and lots of food. It was a little bit of sweat equity but a lot of fun with everyone helping. Anybody can paint and you will be so happy once you step back and see the change. I am telling you, I have brought back so many outdated rooms and furniture pieces with a can of paint (or spray paint).
I have found paint and light fixtures go a long way in making a big change. Both can be done relatively inexpensive. If you can shop around for a good deal (or use a coupon) on the light fixtures, that will save even more. Also, don’t forget to sell your old fixtures. Sherwin Williams also has a 50% off paint sale a few times a year. Try to plan your projects around this sale. It will save a lot of money too. Anybody can make these two big impact changes.
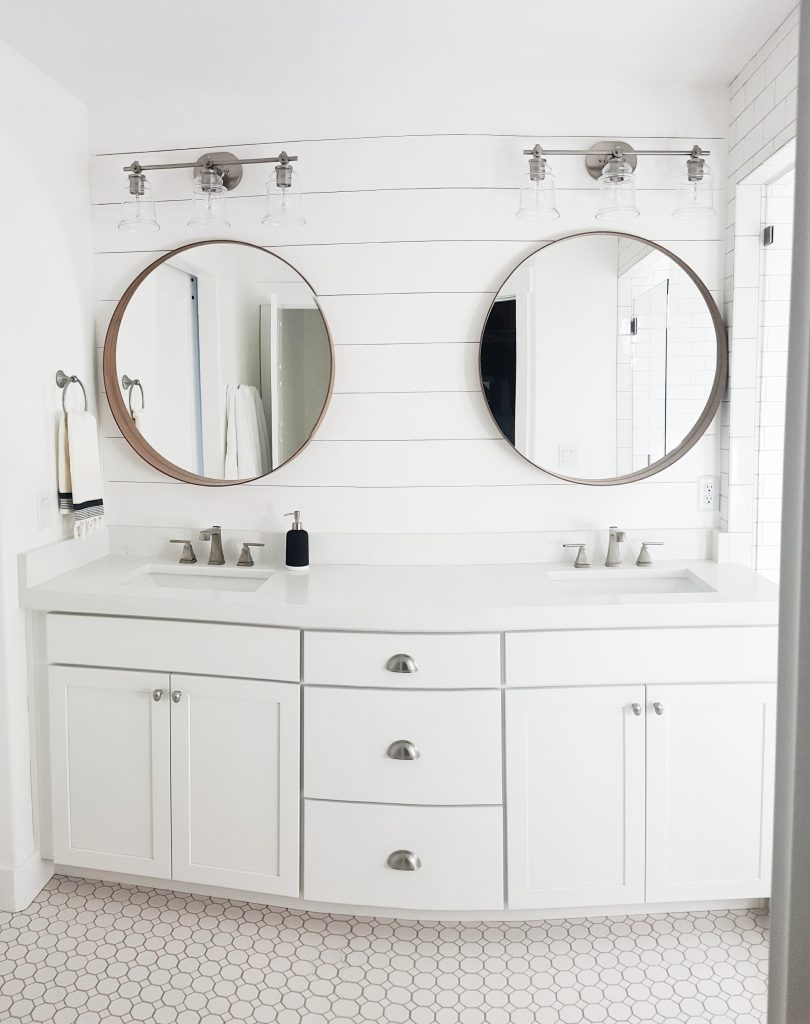
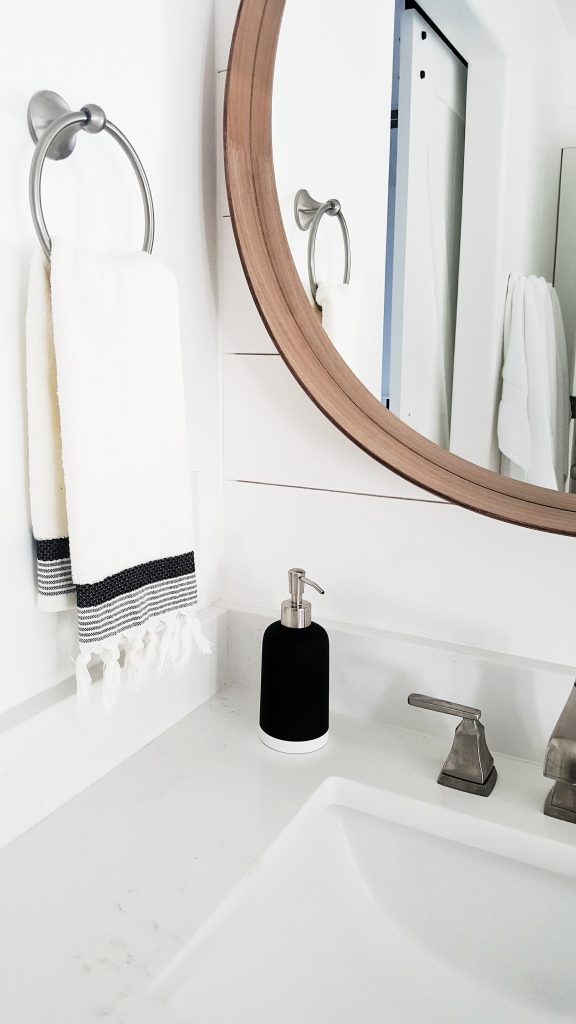
I finally got the shiplap put up above our vanity and I am in L.O.V.E. I have been trying to get it done for about a month. We have only lived in our new house two months but the projects have been planned for a loooooong time! From the second we picked our floor plan, the project list started. This was really an easy weekend project that made a big impact. We did this same type of “shiplap” in our townhouse going to the basement. The method we use is way cheaper than traditional shiplap. I think it looks just as good too!
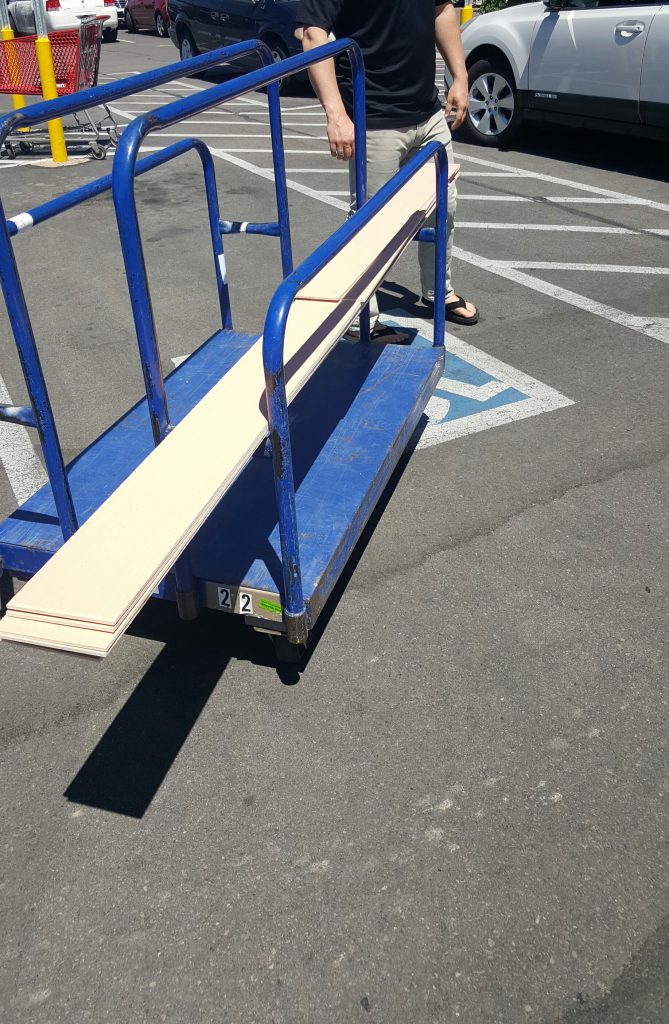
Mr. Whitelane and I started out by going to Lowe’s to get some plywood underlayment board. It comes in 4’ by 8’ sheets for $14.48. Then we had Lowe’s cut the board into six-inch strips. They will do straight cuts for free. So, take advantage of that! I was able to get five stripes that were six inches. There was one more strip that came out of the sheet but it was a little less than six inches because of the saw blade. When you make cuts, you lose a little of your board each time due to the width of the blade. After I had my six-inch stripes, I had them cut the boards to the length I need to go across my vanity.
Now that we had our strips, we loaded them up and got to work. NOT! We went home, unloaded them to the garage, and that is where the boards sat for a month. Each weekend we had something come up and it did not get done. I finally got tired of looking at those boards. I decided that we would get it done this past weekend, no matter what! It is a miracle! It actually got done between our kid’s football and soccer games.
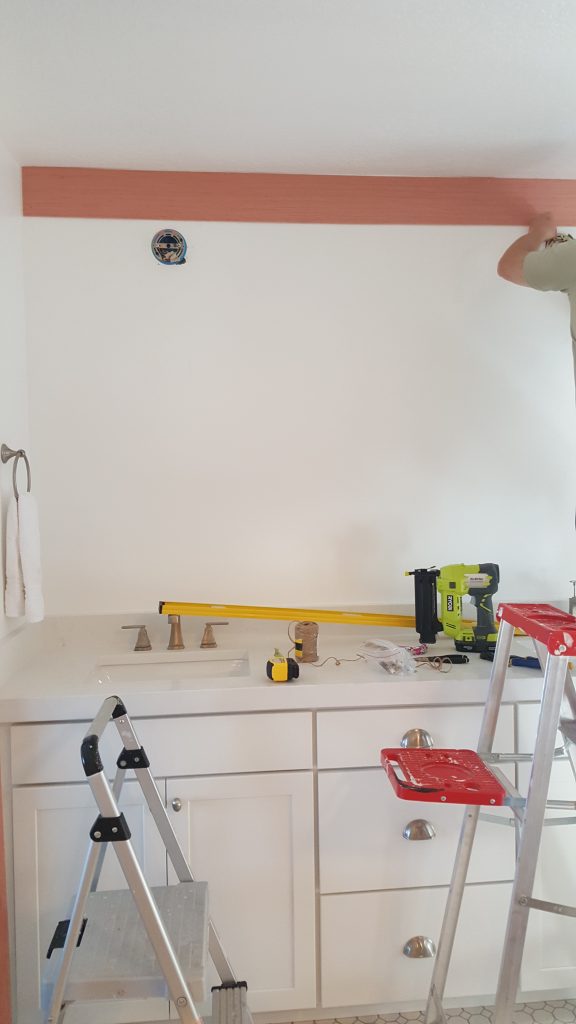
Before we started, I took a sander to the all the edges of the six-inch strips. The edges can be a little rough after they are cut. Just to be sure, I like to sand all around the boards to make it smooth. Mr. Whitelane got our little one down for a nap, while I quickly gave the boards a sanding. Now we were ready to nail them up. In most cases, your ceiling is not level. Make sure the first board you put at the top of your wall is level. There may be a gap between certain spots of the board and your ceiling. That’s okay because caulk will hide any gaps.
After the first board is level, things go pretty quick. I used nickels to space between each board to give that small line. I love using my Ryobi Power Strikecordless nail gun. It is so simple and no cords get in the way. We used a jigsaw to cut around our electrical boxes and outlet. It is not perfect but caulk is a lifesaver!
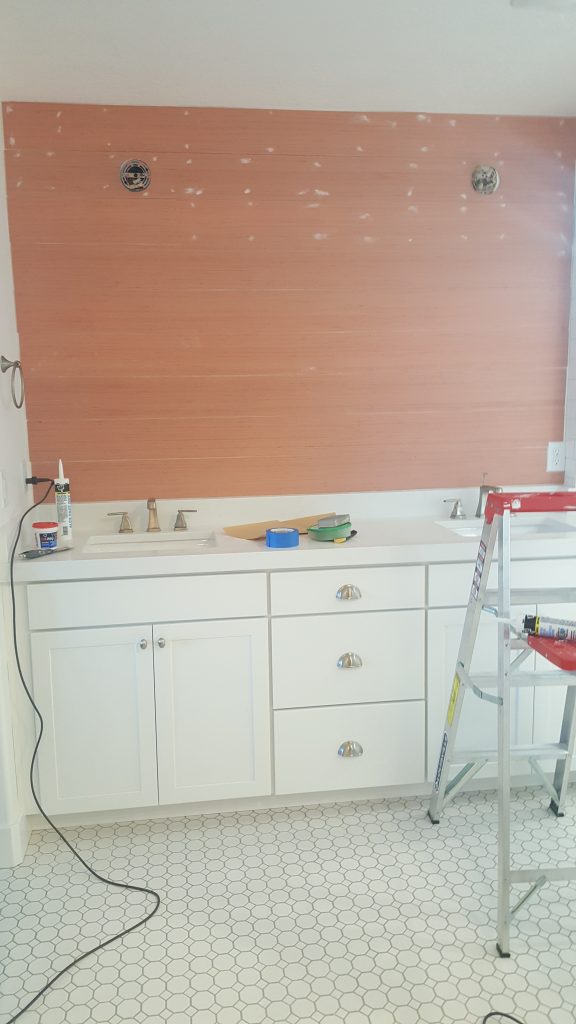
When we got all our boards up, I went back and filled the nail holes with spackle. I then used a lot of caulk to fill and smooth all my gaps. I used to hate caulking because of how messy it got. Mr. Whitelane then introduced me to the best invention ever. A caulk toolmakes the perfect smooth lines with half the mess. I love how perfect and easy it is to use. You really need to try one for your next project. It’s a game changer!
Now that everything was spackled and caulked, I let it dry overnight. I then used a foam roller to put on four coats of Sherwin Williams “High Reflective White.” Another great trick I like to use in between painting is to put your roller in a plastic bag in the fridge. Keeping the roller in the fridge stops the paint from drying out. You also don’t have to rinse it out each time. Just grab it out of the fridge and start painting again. When you are done with all your coats, you can trash it or rinse it out.
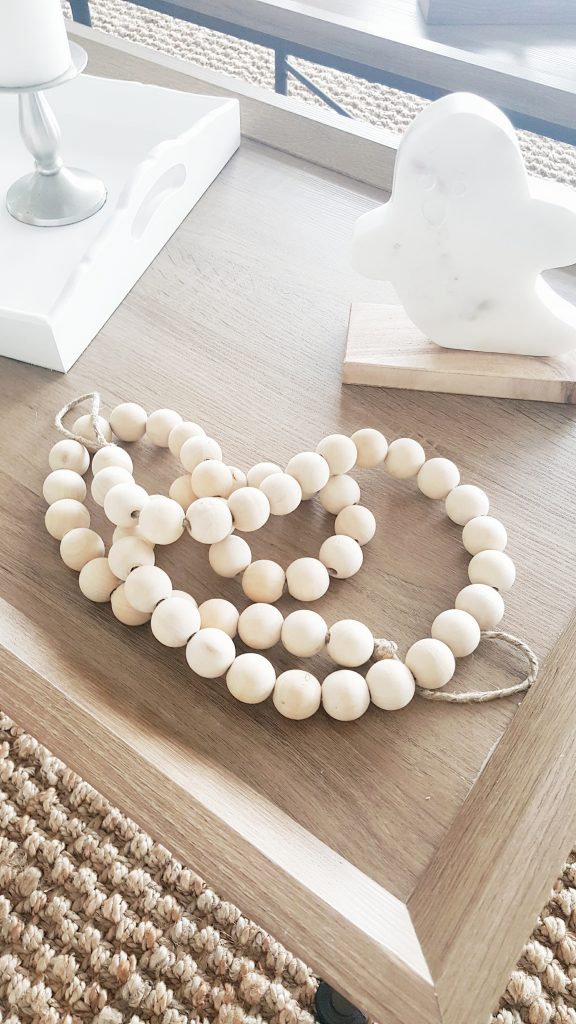
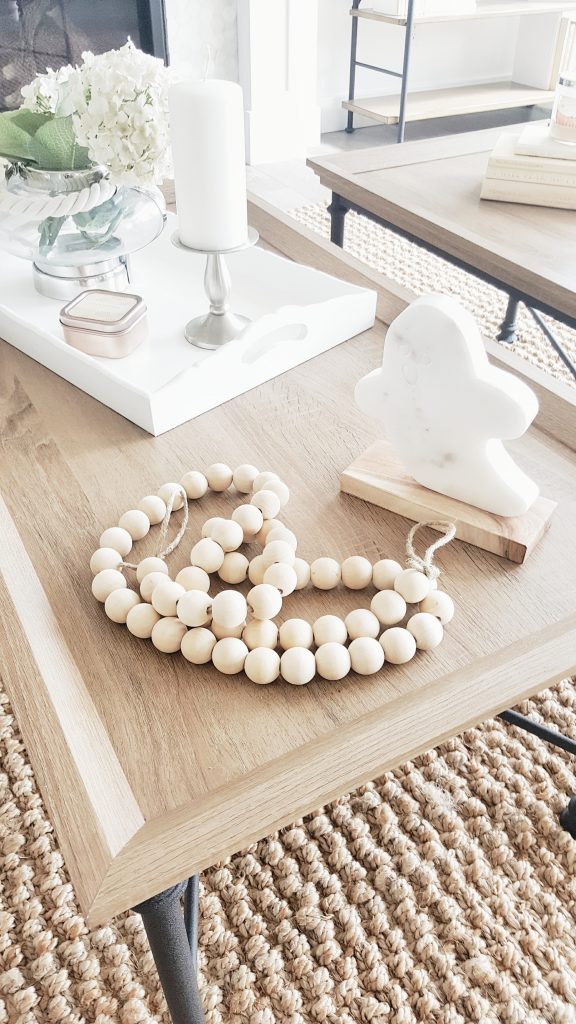
You have probably seen these wood bead garlands around. I just love how neutral and fun they look. I started shopping around and found some really cute bead garlands. However, I knew they were so simple and couldn’t cost very much to make. I decided to just go for it. This is probably the easiest DIY I have EVER done.
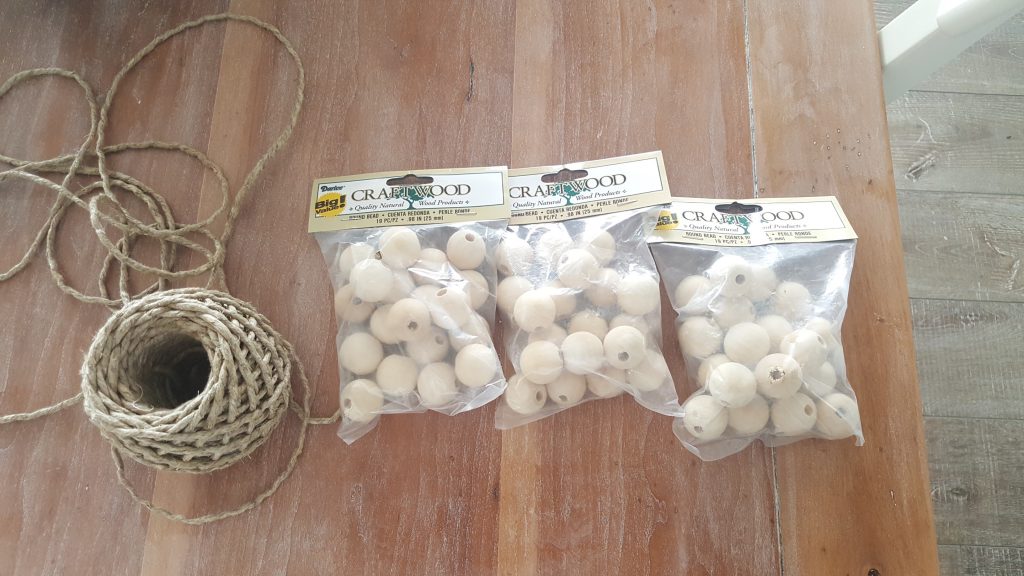
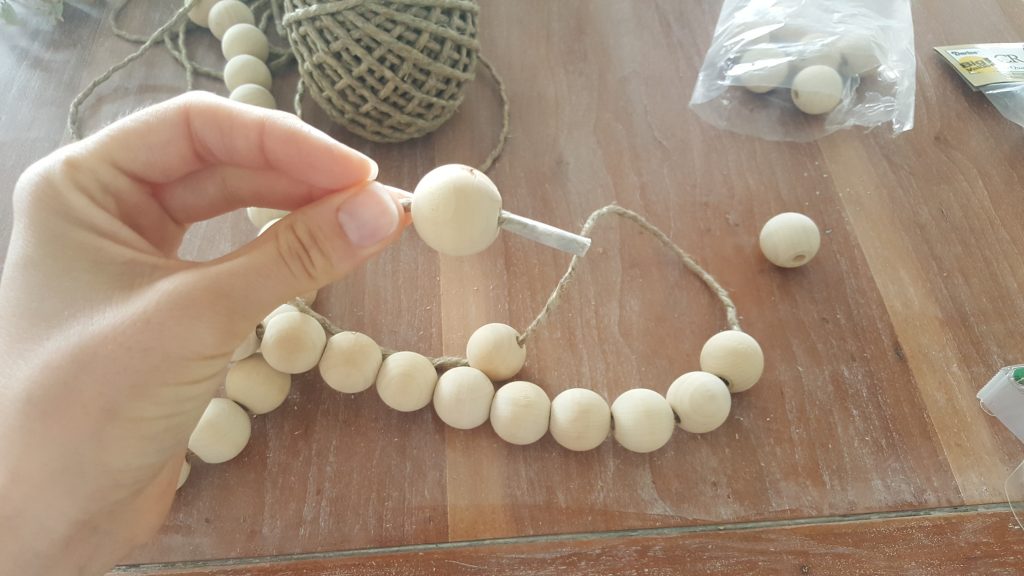
I went to Jo-Ann’s craft store and bought three bags of wood beads. They come pre-drilled with holes through each round wood bead. You know I love my coupons. Jo-Ann’s was having a killer sale. I had two 50% off coupons and one 40% off coupon. I got all three bags for $11.69. I used some hemp/jute twine that I already had on hand. All I did was wrap tape around the end of the jute twine. This made it easy to pass through the wood beads. My three year old could have done this. Just put all three packages of beads on the twine.
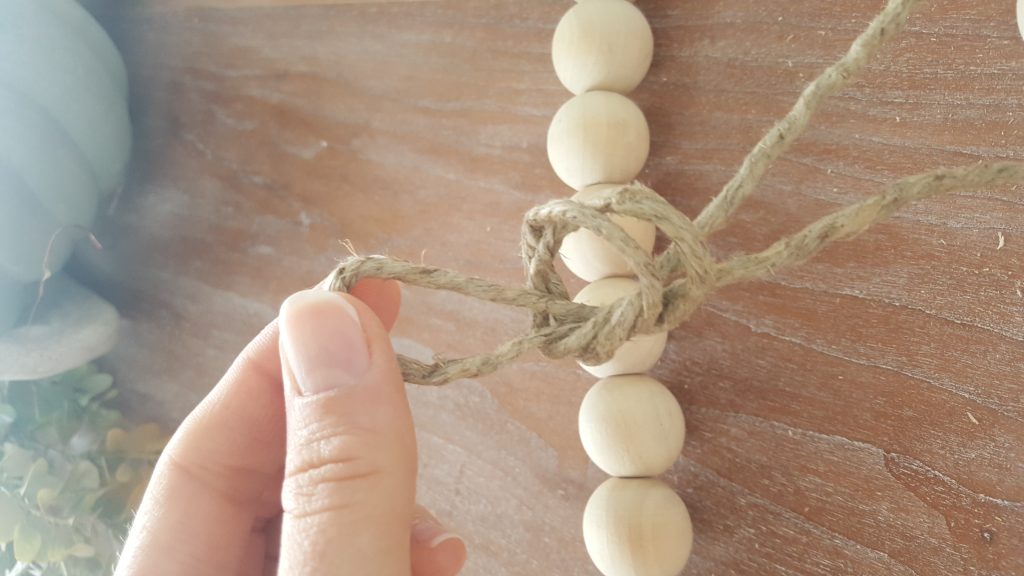
After all the beads were on, I tied loops on each end. That is it! Super easy and so cute. I will probably move this all over the house. It even looks cute on my pumpkins. For now, it is draped on my coffee table. The loops at each end will make it easy to hang as garland at some point. This was so quick and fun I had to share.
Hi there, I’m Kate. Welcome to White Lane Decor. Thanks for stopping by. I love neutral, bright, and airy spaces. I’m always looking for new ways to turn our house into a home. Have a look around and find inspiration for your next project.
Search
Disclosure
Some of my blog posts, ads, and banners contain "affiliate links." This means if you click on the link and purchase the item, I will receive an affiliate compensation. However, I only recommend products or services I use personally and truly feel you will enjoy too! I am disclosing this in accordance with the Federal Trade Commission's 16 CFR, Part 255: "Guides Concerning the Use of Endorsements and Testimonials in Advertising.” White Lane Decor is a participant in the Amazon Services LLC Associates Program, an affiliate advertising program designed to provide a means for sites to earn advertising fees by advertising and linking to amazon.com.
Our furniture hasn’t even arrived and I am decorating for fall. I’m the crazy lady putting pumpkins around the partially empty house (our couches are on back order). That’s how we do it around here. I did not want to spend a lot of money on decorations. I had a ton of fall pumpkins and acorns, from years ago, that were orange, yellow, and gold. Those were not the colors that work for me anymore. You know I busted out the spray paint to get those back in style.
This was a little different than my typical spray painting technique. When the holidays come around I love to add glitter to everything. It really is a weakness. If it sparkles, I want it! I had some champagne, white, silver, and glass glitter from previous projects. I decided to take my Kilz primer and spray the pumpkins and acorns. After that dried, I took white Krylon spray paint and covered the pumpkins. While they were still wet with paint (wear disposable gloves) I placed them in big ziplock bags. Next, I dumped the glitter in the bag with the pumpkins and acorns. Now comes the fun part. Zip the bag and SHAKE IT! Just like shake and bake chicken. The wet paint allows the glitter to stick pretty well. Then I just dumped them out of the bag onto cardboard to dry.
I love the new look on these old beauties. I also used some bronze spray paint I had on hand to paint a few more for a different look. Michaels Arts and Crafts has the best white fake pumpkins. I got some last year and used Mod Podge with glitter to give this group of pumpkins a fun pop. The striped one I just taped off lines. Then I added Mod Podge every other space and sprinkled glitter on top. The polka dot pumpkin was so easy too! I got a round sponge from Michaels Arts and Crafts. I dabbed the sponge in Mod Podge and then onto random spots on the pumpkin. Sprinkle the wet circles with glitter and you are done! I still am vibing these cuties.
Finally, came my dining room table fall centerpiece. I wanted to keep it simple and neutral. All the pumpkins came from Michael’s. They only had one blue pumpkin left. I kind of like the lone ranger, though. The antlers came from Texas. OK, funny story. Growing up my mom had antlers and deer skulls all over the house. My sister and I would always make fun of them. Who knew that all these years later, they would come back in style. When my mom went back home to Texas, I told her she had to bring me back those antlers! I was so excited that they fit in here perfectly. I added a touch of greenery and called it good.
It is not a ton of fall decor but we just moved in a few weeks ago. I haven’t even decorated our house for normal everyday life. So, this is a success in my book!
Kate
Hi there, I’m Kate. Welcome to White Lane Decor. Thanks for stopping by. I love neutral, bright, and airy spaces. I’m always looking for new ways to turn our house into a home. Have a look around and find inspiration for your next project.
Search
Disclosure
Some of my blog posts, ads, and banners contain "affiliate links." This means if you click on the link and purchase the item, I will receive an affiliate compensation. However, I only recommend products or services I use personally and truly feel you will enjoy too! I am disclosing this in accordance with the Federal Trade Commission's 16 CFR, Part 255: "Guides Concerning the Use of Endorsements and Testimonials in Advertising.” White Lane Decor is a participant in the Amazon Services LLC Associates Program, an affiliate advertising program designed to provide a means for sites to earn advertising fees by advertising and linking to amazon.com.