Stay Connected With The Latest Posts

  • This field is for validation purposes and should be left unchanged.

Stay Connected With The Latest Posts

Barn Door

Kate

Hi there, I’m Kate. Welcome to White Lane Decor. Thanks for stopping by. I love neutral, bright, and airy spaces. I’m always looking for new ways to turn our house into a home. Have a look around and find inspiration for your next project.

Disclosure

Some of my blog posts, ads, and banners contain "affiliate links." This means if you click on the link and purchase the item, I will receive an affiliate compensation. However, I only recommend products or services I use personally and truly feel you will enjoy too! I am disclosing this in accordance with the Federal Trade Commission's 16 CFR, Part 255: "Guides Concerning the Use of Endorsements and Testimonials in Advertising.” White Lane Decor is a participant in the Amazon Services LLC Associates Program, an affiliate advertising program designed to provide a means for sites to earn advertising fees by advertising and linking to amazon.com.

Shop My Home

Barn Door

Our builder wanted to charge us a couple hundred dollars to have a door from our master bedroom to the bathroom. Otherwise, it would just be an opening. There was no way I was paying to have another basic door like the rest of the house. Having a door open into the bathroom from the bedroom would be a waste of space too. I opted to leave it as an opening and I would add my own barn door later. The barn door would save space and be way cuter!

(Don’t laugh at my bathroom mirror. We are in the middle of putting shiplap on the wall behind the mirror. So for now, it is just sitting there.)

I started looking for barn doors and hardware. I could not decide what style I wanted, from the door to the hardware. I looked for months trying to find the perfect style and price. Well, I found pieces of what I wanted here and there but they were way over priced. Then one day I was at my second home, Home Depot. Strolling the aisles I came across their selection of barn doors. I found this Masonite Knotty Alder “Z” barn door. It needed some adjustments but I knew I could make it work. At $499 for the door and hardware, I was sold! Plus, I had a coupon. We loaded up this bad boy and brought it home to get to work. I loved the planks and face of the door. I didn’t love the knotty alder wood. The door comes unfinished so you can paint or stain it. I knew I wanted it white. Shocker! I did not want all the knots to show up so I filled them with wood filler. One side at a time. Once it was dry, I sanded them down smooth. Now, we had a nice smooth wood surface to paint.

I got out my favorite spray can primer, KILZ. I attached my spray gun nozzle (so my finger wouldn’t die) and started spraying. I used the same method as in my video tutorial. After the primer dried, I gave it a fine sanding with 180 grit sandpaper. I flipped the door over and did the same thing to the other side. I used a compressor to blow off all the dust from sanding. I also took a clean rag and wiped down both sides really well. Now I was ready to paint.

I really wanted to use Krylon spray paint for the door too. It is just so easy and quick to use. However, I decided to match the paint with the other doors and trim. Sherwin Williams was having their big 40% off paint sale. Talk about good timing. I grabbed a gallon of semi-gloss “High Reflective White.” I do have a paint sprayer but I hardly ever use it. It is a lot of work and sometimes just a pain. It had to be done, so I busted it out. I even made a little video, just for fun.

I got a 1×4 solid wood primed header piece to attach the hardware and door to the wall. I sprayed the header while I was spraying the door. I did not love the handle that came with the door. I found this one at Lowe’s that matched our house better.  Our awesome contractor hung the door for us and I am loving it!

Kate

Hi there, I’m Kate. Welcome to White Lane Decor. Thanks for stopping by. I love neutral, bright, and airy spaces. I’m always looking for new ways to turn our house into a home. Have a look around and find inspiration for your next project.

Disclosure

Some of my blog posts, ads, and banners contain "affiliate links." This means if you click on the link and purchase the item, I will receive an affiliate compensation. However, I only recommend products or services I use personally and truly feel you will enjoy too! I am disclosing this in accordance with the Federal Trade Commission's 16 CFR, Part 255: "Guides Concerning the Use of Endorsements and Testimonials in Advertising.” White Lane Decor is a participant in the Amazon Services LLC Associates Program, an affiliate advertising program designed to provide a means for sites to earn advertising fees by advertising and linking to amazon.com.

Shop My Home

Dining Table Re-Makeover

I finally did it! I have been talking about it long enough. I refinished my dining room table. Wow! I am glad it is over. I know you remember this table from my last makeover post. It has been through a lot of makeovers through the years. The table was due for another refinish. I decided to leave the table apron and legs white. I just tackled refinishing the top. I wanted a light neutral wood color, almost a driftwood color. I taped off the apron and got to work.


I thought I was going to just sand it down and put on a new stain. Well, I started sanding with 100 grit sandpaper. I quickly realized I would be sanding for days before I got anywhere. I was thinking the table was so old and the finish was already peeling off, that the sanding would take it right off. I was wrong, so wrong. I decided to try Citristrip. I put a thick coat on and let it sit for an hour and a half. I came back to scrape it off and the table was still really cherry looking. It was not taking off all the stain. I did another coat of Citristrip and that still did not take it all off. I was in my Mother-in-Law’s shed. I looked around and found some very old paint stripper. It was almost gone but I got what I could on a small section of the table. Sure enough, I could finally start to see some raw wood. WOO HOO! I went to the store and grabbed another can of Klean Strip Premium Stripper and put on a thick coat. I scrapped it off to find the raw wood. I then took 150 grit sandpaper and gave it a good sanding. I was little sad to realize that the raw wood still had a lot of red in it. I wiped it all down with Mineral Spirits and let that dry. I then put on my wood conditioner and let that dry.

This is the small spot I started sanding. Don’t mind my makeshift stand from some old 80’s end table bases I found in the shed.

Here it is with the Citristrip drying before I scraped it off.

20160709_200000
Finally, raw wood after my two coats of Klean Strip.

Next came the stain. I thought I would use my typical “Early American” by Minwax. I was worried about it bringing out, even more, red tones. I decided to cut it with Minwax “Golden Oak”. It did break down some of the redwood in the table but not completely. I wiped it on with a foam brush and let it dry. I then wiped on some shellac so that the liming wax would adhere better. After the shellac dried I took a large metal putty knife and worked the liming wax into the wood going the direction of the wood grain. I then took #0000 steel wool and buffed it out (in the direction of the woodgrain) until I liked the look of the liming wax. I then decided to seal it all in with Citrus Shield Premium Paste Wax in “neutral”. I love how it turned out. I am thinking I might attempt to do the apron and legs of the table too now.

.20160713_160705

Now for the finished product all sealed in with my paste wax. I haven’t decorated or decided what I want to put in the middle of the table yet. I could not get a good full shot of the table either. Our house is a big construction site/ moving site right now. We have a lot of projects going on over here and have not even finished unpacking yet. There is brown paper down all over the floors, so this is the best I could do. I will share more pictures as soon as some of our projects are done.

.
20160809_111022-01.
Processed with VSCO with s2 preset

Kate

Hi there, I’m Kate. Welcome to White Lane Decor. Thanks for stopping by. I love neutral, bright, and airy spaces. I’m always looking for new ways to turn our house into a home. Have a look around and find inspiration for your next project.

Disclosure

Some of my blog posts, ads, and banners contain "affiliate links." This means if you click on the link and purchase the item, I will receive an affiliate compensation. However, I only recommend products or services I use personally and truly feel you will enjoy too! I am disclosing this in accordance with the Federal Trade Commission's 16 CFR, Part 255: "Guides Concerning the Use of Endorsements and Testimonials in Advertising.” White Lane Decor is a participant in the Amazon Services LLC Associates Program, an affiliate advertising program designed to provide a means for sites to earn advertising fees by advertising and linking to amazon.com.

Shop My Home

Tips for Keeping a White House

I get asked all the time about how I keep all the white in my house clean. I love white and how it makes a space feel so fresh and open. I also have two children and a lot of traffic that comes through our home. There is even more white at our new house than we had at our townhouse. So, I am letting you in on a few tricks I have learned.

Do not use Clorox wipes on your white cabinets. It will ruin the finish. It may take the dirt away for now, but over time it will leave a dulling film. Simple Green is your friend! It takes away the dirt without leaving a film. Simple Green has been a life saver. After every meal, I have to wipe down the island where my kids eat. Their dirty little footprints and food are covered all over the cabinets. I used to buy the spray bottles of Simple Green and paper towels to wipe down everything. Sometimes I would get lazy and not want to do that. I would just use plain old wet wipes. They didn’t really get the stains out. Or worse, I would use a Clorox wipe. Then I found these, Simple Green wet wipes! Seriously, changed my life by having these around. Wiping down everything is such a breeze. I also have white IKEA barstools. They usually are covered in the kids latest meal too. I can use Simple Green wipes to get the island and barstools all wiped down after every meal , quickly and easily.

The nice thing about having white bedding is bleach. I really haven’t even had a problem with our white bedding. Our master bedroom is the hub for our nighttime routine. We hang out there, read, talk, pray, and play. We have had our white bedding for 2 years and it still looks as white as it did the day I brought it home. I wash it regularly and spot treat, if needed, with Oxi Clean.

Our Rugs USA rug in the living room has taken a beating. I would not recommend this white rug in a living room. It does tend to show a lot of dirt and stains. They always come right out when I clean it, but it is a pain to keep clean. I will not have this rug in the living room at the new house. It will be going to a low traffic area, such as our master bedroom.

Tile grout is my nemesis. In our townhouse, we did not seal the grout when we moved in. It was nice and white for a few weeks, then it turned brown. Lesson learned, seal your grout on day one. I spent countless hours on my hands and knees using Grout Renew from Home Depot. I love this product. It took our grout back to the nice white color it used to be, and sealed it, all at once. Our entire main floor was tile , except for the living room. So, it took some time to apply but the finished result was worth it! At the new house, I will be sealing the grout before we move in!

I always keep baby wet wipes handy. They work wonders for wiping down the walls and baseboards. Food and fingerprints always seem to be smeared across our walls. I just grab a few wet wipes and easily wipe them off. Wet wipes work great for walls, in my experience, but not so much for bar stools and cabinets.

Now, let’s talk about sofas. I have always had leather because of durability. However, that changed a few years ago. I got my first, light colored fabric sofa. I was nervous and did not want to even sit on it. I would just admire it from afar. Let’s be real, that did not last long. I bought the protection plan for an extra $100, that also came with the entire sofa scotch guarded. I highly recommend this! Scotch Guard is amazing. The protection plan gives me such a peace of mind with kids. It pretty much covers any damage and stains that won’t come out. It really is worth the extra money. The new sofas I have picked out are also a light fabric. I will definitely be adding the protection plan to these beauties too.

I think that covers most of the things that help me keep my white house looking white. If you have any other tips, please do share in a comment below!

Kate

Hi there, I’m Kate. Welcome to White Lane Decor. Thanks for stopping by. I love neutral, bright, and airy spaces. I’m always looking for new ways to turn our house into a home. Have a look around and find inspiration for your next project.

Disclosure

Some of my blog posts, ads, and banners contain "affiliate links." This means if you click on the link and purchase the item, I will receive an affiliate compensation. However, I only recommend products or services I use personally and truly feel you will enjoy too! I am disclosing this in accordance with the Federal Trade Commission's 16 CFR, Part 255: "Guides Concerning the Use of Endorsements and Testimonials in Advertising.” White Lane Decor is a participant in the Amazon Services LLC Associates Program, an affiliate advertising program designed to provide a means for sites to earn advertising fees by advertising and linking to amazon.com.

Shop My Home

Close5 App

The following post contains affiliate links and is sponsored by Close5. Read my full disclosure here.

I am a bargain hunter (in most cases). It is what I do. I love yard sales and garage sales. I have been starting to collect decor for our new house. It takes time and I want to make sure I love the pieces. When I found this little wood tool box, I knew instantly how I wanted to transform this piece. I have to tell you how I came across this little gem. I downloaded this awesome buy and sell app for Android called Close5 (check out their Instagram for awesome inspiration). It is right up my alley and don’t worry the buy and sell app for iPhone is available too. The app is free and you can buy and sell items within a radius in your area (or any area). It is so easy to use. All of the communication with buyers and sellers are private through the selling app . I love that the alerts just pop up on my phone, about the items I have shown interest in. You have to give it a try!

When this beauty came available, I quickly snatched it up. I know it looks basic but I had a vision for what it could be. My husband was extremely underwhelmed when I showed him. I assured him that it would look good when I was done. I brought it home and decided to get rid of the middle rod. It did not jive with the look I was going for.

1-2-48-42-pm. 2-2-48-40-pm
 

Next, was the refinishing. This box is made of pine. My first step was a light sanding using 150 grit sandpaper. Then I used wood conditioner. I like to use wood conditioner because it allows the stain to not penetrate as deep. I let the conditioner dry for 45 minutes. Then it was time to apply the stain. I just cut up an old shirt and wiped on the stain in the direction of the grain. Minwax “Early American” is still my favorite stain color. I let the stain dry for a couple hours in the sun.3-2-48-37-pm
5-2-48-37-pm

Once it was dry, I applied my shellac. Since I was going to use liming wax, the shellac was a must. The shellac allows the liming wax to grip to the wood better. After the shellac dried for an hour or two, I went over the box with 150 grit sand paper. I also went over the box with a brass bristle brush (in the direction of the grain). This helps open the pores of the wood. That allows the liming wax to show up better. I wiped all the dust off and applied my liming wax. I used a putty knife to scrape it over the wood surface. I did one side at a time and let it sit for a minute or two. I then took my rag and wiped off the excess liming wax. I sanded a few areas more to lighten the white wax. Now the box was complete…NOT! I had to hit up IKEA and grab some of my favorite bottles. I found these cute striped hand towels while I was there too. I may, or may not, have brought this to the new house (just to snap a pic against my newly installed backsplash).

Processed with VSCO

8-2-48-37-pm
                                                                   

Let’s recap this dreamy finshish:

*Wood conditioner

*Early American Minwax Stain

*Shellac

*Brass bristle brush sanding

*Liming Wax

* Sanding to liking

I love how it turned out and I can’t wait to find more goodies on Close5 for our house.


Kate

Hi there, I’m Kate. Welcome to White Lane Decor. Thanks for stopping by. I love neutral, bright, and airy spaces. I’m always looking for new ways to turn our house into a home. Have a look around and find inspiration for your next project.

Disclosure

Some of my blog posts, ads, and banners contain "affiliate links." This means if you click on the link and purchase the item, I will receive an affiliate compensation. However, I only recommend products or services I use personally and truly feel you will enjoy too! I am disclosing this in accordance with the Federal Trade Commission's 16 CFR, Part 255: "Guides Concerning the Use of Endorsements and Testimonials in Advertising.” White Lane Decor is a participant in the Amazon Services LLC Associates Program, an affiliate advertising program designed to provide a means for sites to earn advertising fees by advertising and linking to amazon.com.

Shop My Home

How To Apply Stain

I have been talking about refinishing my dining room table forever. It will be the third makeover since I got the table off a yard sale site years ago. This time, I am just refinishing the top. I will leave the legs white. It has taken me so long to figure what color and look I want. I have been testing out stain colors like crazy.

Processed with VSCO with s2 preset

I first tried Special Walnut. I really liked the color but I wanted something a little lighter. In truth, I bought about six different miniature cans of Min Wax stain from Wal-Mart to test all the colors. My two favorites were Special Walnut and Early American. I chose Early American because it was slightly lighter and I like the tones of it. Today I was at Home Depot and even bought two more cans of different colors to try. I know, I’m out of control. I just want to make sure I have it right before I put it on my actual table. So for now, Early American is winning.

Processed with VSCO with s2 preset
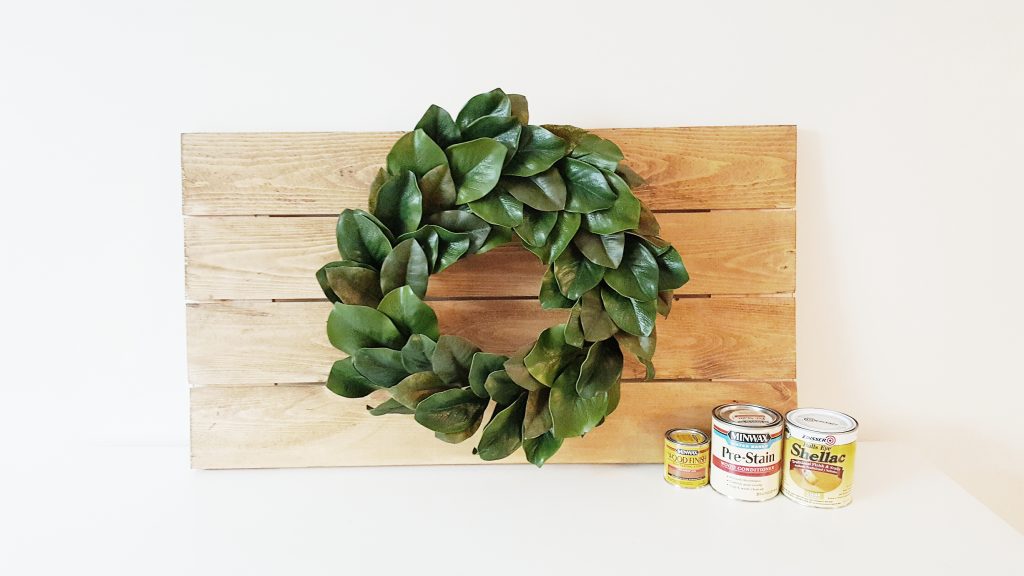
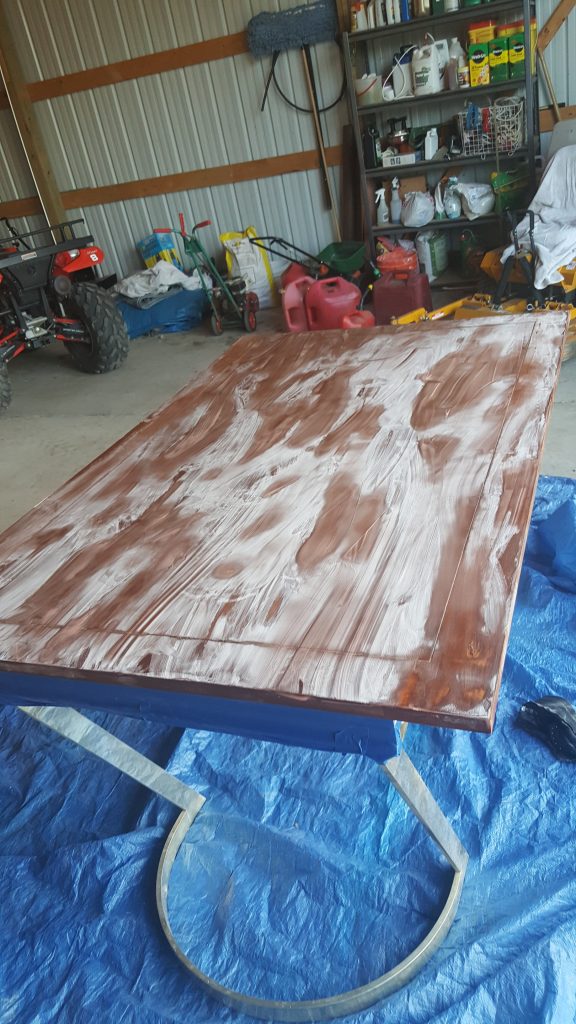
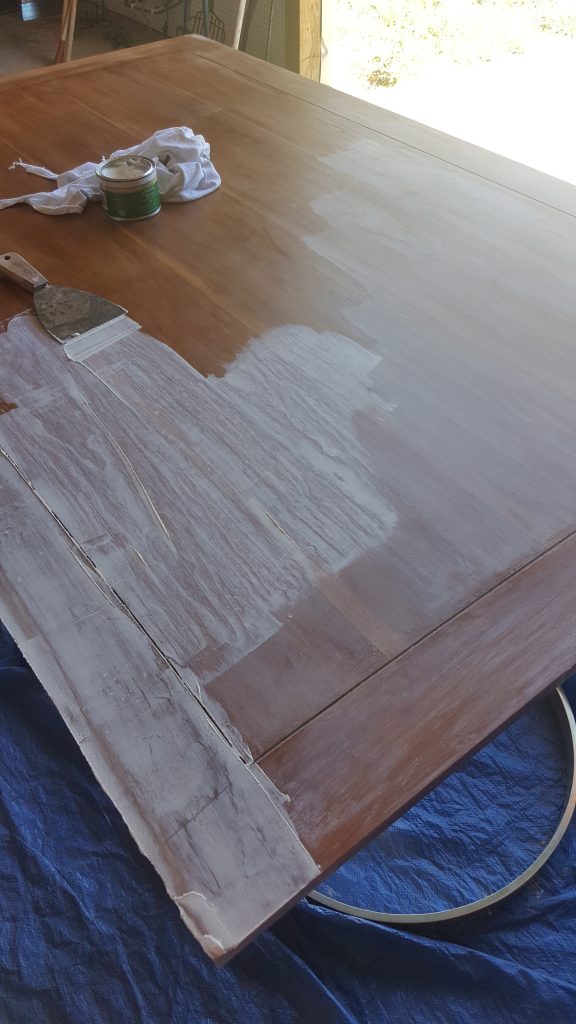
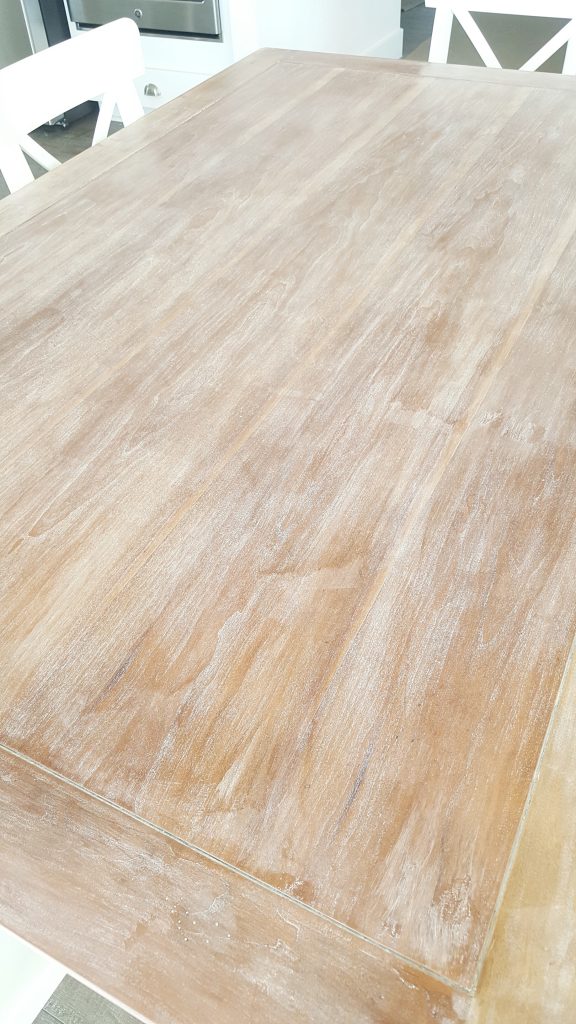
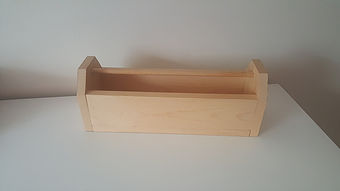
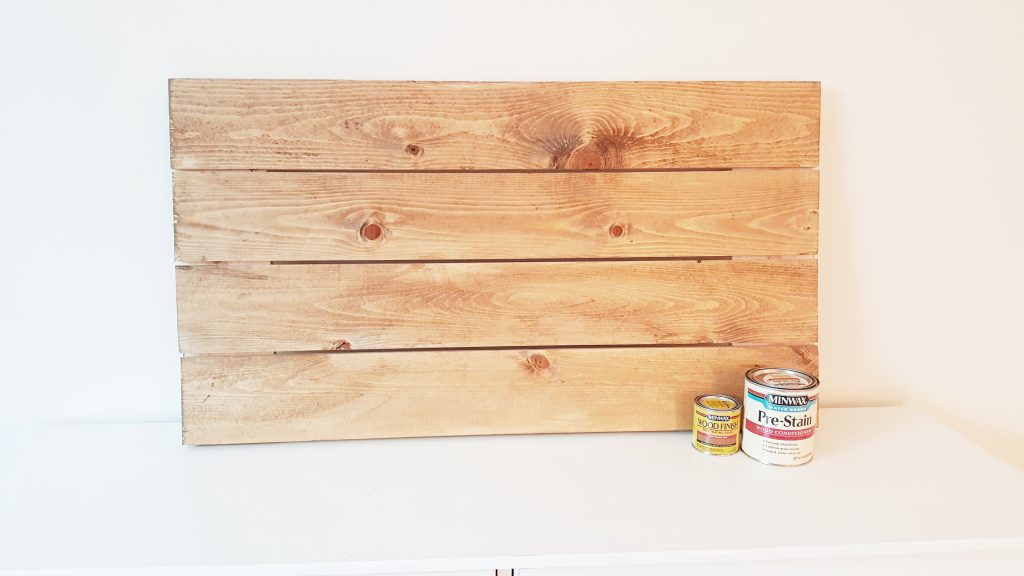
I had this pallet board I made laying around. I figured it would be perfect to test all my colors. I took 1×6 pine boards and laid them horizontally (cut to my desired size). Then, I took two more vertical 1×6 boards (cut to the length of the horizontal boards) and place them at each end of my horizontal boards. I used wood screws down the vertical boards to secure it all in place. I originally had planned on this being the top of our toy box we made. I never ended up putting it on because I did not want my kids smashing their fingers. It sat in the garage forever until this little stain experiment.

20160519_105913

I wanted to make a quick video about how I apply my stain to the wood. Go check it out on my YouTube channel. I found some old soft cotton pants I did not want any more and cut them up. I got a lot of rags cut out of those pants to use for my stain testing ( you can also buy lint-free rags or use an old T-shirt). Then, I applied Minwax wood conditioner. I did not want the raw wood to soak up a lot of the stain. After the conditioner dried for about thirty minutes to an hour, I then applied my Early American stain. I take my rag, dip it lightly in stain, and then wipe it on the wood in the direction of the grain. Super easy. Continue to do this until all of the piece of wood is covered. After you wipe the stain on, let it cure for twenty-four hours. Really, applying stain is so simple. Next, I will be showing you all about liming wax. I have some expected to arrive next week. I love the look of liming wax and can’t wait to show you all about it.

Processed with VSCO with s2 preset
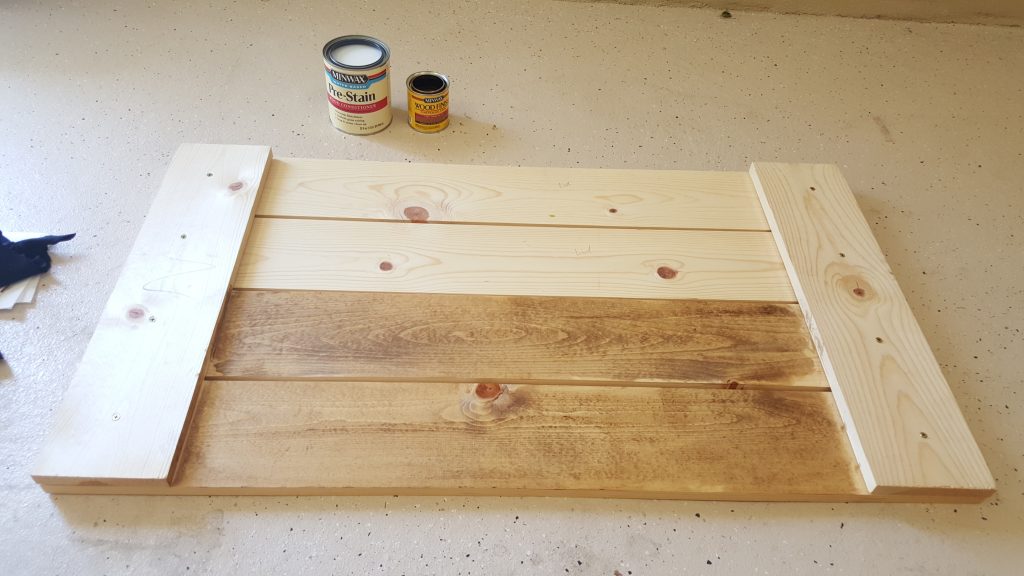
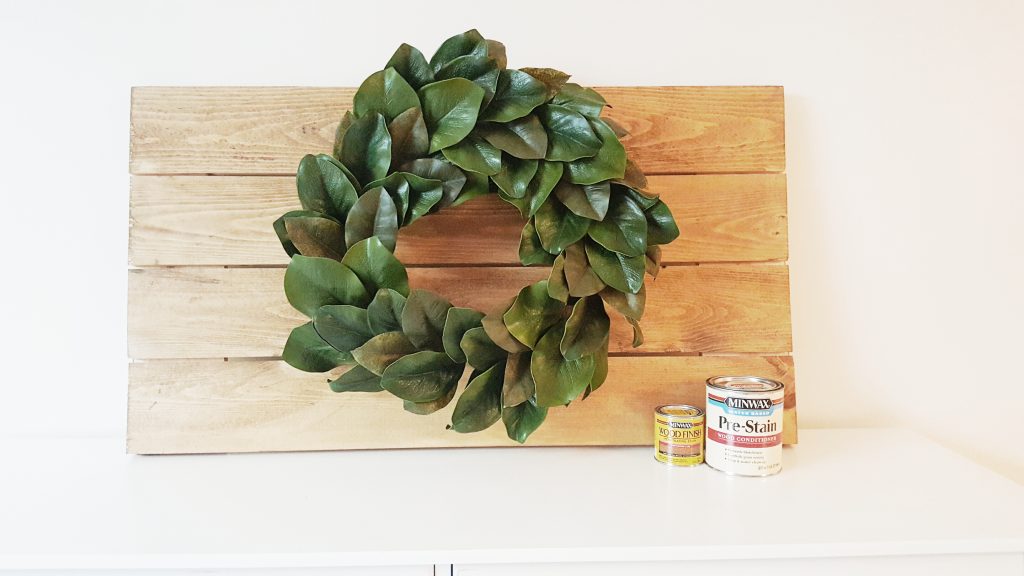
P.S. I am loving my new magnolia wreath from Hobby Lobby. 

Kate

Hi there, I’m Kate. Welcome to White Lane Decor. Thanks for stopping by. I love neutral, bright, and airy spaces. I’m always looking for new ways to turn our house into a home. Have a look around and find inspiration for your next project.

Disclosure

Some of my blog posts, ads, and banners contain "affiliate links." This means if you click on the link and purchase the item, I will receive an affiliate compensation. However, I only recommend products or services I use personally and truly feel you will enjoy too! I am disclosing this in accordance with the Federal Trade Commission's 16 CFR, Part 255: "Guides Concerning the Use of Endorsements and Testimonials in Advertising.” White Lane Decor is a participant in the Amazon Services LLC Associates Program, an affiliate advertising program designed to provide a means for sites to earn advertising fees by advertising and linking to amazon.com.

Shop My Home

Valentines Decor

Valentines Day is so fun! I think in the past I haven’t really put much effort into Valentines decorations. Really I would just do enough to make my kids happy. I mean let’s be real. It’s right after Christmas and it is hard to think about decorating for another holiday when you have Christmas to put away.  It all happens so fast. This is year was a little different.2016-01-12-07-56-50-1-1

I actually wanted to decorate for Valentines. I had so many creative ideas about what I wanted to do for Valentines. This is probably because we are living in a temporary home while we build our house. I didn’t really decorate for Christmas because we were at families houses to enjoy all of their decor. Not having my own house to decorate is making me itch to get into our house this summer and get to decorating. So after making all those cute Valentines garlands from Michaels; I put together a small little Valentines area in our temporary home.

Processed with VSCO with s2 preset

I love all the hand written signs in wood frames. I have seen them all over Etsy for $100-$300. WOW! I was eyeing a few for the new house but that wasn’t going to happen anytime soon. Well, I went to Hobby Lobby to get the gold letters for my chipboard banner. You can’t go into Hobby Lobby without looking at the entire store. Well, I found this awesome wood frame sign that screamed Valentines to me. It was on the clearance aisle for $20. WHAT!? It looked like some of the pricey ones I had seen for way more. I snatched it up and ran. 🙂2016-01-12-07-56-21-1-1-1

Processed with VSCO with s2 preset

I’m excited to use all these pieces in our new home next year. For now, this will be our Valentines decor.

Kate

Hi there, I’m Kate. Welcome to White Lane Decor. Thanks for stopping by. I love neutral, bright, and airy spaces. I’m always looking for new ways to turn our house into a home. Have a look around and find inspiration for your next project.

Disclosure

Some of my blog posts, ads, and banners contain "affiliate links." This means if you click on the link and purchase the item, I will receive an affiliate compensation. However, I only recommend products or services I use personally and truly feel you will enjoy too! I am disclosing this in accordance with the Federal Trade Commission's 16 CFR, Part 255: "Guides Concerning the Use of Endorsements and Testimonials in Advertising.” White Lane Decor is a participant in the Amazon Services LLC Associates Program, an affiliate advertising program designed to provide a means for sites to earn advertising fees by advertising and linking to amazon.com.

Shop My Home