Wow! It has been a while. This update is long overdue and I am excited to share what we have been up to. Where do I start? Well, first of all, we sold our house. I know, I know. Crazy! It was really a random idea we had on a whim. We just thought it would be fun to through our house up for sale by owner to see what happened (not really serious about moving anytime soon). Before we knew it, we were under contract and no idea where we were going. 🙂
We didn’t want to rush into buying another house if we didn’t love it. Since our house sold so fast, we decided to stay with family until we find the right house (thank goodness they graciously let us move into their newly finished basement). I feel bad breaking it in but it is actually really nice! It makes searching for our next home a lot easier.
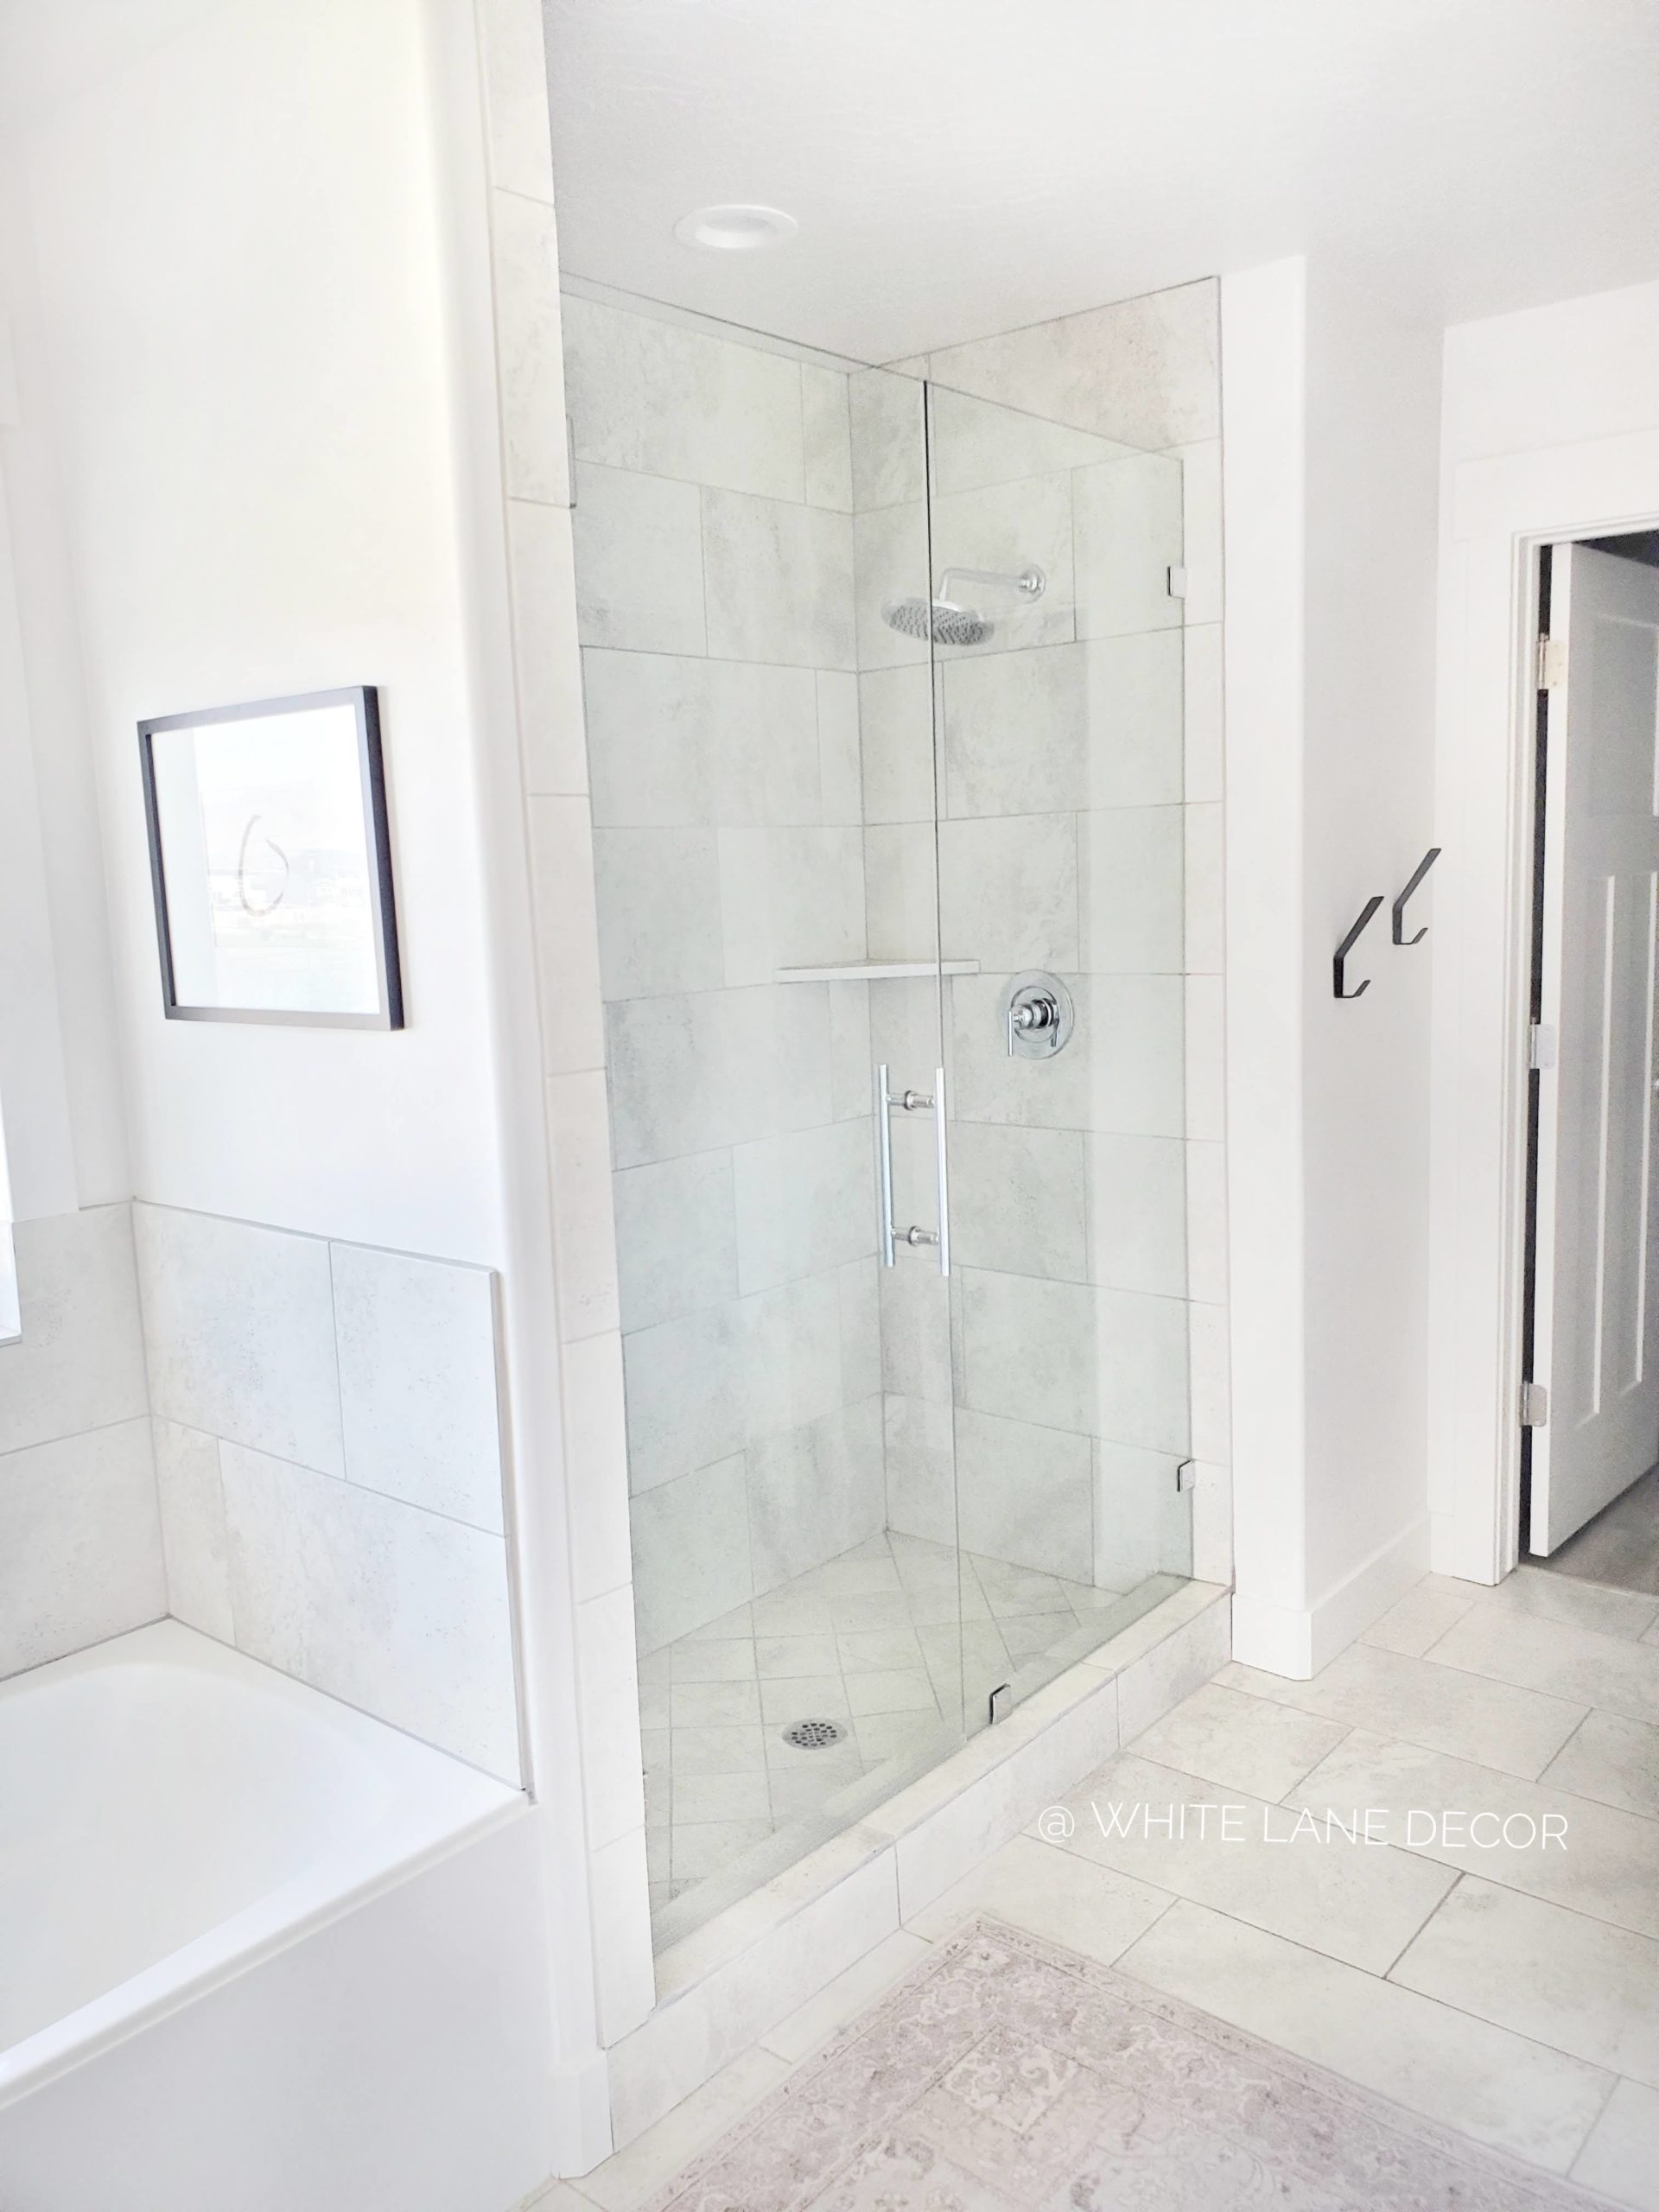
There are also a lot of spaces I never showed in the house we sold. I will be sharing a lot more of those in the coming weeks starting with our master shower. We did an easy cosmetic update by continuing the tile to the ceiling that was already there. We also changed the fixtures and put in a Euro glass enclosure.
I don’t know when or where our next house will be. I want more land and a bigger property this time around. Mr. Whitelane wants to travel around the U.S.A. in an RV. I guess we will settle somewhere in between. 🙂
In the meantime, I will keep you updated along the way. I am having fun styling our new temporary home and will show more of that soon.
The following post contains affiliate links and is sponsored by Spectrum Brands, Pfister. Read my full disclosure here.
This project has been such a great experience for me. I learned a lot along the way. I am excited to share how we updated our master bathroom on a budget. Don’t get me wrong I could have torn this whole thing down and started over. Instead, we saved a lot of time and money and worked around what we had. If there is anything I have learned from this bathroom update, it’s that we shouldn’t try to impose what we want things to be. Just embrace what they already are.
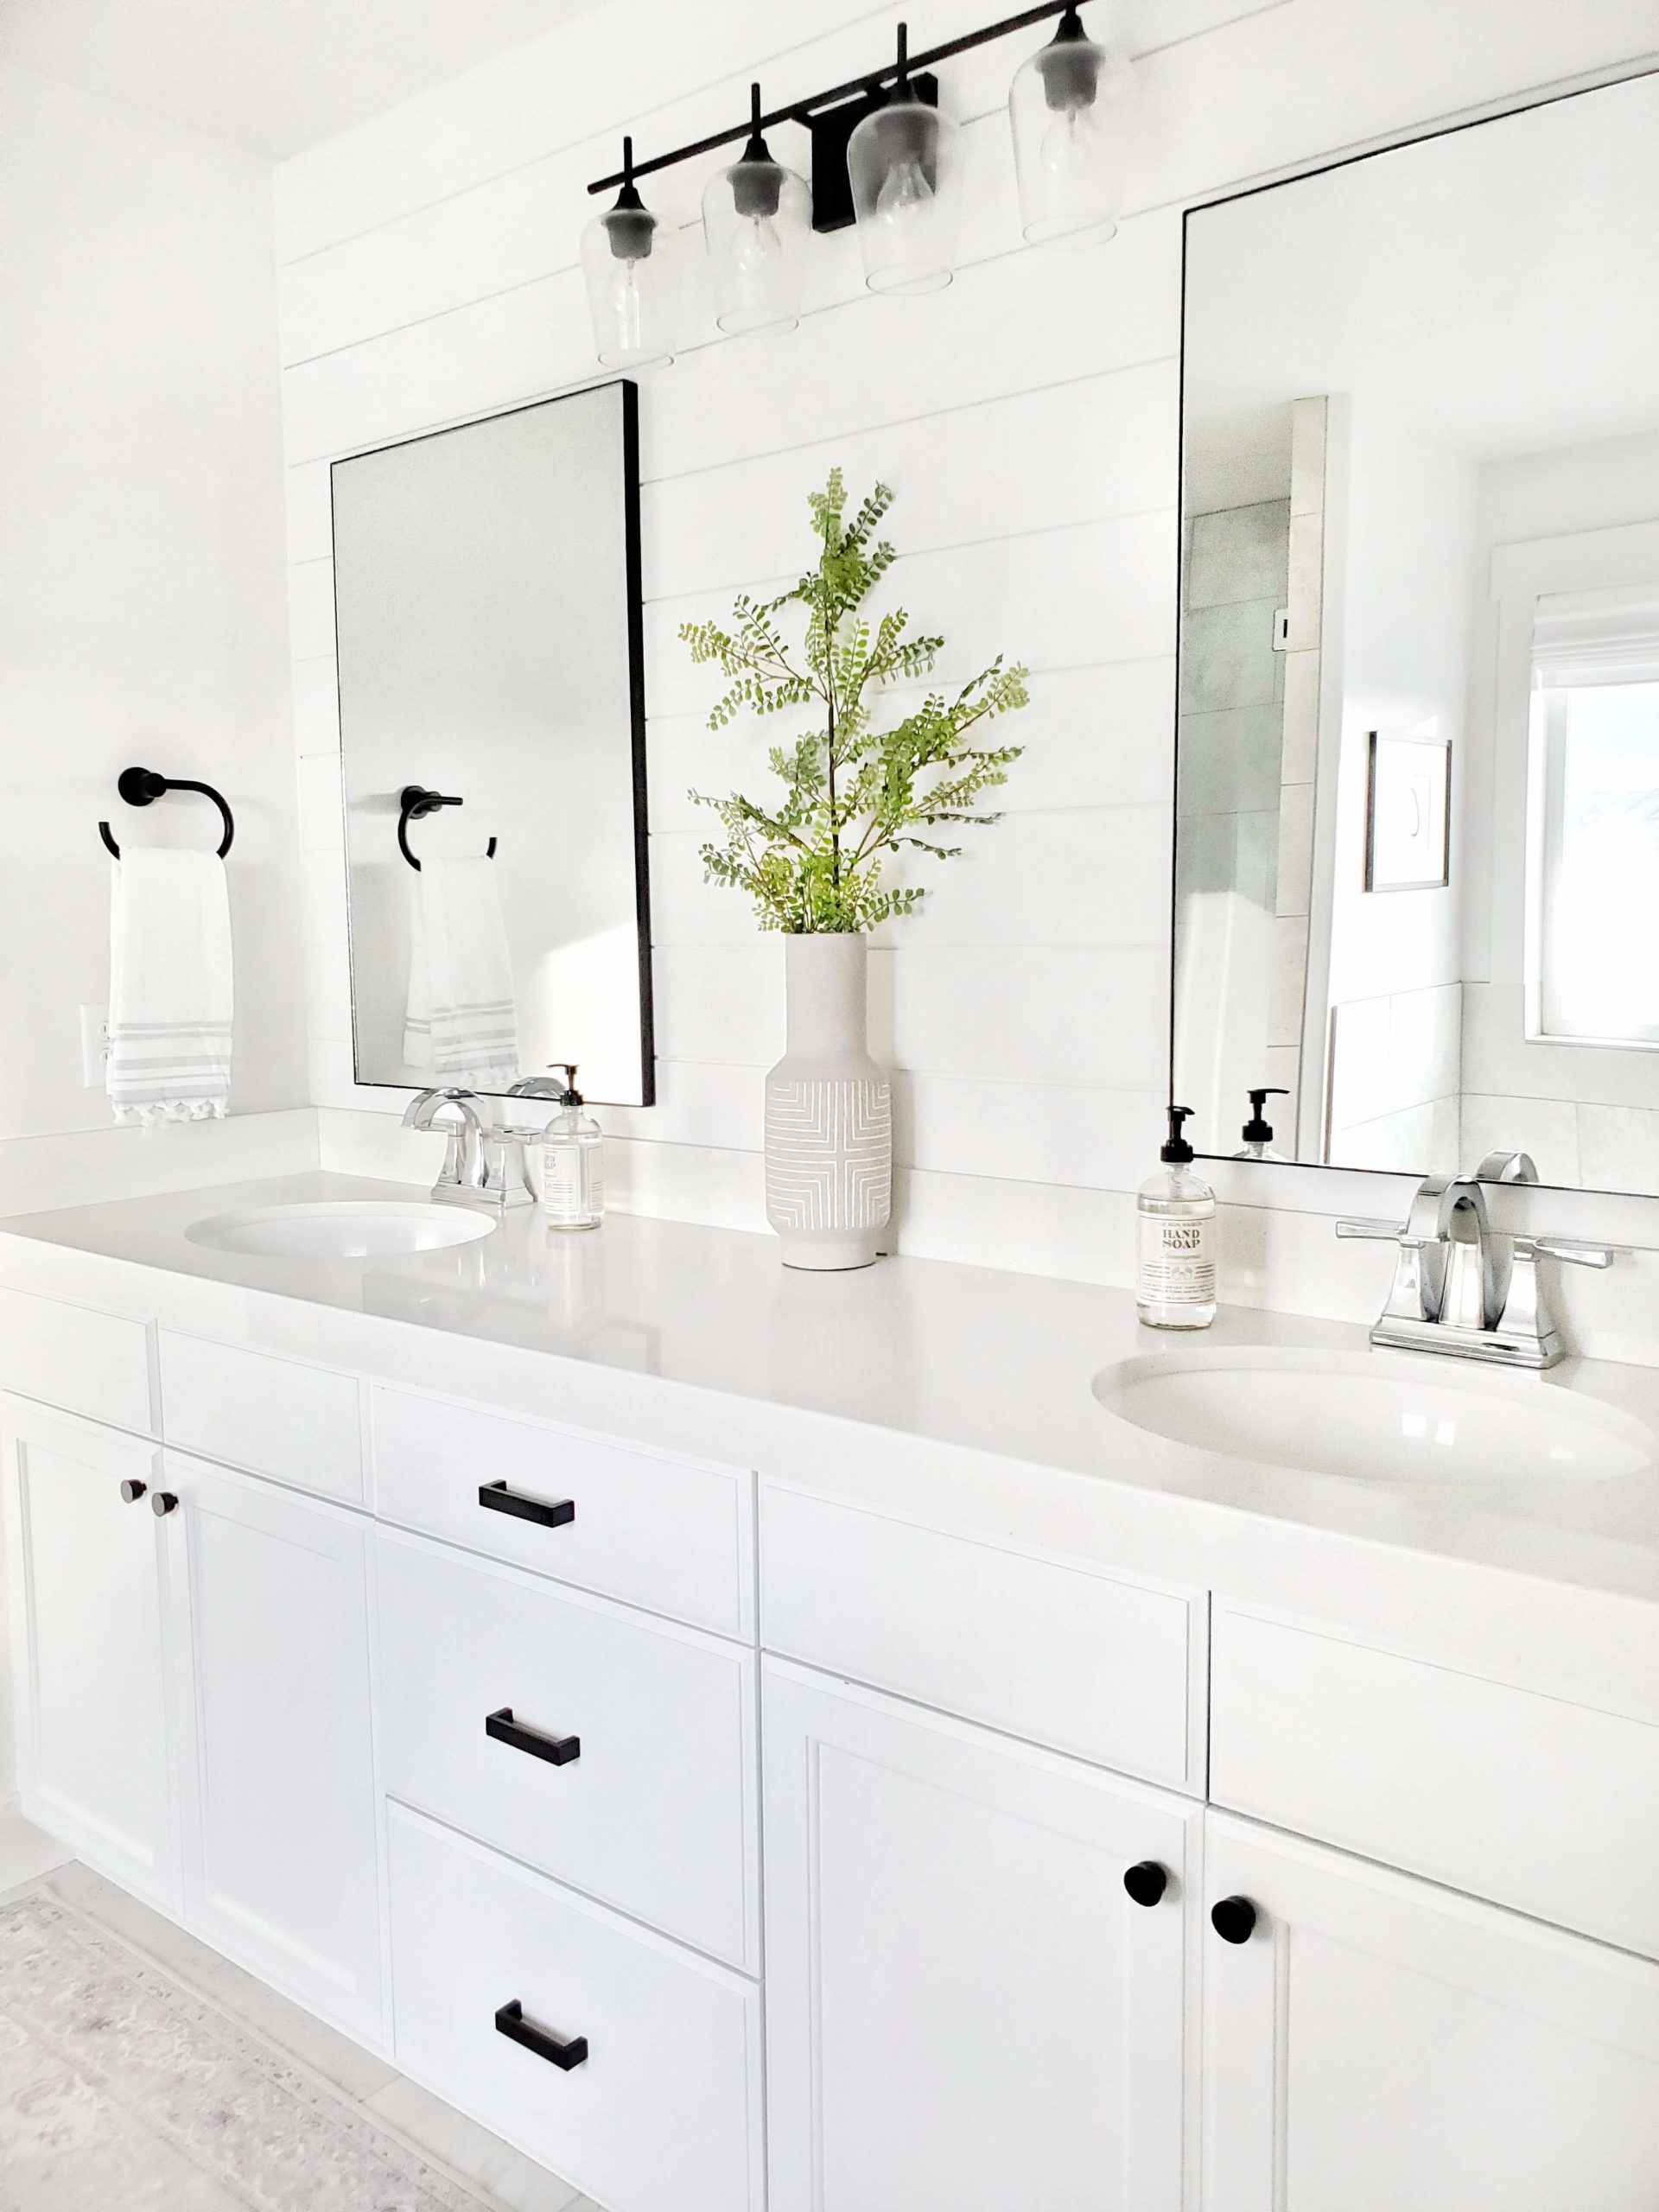
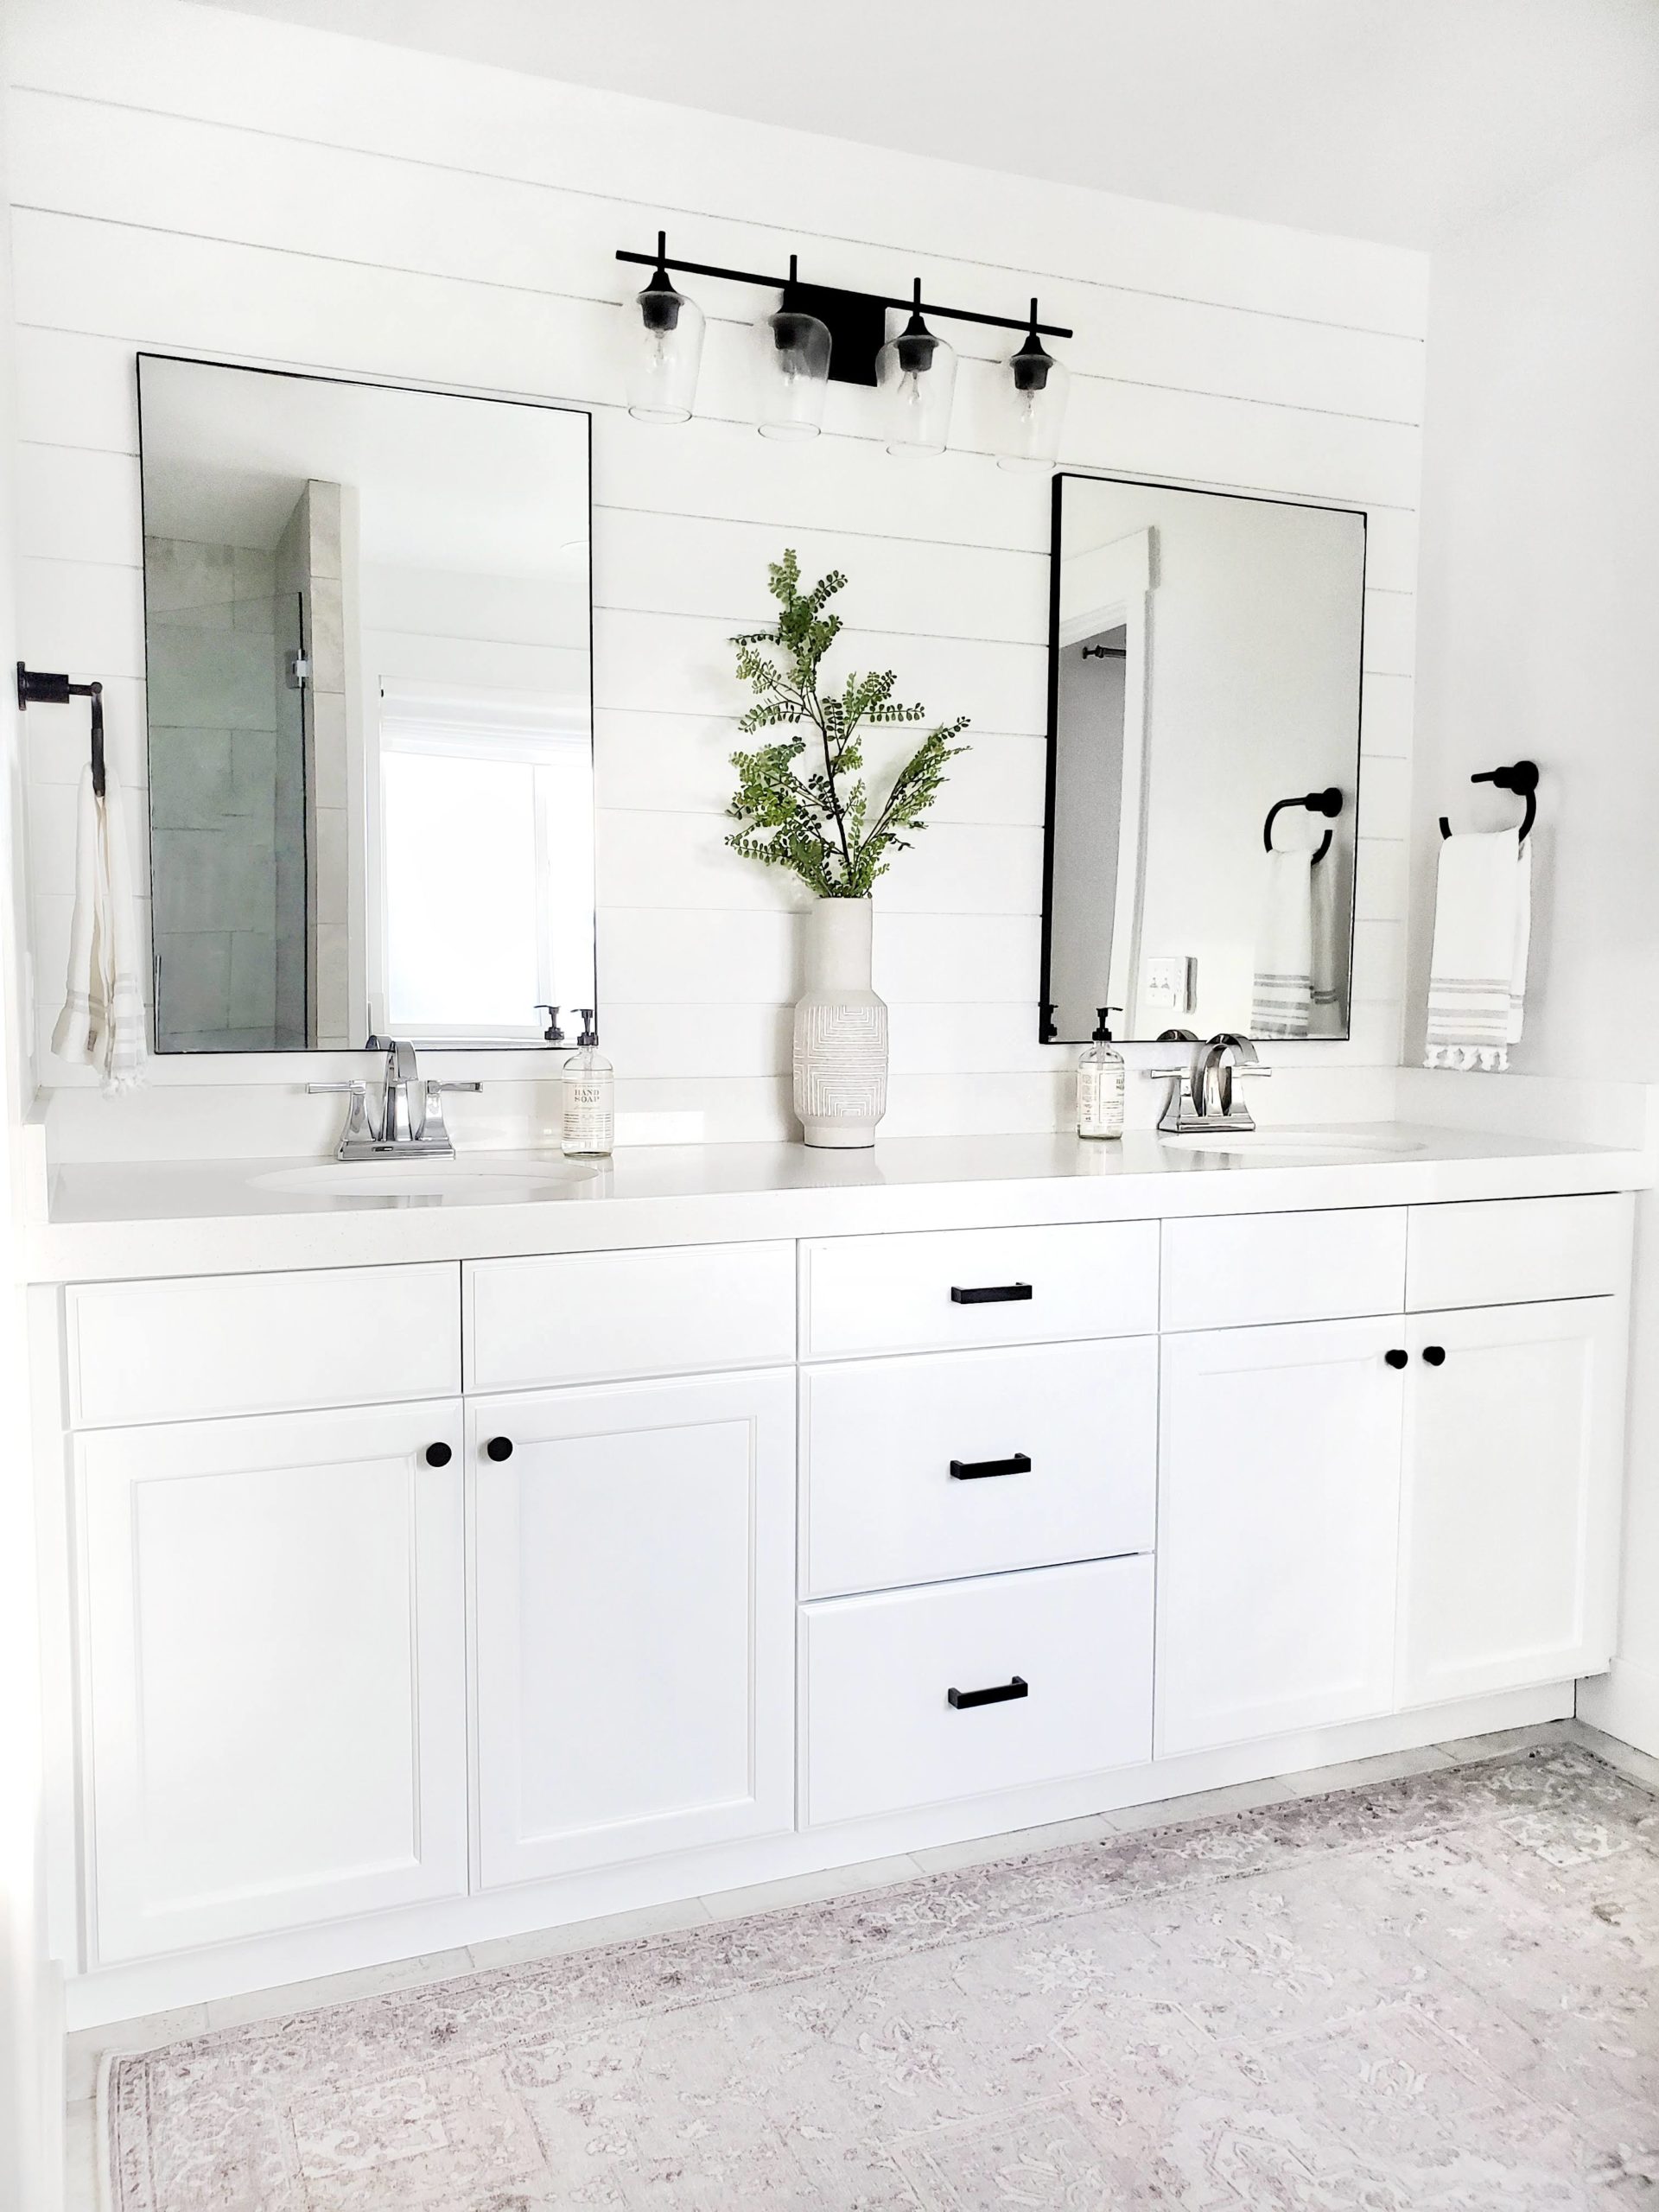
So, after much deliberation, we embraced this gray floor tile. Once, I started pairing decor that complimented the tile, it looked a lot better. A great rug also helps! Since we opted to not change the tile, we changed everything else. 🙂 Updating the builder basic fixtures made a huge difference. The Halifax faucets from Pfister are so modern and sleek. They come in three finishes that don’t disappoint. I chose the chrome finish to really make this white counter pop! The install was so simple too. The included pop-up drain made this quick update only take minutes. I am amazed at how such a simple change can make a space look so much more put together and updated.
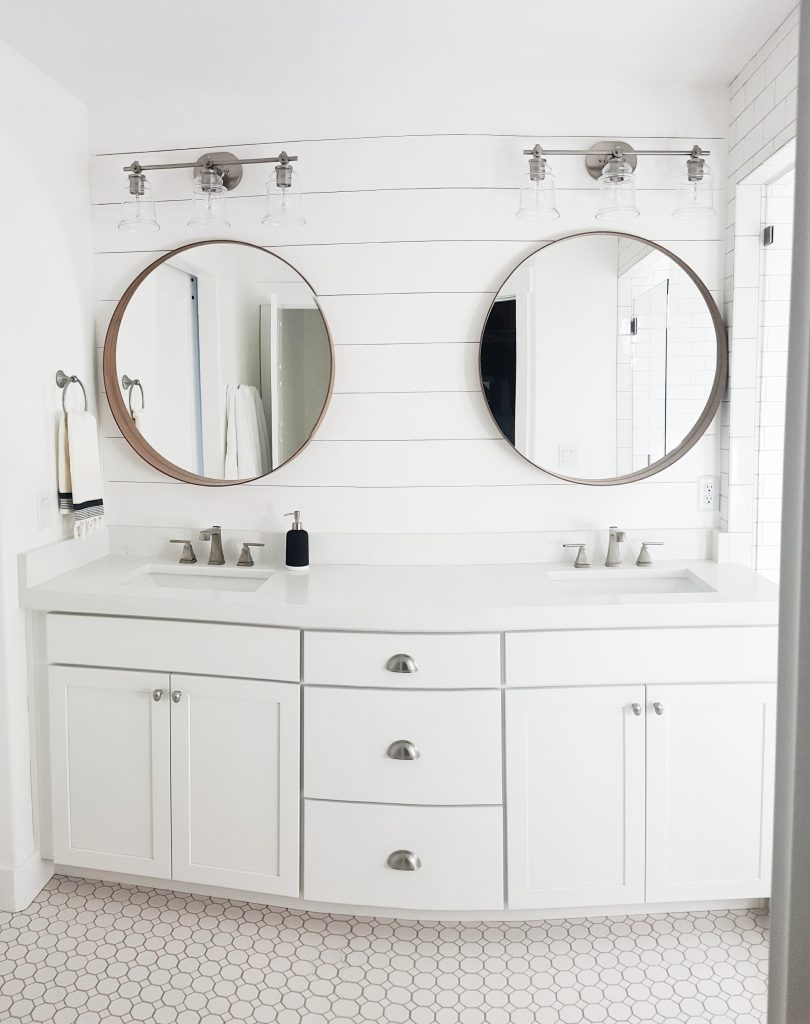
The bathroom “before” when we bought the house.
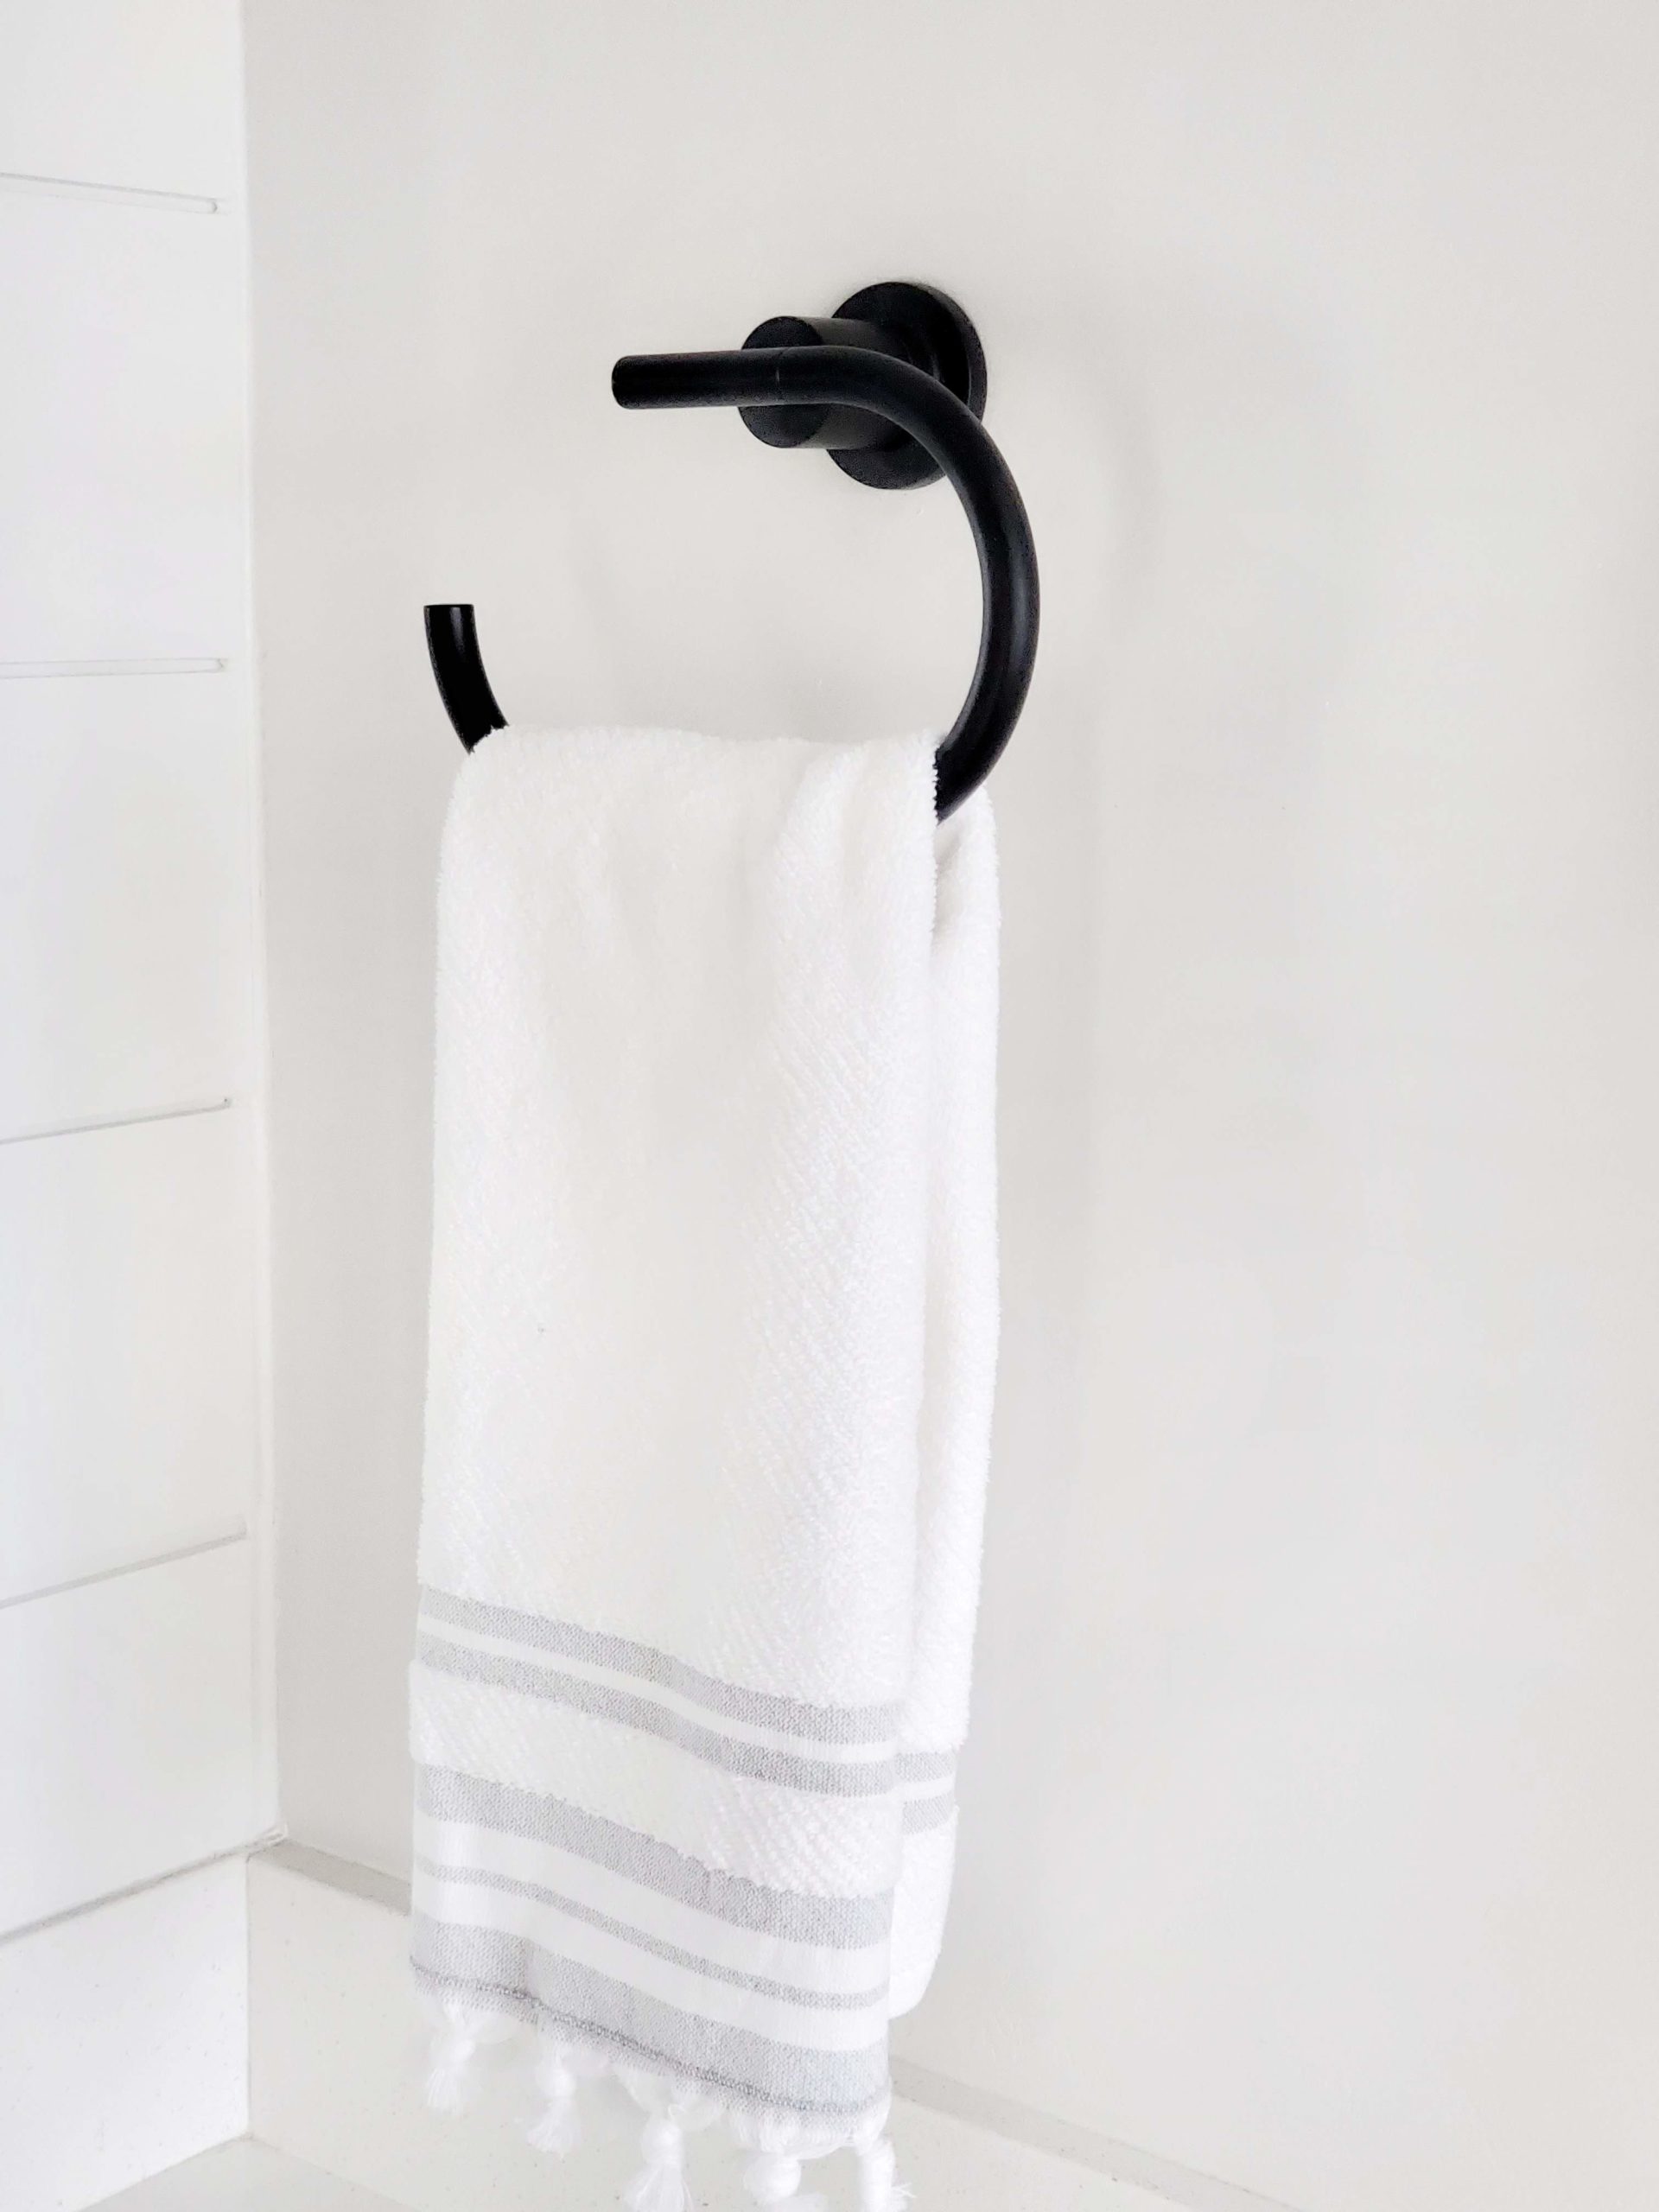
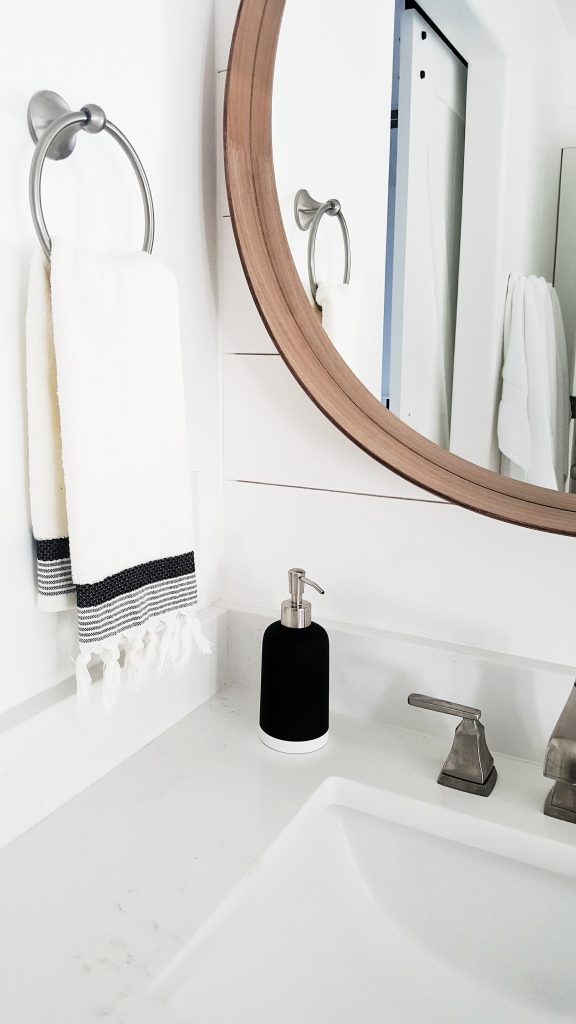
I also had the cabinets refinished and put on new matte black hardware. Yes, you can totally mix metals in a room! I like to stick to the rule of using two metals but no more than three in a space. The black and chrome finishes on this vanity complement each other perfectly. Pfister has a variety of fixture finishes available that make customizing simple! Don’t be afraid to mix and match. Although I chose Halifax faucets in chrome, the Contempra matte black towel rings still flow with the design.
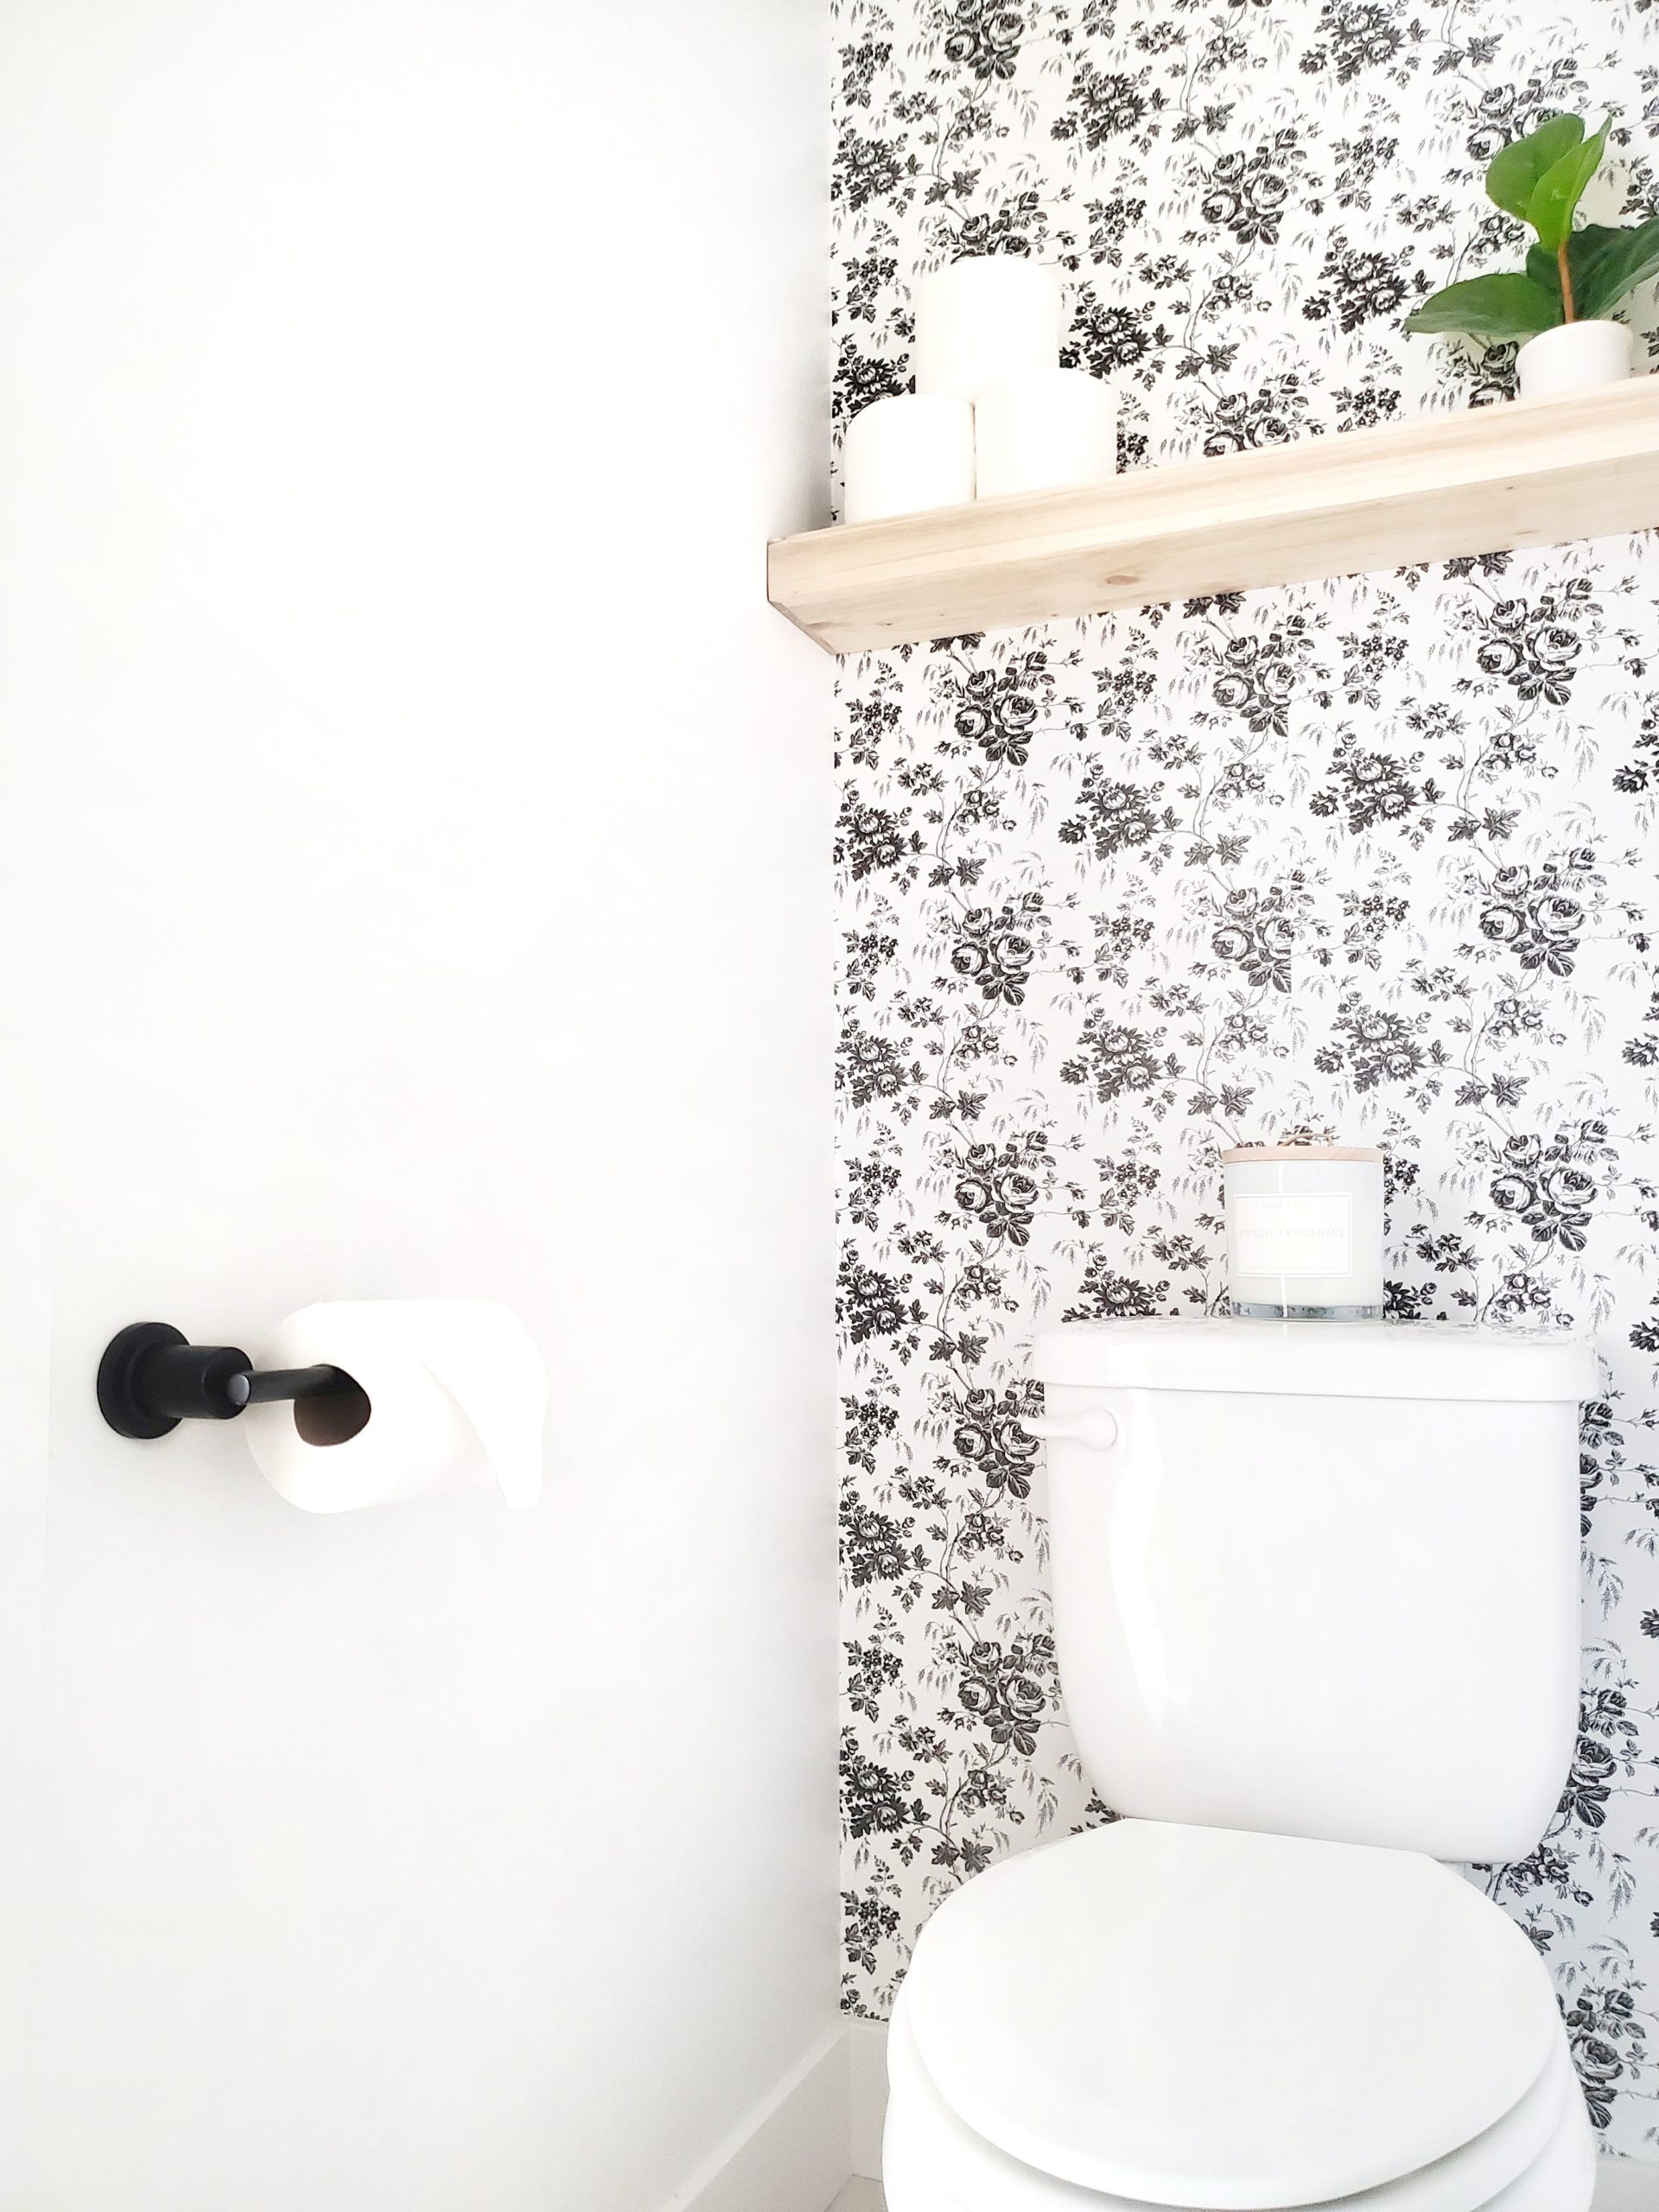
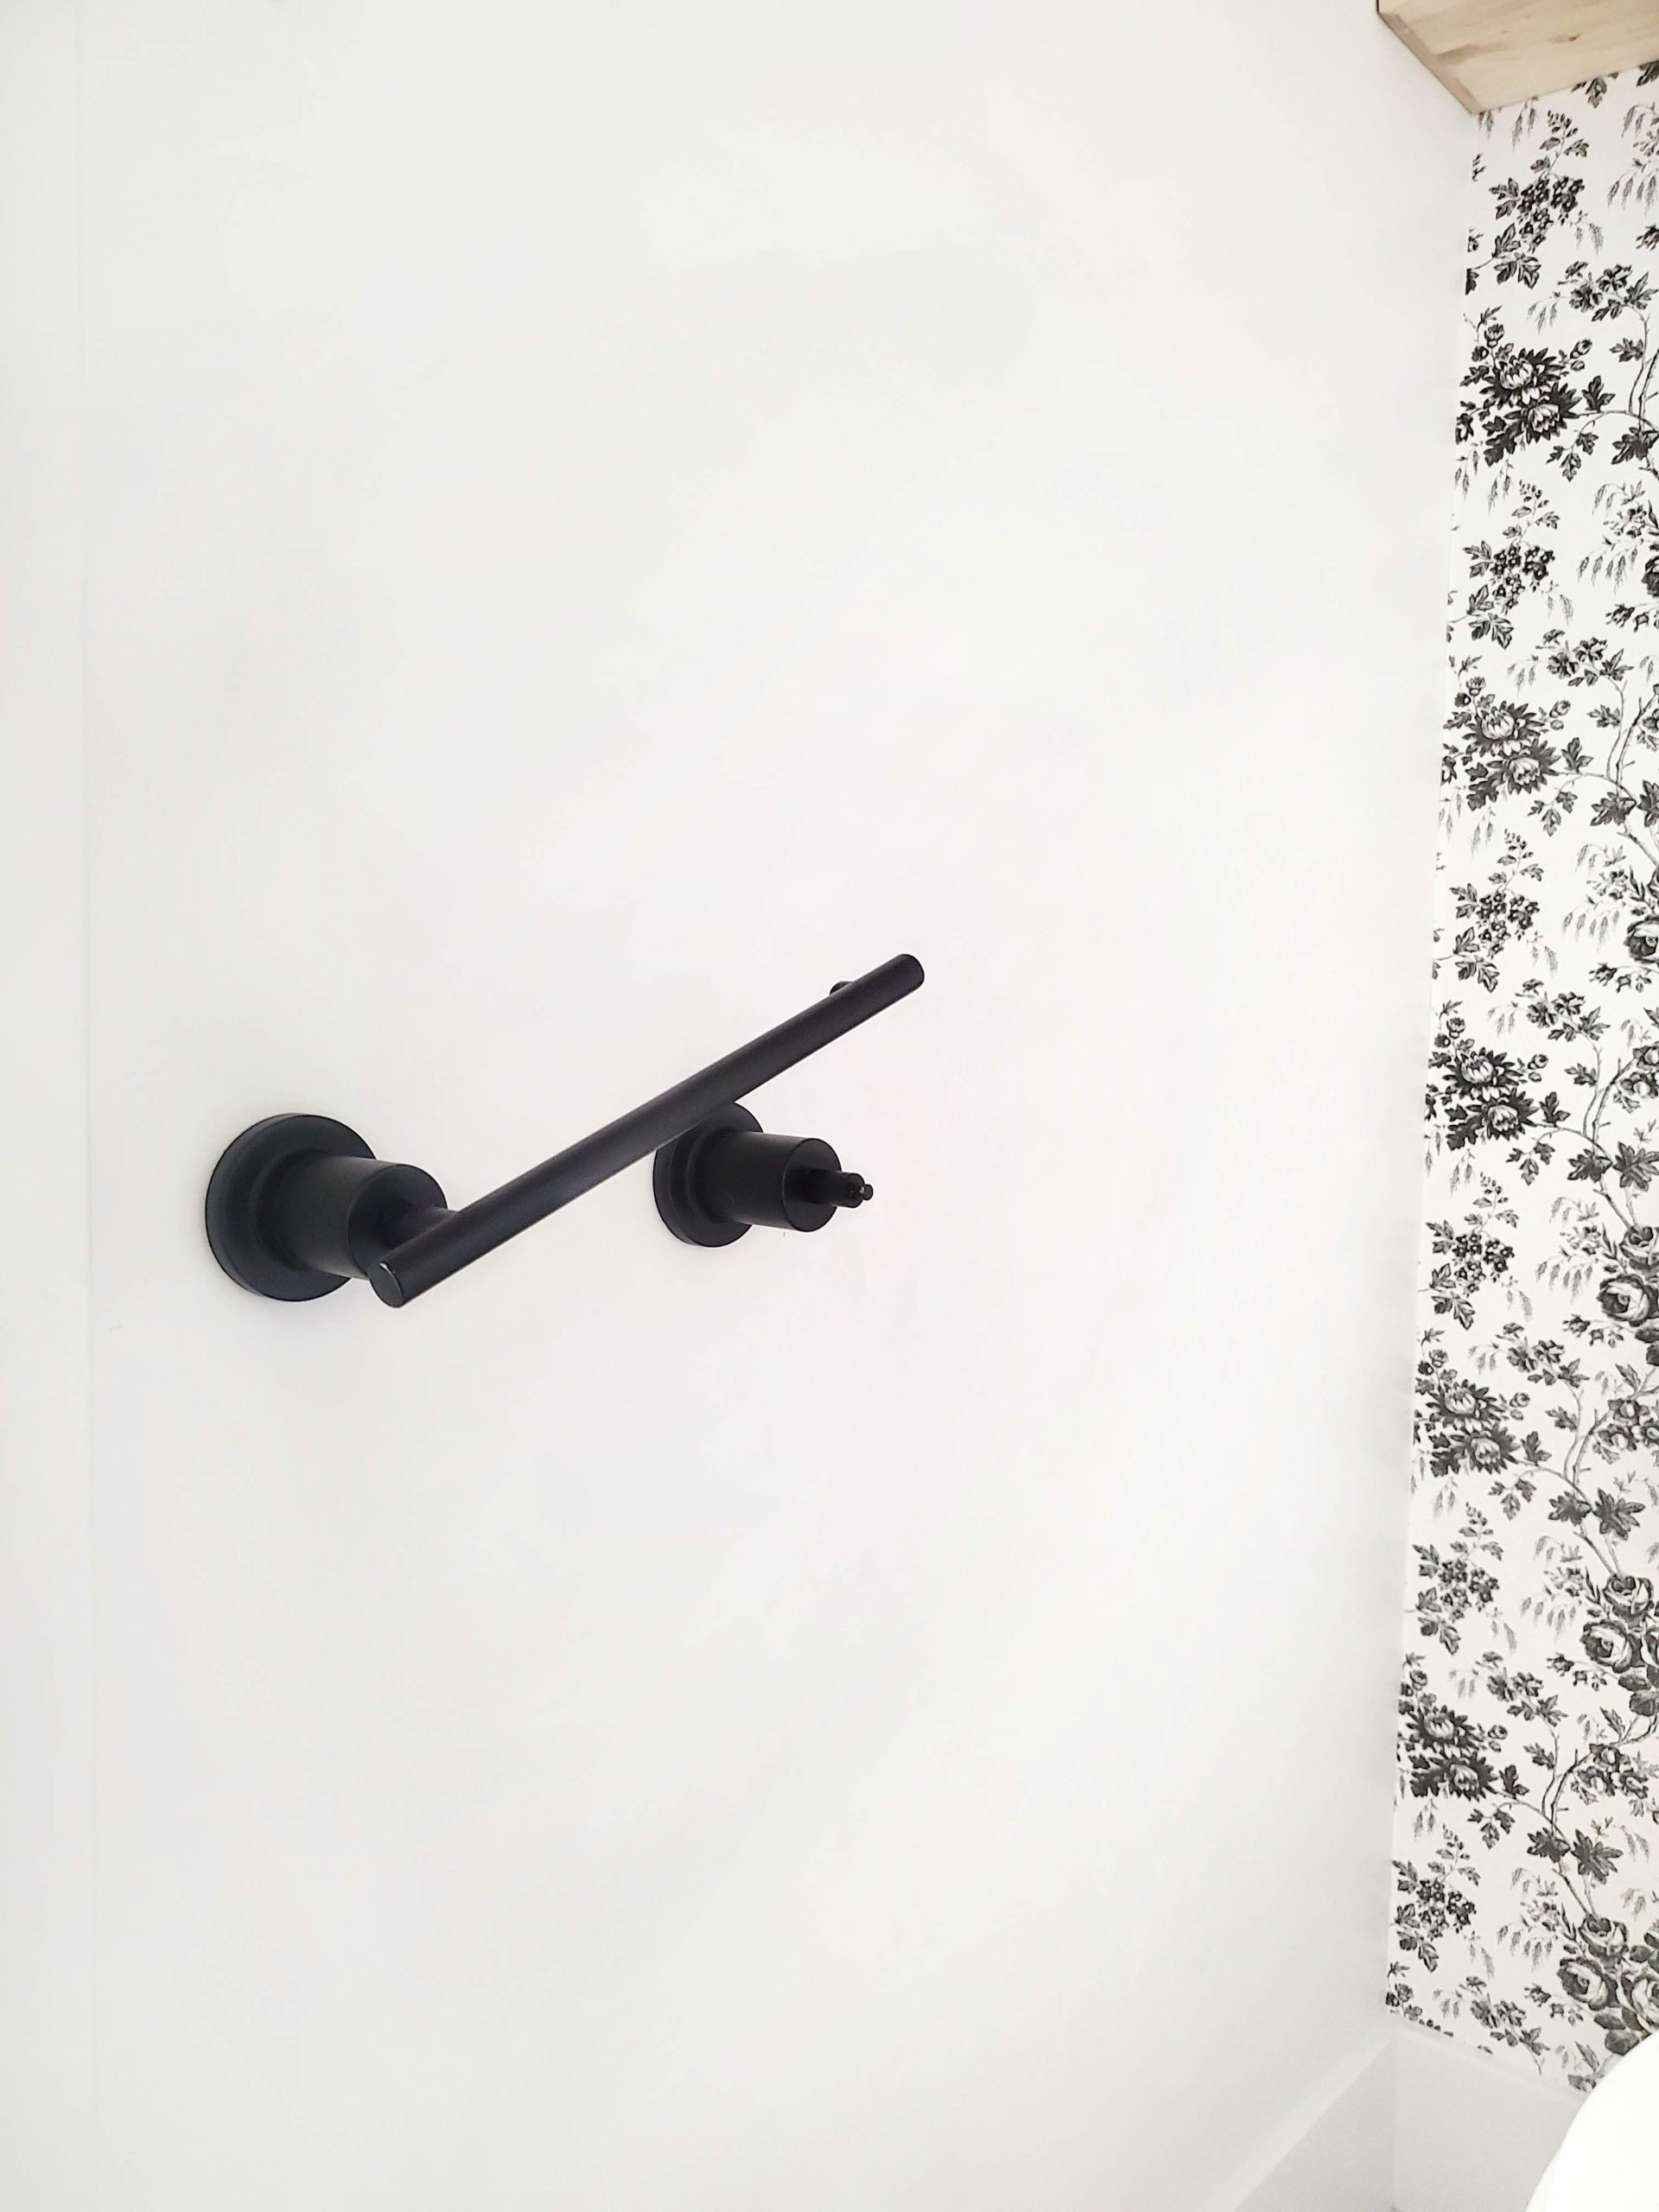
I mean just look at these Contempra matte black towel rings! It was love at first sight. They pair so well with the mirrors and cabinet hardware. I love the bold design and modern feel! I also went with the Contempra paper holder for the water closet. Can we talk about how awesome this paper holder is? I think we often underestimate the use of well-made bathroom fixtures. The simple design allows me to easily change toilet paper with just a lift of the bar. No excuses for an empty roll now! 🙂
The Contempra collection is also available in four stunning finishes. The modern contemporary design is just exactly what I was looking for in this bathroom. I did a fun accent wall in this water closet as well. I used the same DIY shelf liner paper from my office reveal. This inexpensive hack is a fun way to add some character to any space. I also decided to add the natural wood floating shelf for extra storage and contrast.
With a little creativity (and our friends at Spectrum Brands), we were able to make this gray tiled/ dark bathroom work after all. I’ll be honest, it was one of the first things I wanted to change when we bought this house. One of the things about buying a pre-existing house is that you get what you get 🙂 . The bathroom got put on the back burner with all the other projects we had going. Now I actually don’t hate it. Just a few cosmetic changes can go a long way. All the Pfister fixtures really make this bathroom feel modern and loved again. Most of all, the bathroom feels more like us. The bathroom really works for our family and now we enjoy it even more.
I am looking forward to the day we can tackle our master bathroom. There are so many things I want to change. We gave it a mini update when we moved in. However, it has a long way to go before it is finished.
Today I wanted to share some bathroom inspiration and my plans. The footprint is already pretty good for the space we are working with. I plan on keeping the countertops and refinishing the cabinets to a lighter color. The vanity will just be an easy cosmetic update.
The real fun comes when I get to change the flooring! There is so much gray rectangle tile that came in this bathroom when we bought it. It is on the floor, the shower, and walls. I can not wait to break this up and change all this tile!
Another big change we will make is swapping out the glass shower for Euro glass. Mr. Whitelane and I are also planning on bringing down the wall as far as we can between the shower and bathtub.
These changes alone will have a huge impact. It will look completely different. I want to continue the tile surround we pick for the bathtub, around the window above too. EEKKK! It will be a fun statement!
There are quite a few projects we have to tackle before we make it to the bathroom though. A girl can dream, right? Next up we have the flooring in the upstairs bedrooms. Once we get that out of the way, I can start talking Mr. Whitelane into the bathroom project. 🙂
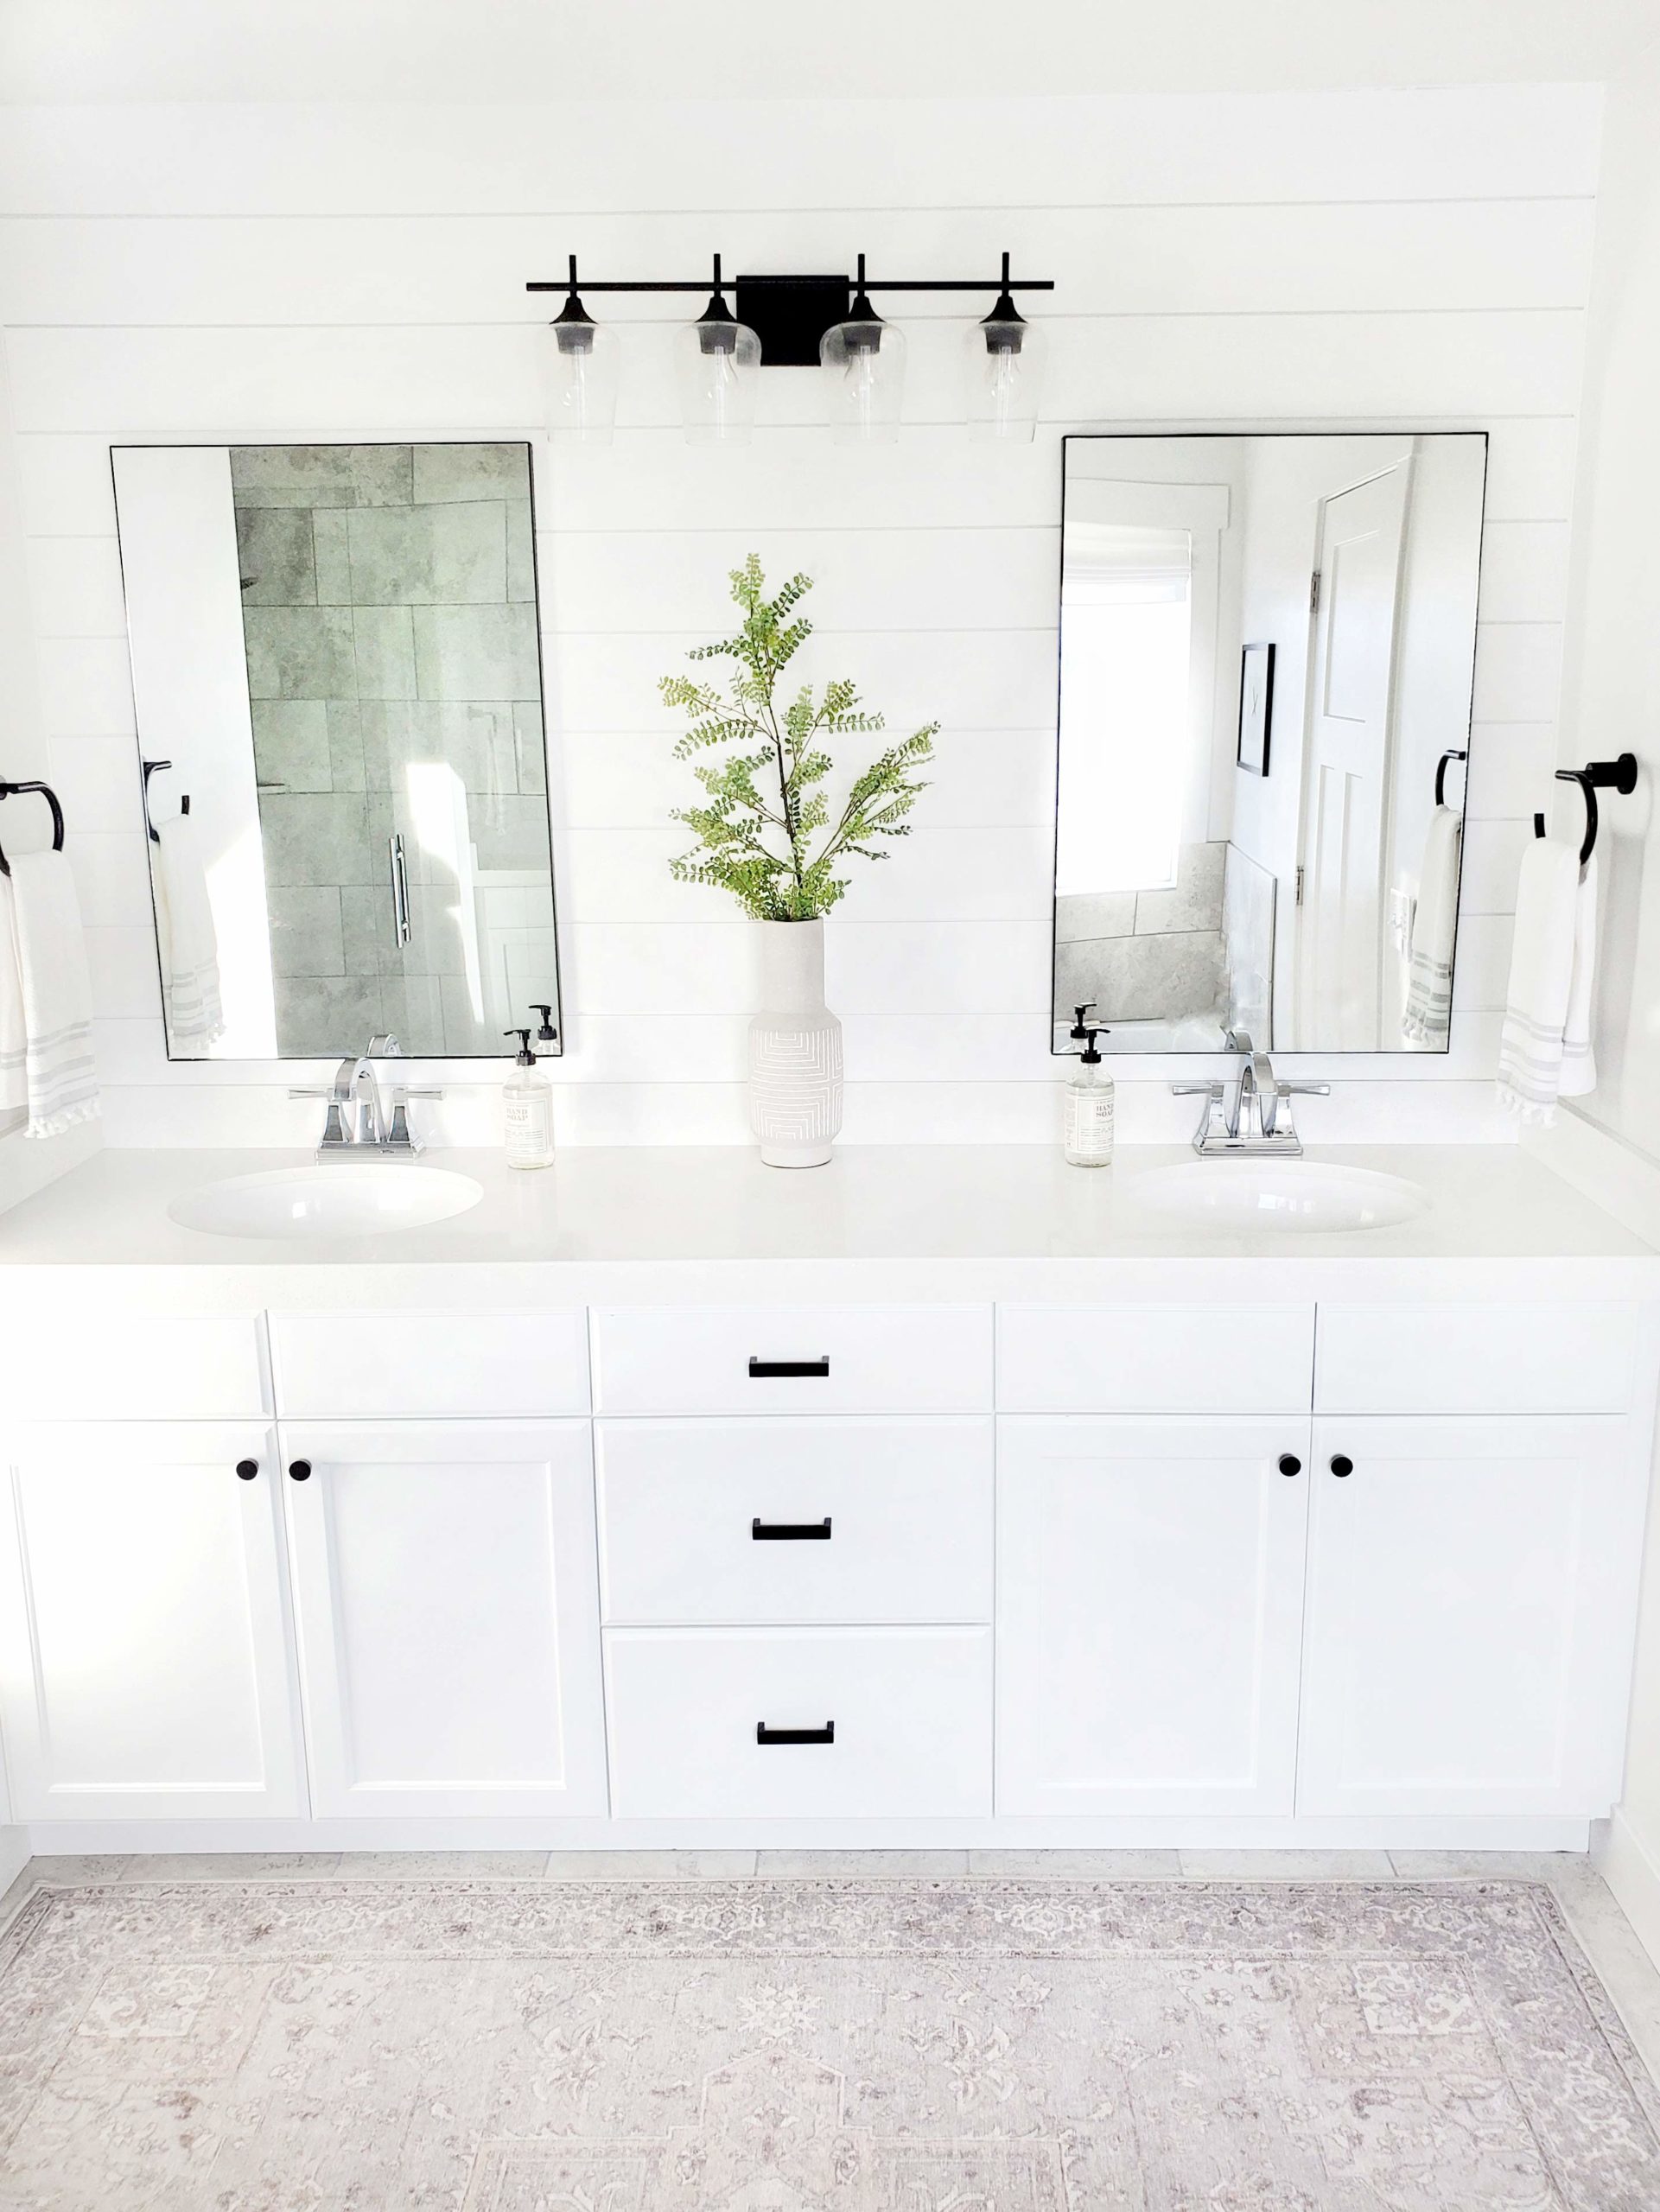
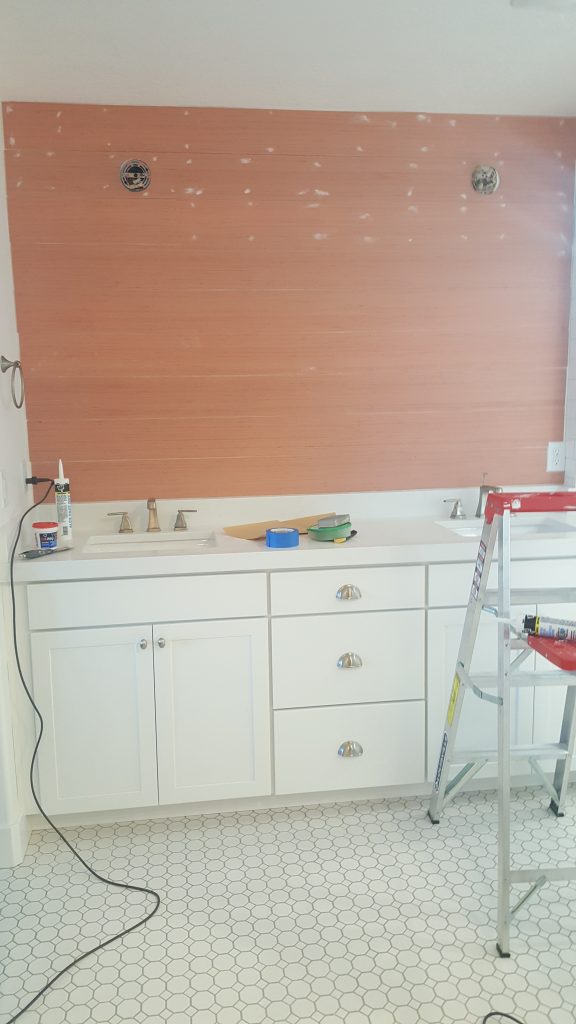
I finally got the shiplap put up above our vanity and I am in L.O.V.E. I have been trying to get it done for about a month. We have only lived in our new house two months but the projects have been planned for a loooooong time! From the second we picked our floor plan, the project list started. This was really an easy weekend project that made a big impact. We did this same type of “shiplap” in our townhouse going to the basement. The method we use is way cheaper than traditional shiplap. I think it looks just as good too!
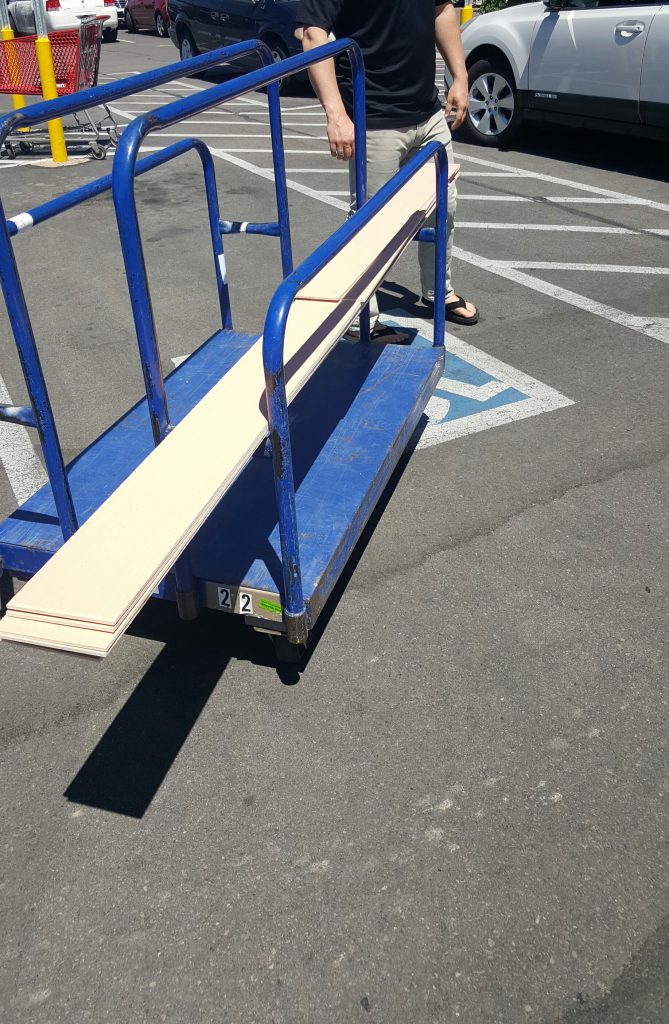
Mr. Whitelane and I started out by going to Lowe’s to get some plywood underlayment board. It comes in 4’ by 8’ sheets for $14.48. Then we had Lowe’s cut the board into six-inch strips. They will do straight cuts for free. So, take advantage of that! I was able to get five stripes that were six inches. There was one more strip that came out of the sheet but it was a little less than six inches because of the saw blade. When you make cuts, you lose a little of your board each time due to the width of the blade. After I had my six-inch stripes, I had them cut the boards to the length I need to go across my vanity.
Now that we had our strips, we loaded them up and got to work. NOT! We went home, unloaded them to the garage, and that is where the boards sat for a month. Each weekend we had something come up and it did not get done. I finally got tired of looking at those boards. I decided that we would get it done this past weekend, no matter what! It is a miracle! It actually got done between our kid’s football and soccer games.
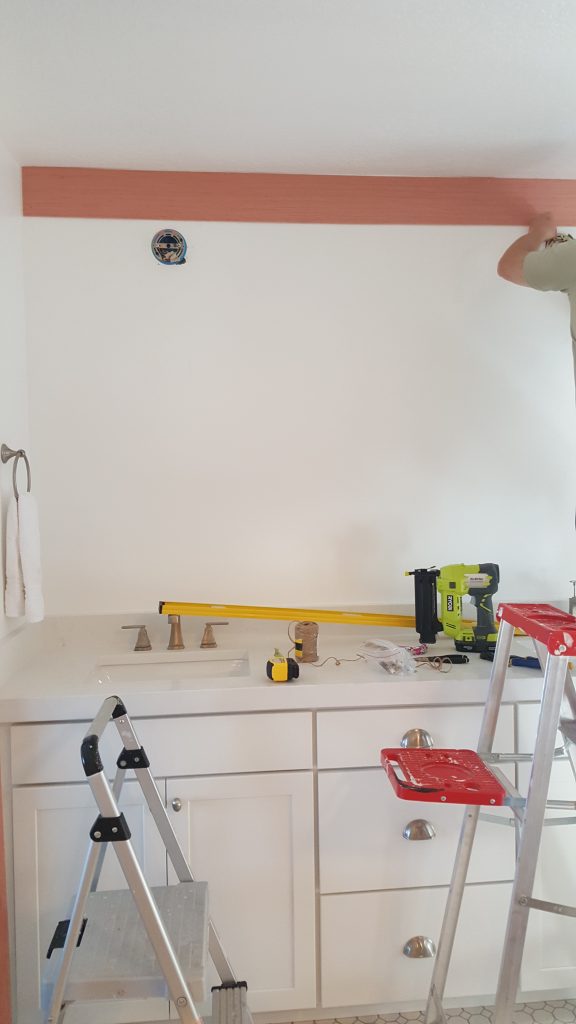
Before we started, I took a sander to the all the edges of the six-inch strips. The edges can be a little rough after they are cut. Just to be sure, I like to sand all around the boards to make it smooth. Mr. Whitelane got our little one down for a nap, while I quickly gave the boards a sanding. Now we were ready to nail them up. In most cases, your ceiling is not level. Make sure the first board you put at the top of your wall is level. There may be a gap between certain spots of the board and your ceiling. That’s okay because caulk will hide any gaps.
After the first board is level, things go pretty quick. I used nickels to space between each board to give that small line. I love using my Ryobi Power Strikecordless nail gun. It is so simple and no cords get in the way. We used a jigsaw to cut around our electrical boxes and outlet. It is not perfect but caulk is a lifesaver!
When we got all our boards up, I went back and filled the nail holes with spackle. I then used a lot of caulk to fill and smooth all my gaps. I used to hate caulking because of how messy it got. Mr. Whitelane then introduced me to the best invention ever. A caulk toolmakes the perfect smooth lines with half the mess. I love how perfect and easy it is to use. You really need to try one for your next project. It’s a game changer!
Now that everything was spackled and caulked, I let it dry overnight. I then used a foam roller to put on four coats of Sherwin Williams “High Reflective White.” Another great trick I like to use in between painting is to put your roller in a plastic bag in the fridge. Keeping the roller in the fridge stops the paint from drying out. You also don’t have to rinse it out each time. Just grab it out of the fridge and start painting again. When you are done with all your coats, you can trash it or rinse it out.
Hi there, I’m Kate. Welcome to White Lane Decor. Thanks for stopping by. I love neutral, bright, and airy spaces. I’m always looking for new ways to turn our house into a home. Have a look around and find inspiration for your next project.
Search
Disclosure
Some of my blog posts, ads, and banners contain "affiliate links." This means if you click on the link and purchase the item, I will receive an affiliate compensation. However, I only recommend products or services I use personally and truly feel you will enjoy too! I am disclosing this in accordance with the Federal Trade Commission's 16 CFR, Part 255: "Guides Concerning the Use of Endorsements and Testimonials in Advertising.” White Lane Decor is a participant in the Amazon Services LLC Associates Program, an affiliate advertising program designed to provide a means for sites to earn advertising fees by advertising and linking to amazon.com.
I am so excited I finally found what I want for the master bedroom ceiling. I was really bummed that the ceiling is not vaulted….I know??? What’s up with that? There was a tray ceiling but we took it out. It had a weird jog and I didn’t like it. So that left us with a clean slate to work with. There is a ceiling fan and two speakers to work around. Not a ton of stuff and I think it will be easy to make it work and look good.
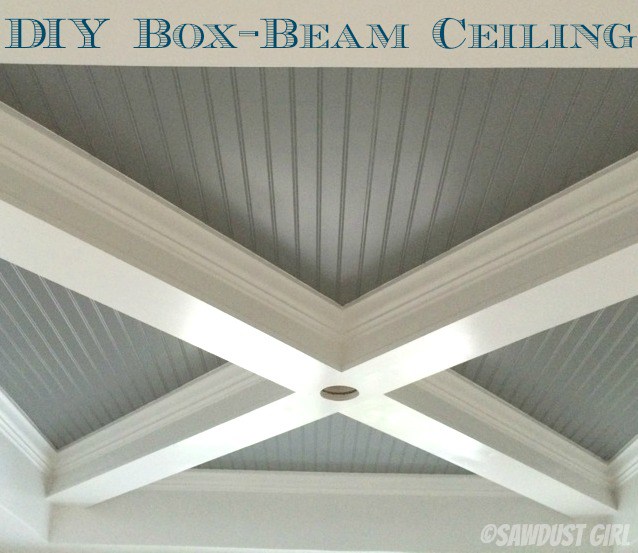
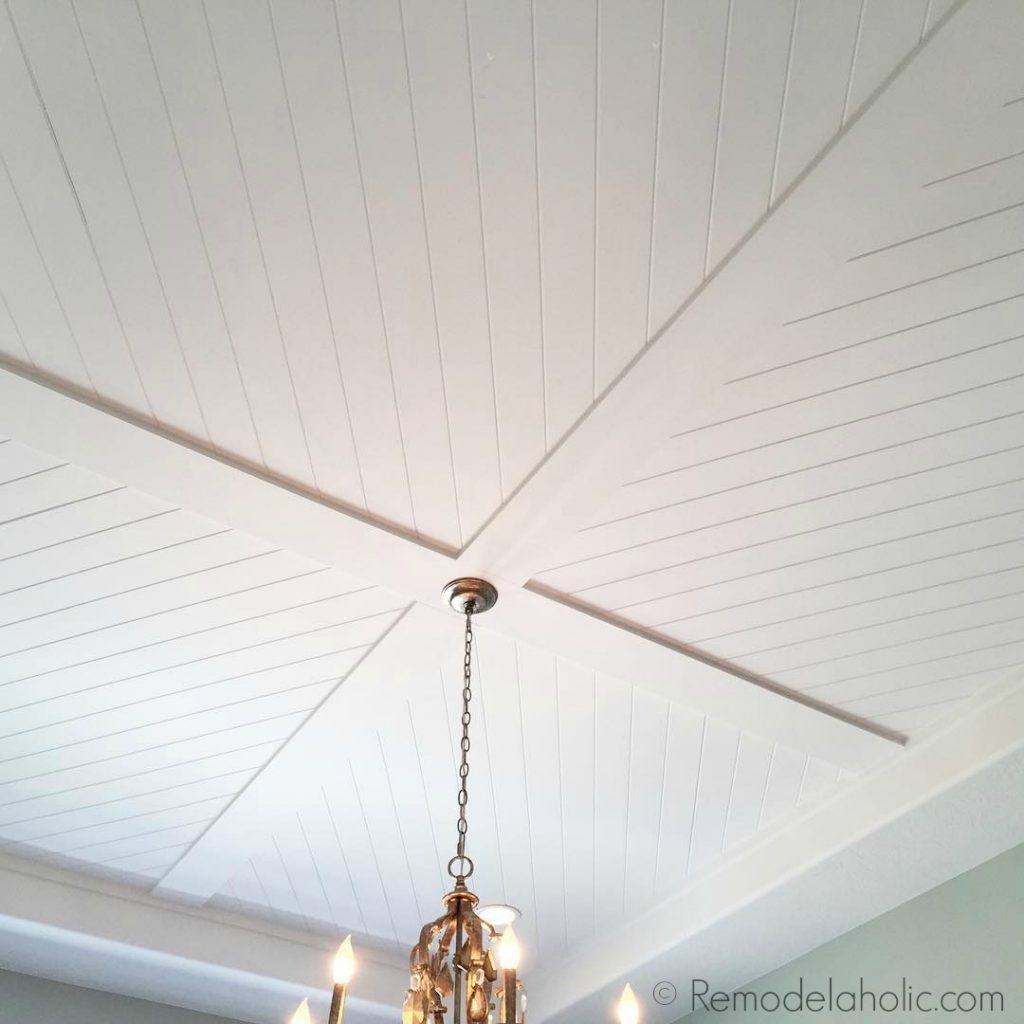
At first, I thought I would do some simple board and batten on the ceiling and call it good. I started to looking for ideas. Planking was another idea I thought about. I liked both of these ideas but nothing was really sticking out to me. Then one day I was browsing Pinterest and came across this picture below. Cassity, over at Remodelholic, snapped this picture at a home show. I was sold on this for our ceiling! I love the planks with the thin overlay “beams”.
.
I also found this image over at Sawdust Girl. Then I was really excited. Now stay with me for this confusing explanation. 🙂 Ok. So, I love the beams in the picture making an “X” but not how thick they are. I also don’t love the beadboard behind the “X” beams. Remodelholic’s picture is great because the beams are low profile but they make a “T”. I think I like the “X” better but I would have them in low profile beams. I also like the planks in Remodelholic’s picture. The planks are going at an angle between the beams. I wonder if the planks going at an angle with an “X” beam overlay will be too busy? I thought that I would do a low profile “X” beam with planks going vertically across the sections. Does that make sense? I will take what I like from each picture and make it work for our bedroom. Who knows? Maybe I will get crazy and do the planks on an angle with a low profile “X” beam. 🙂 I really am indecisive!
The master bedroom needs something on the ceiling to set it apart and jazz it up. I am excited to see how my idea pans out. I guess we will find out in four weeks.
Kate
Hi there, I’m Kate. Welcome to White Lane Decor. Thanks for stopping by. I love neutral, bright, and airy spaces. I’m always looking for new ways to turn our house into a home. Have a look around and find inspiration for your next project.
Search
Disclosure
Some of my blog posts, ads, and banners contain "affiliate links." This means if you click on the link and purchase the item, I will receive an affiliate compensation. However, I only recommend products or services I use personally and truly feel you will enjoy too! I am disclosing this in accordance with the Federal Trade Commission's 16 CFR, Part 255: "Guides Concerning the Use of Endorsements and Testimonials in Advertising.” White Lane Decor is a participant in the Amazon Services LLC Associates Program, an affiliate advertising program designed to provide a means for sites to earn advertising fees by advertising and linking to amazon.com.
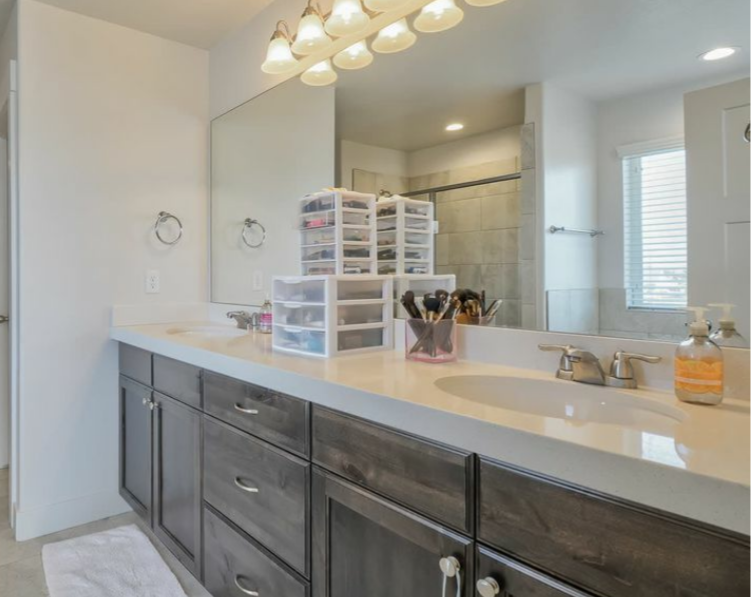 The bathroom “before” when we bought the house.


 .
.