Stay Connected With The Latest Posts

  • This field is for validation purposes and should be left unchanged.

Stay Connected With The Latest Posts

Joyful Christmas Tour

The following post contains affiliate links. Read my full disclosure here.

Guess what time is it? Christmas home tour with some of my favorite bloggers. I can’t believe it is already time for CHRISTMAS!!! Be sure get all the inspiration from their beautiful homes by clicking on the links at the bottom of this post. I love this time of year and all the different themes and colors each home puts out. I know you will enjoy this tour just as much as I have.

Last year I did a pink Christmas and it was just magical. I guess having a new baby girl had something to do with that. It was really fun but this year I was not feeling the pink. It’s funny because I have so many cute pink decorations but just did not feel like it fit this house. Don’t worry, all the pink didn’t go to waste. I let my oldest daughter have free reign to decorate her room with all the pink. I will have a fun mini-tour of her bedroom all decorated soon.

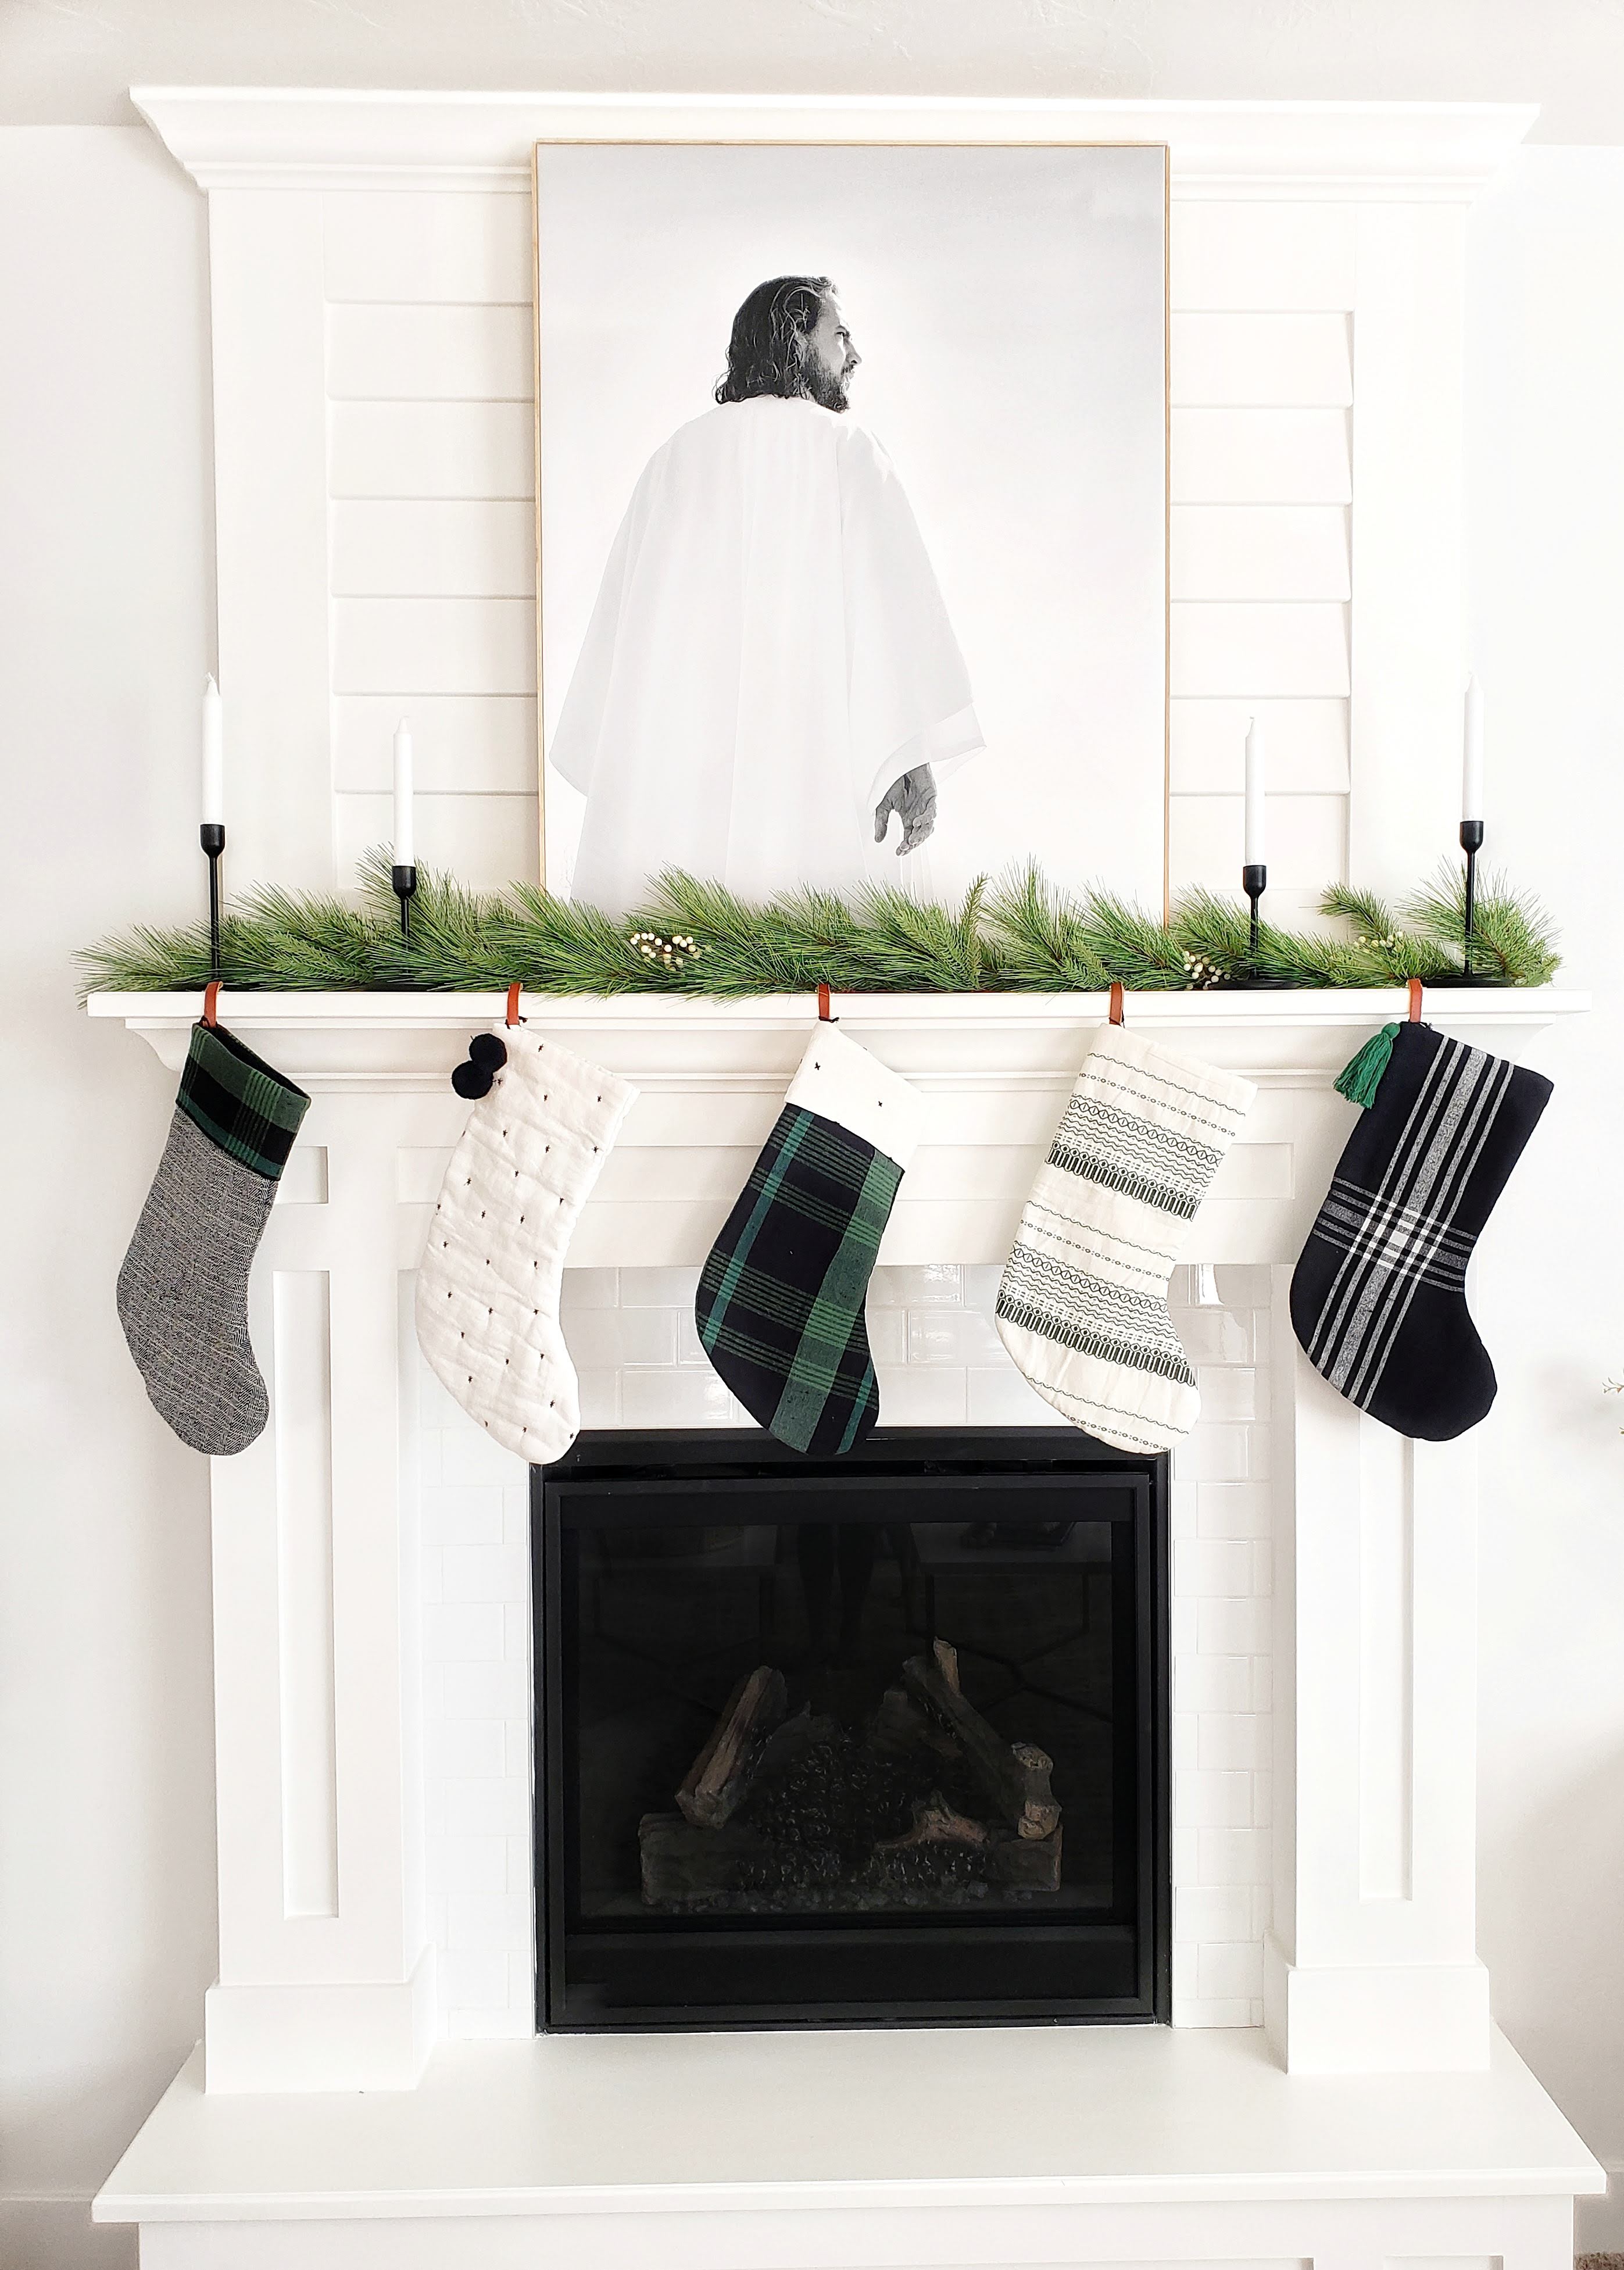
I really felt like an earthy, minimal, and traditional Christmas. With that said, I still didn’t quite commit to the classic red. I was able to bring in some green and loved it! I don’t even know who I am with all this color?? I am all about neutrals but the green was a fun change. It feels almost like a neutral color at Christmas time. I got some new stockings for the mantel after almost 8 years of the same ones. 🙂 It was definitely time. I also added this fun green garland across the mantel to hide the stocking hooks. I ended up just using clear command hooks. All the stocking hangers were bulky and pricey. I really liked the minimal look of the stockings floating off the mantel.

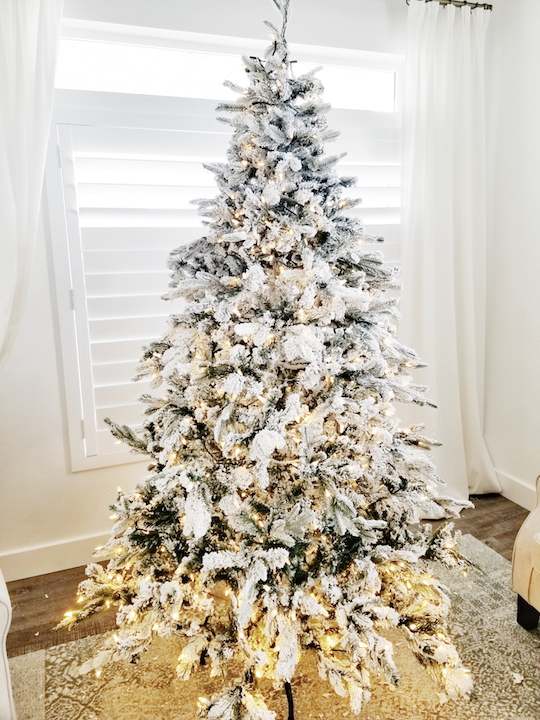
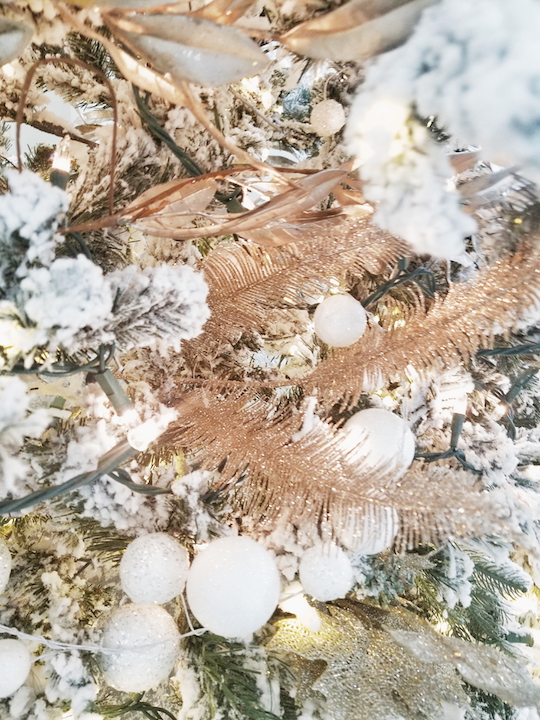
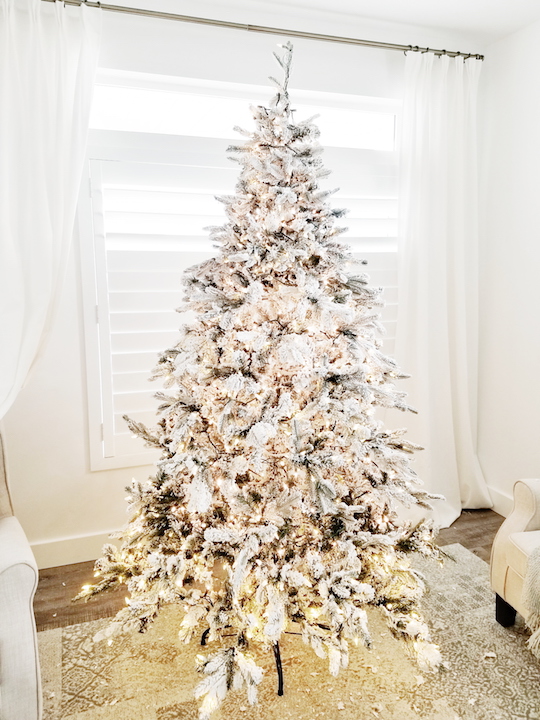
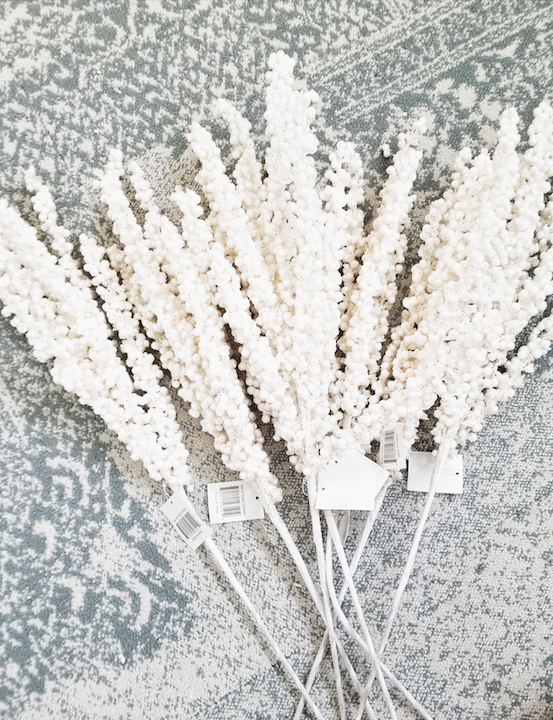
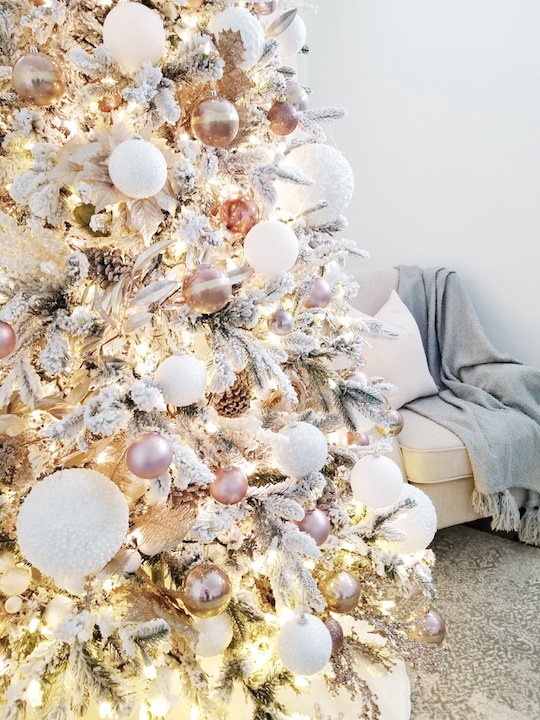
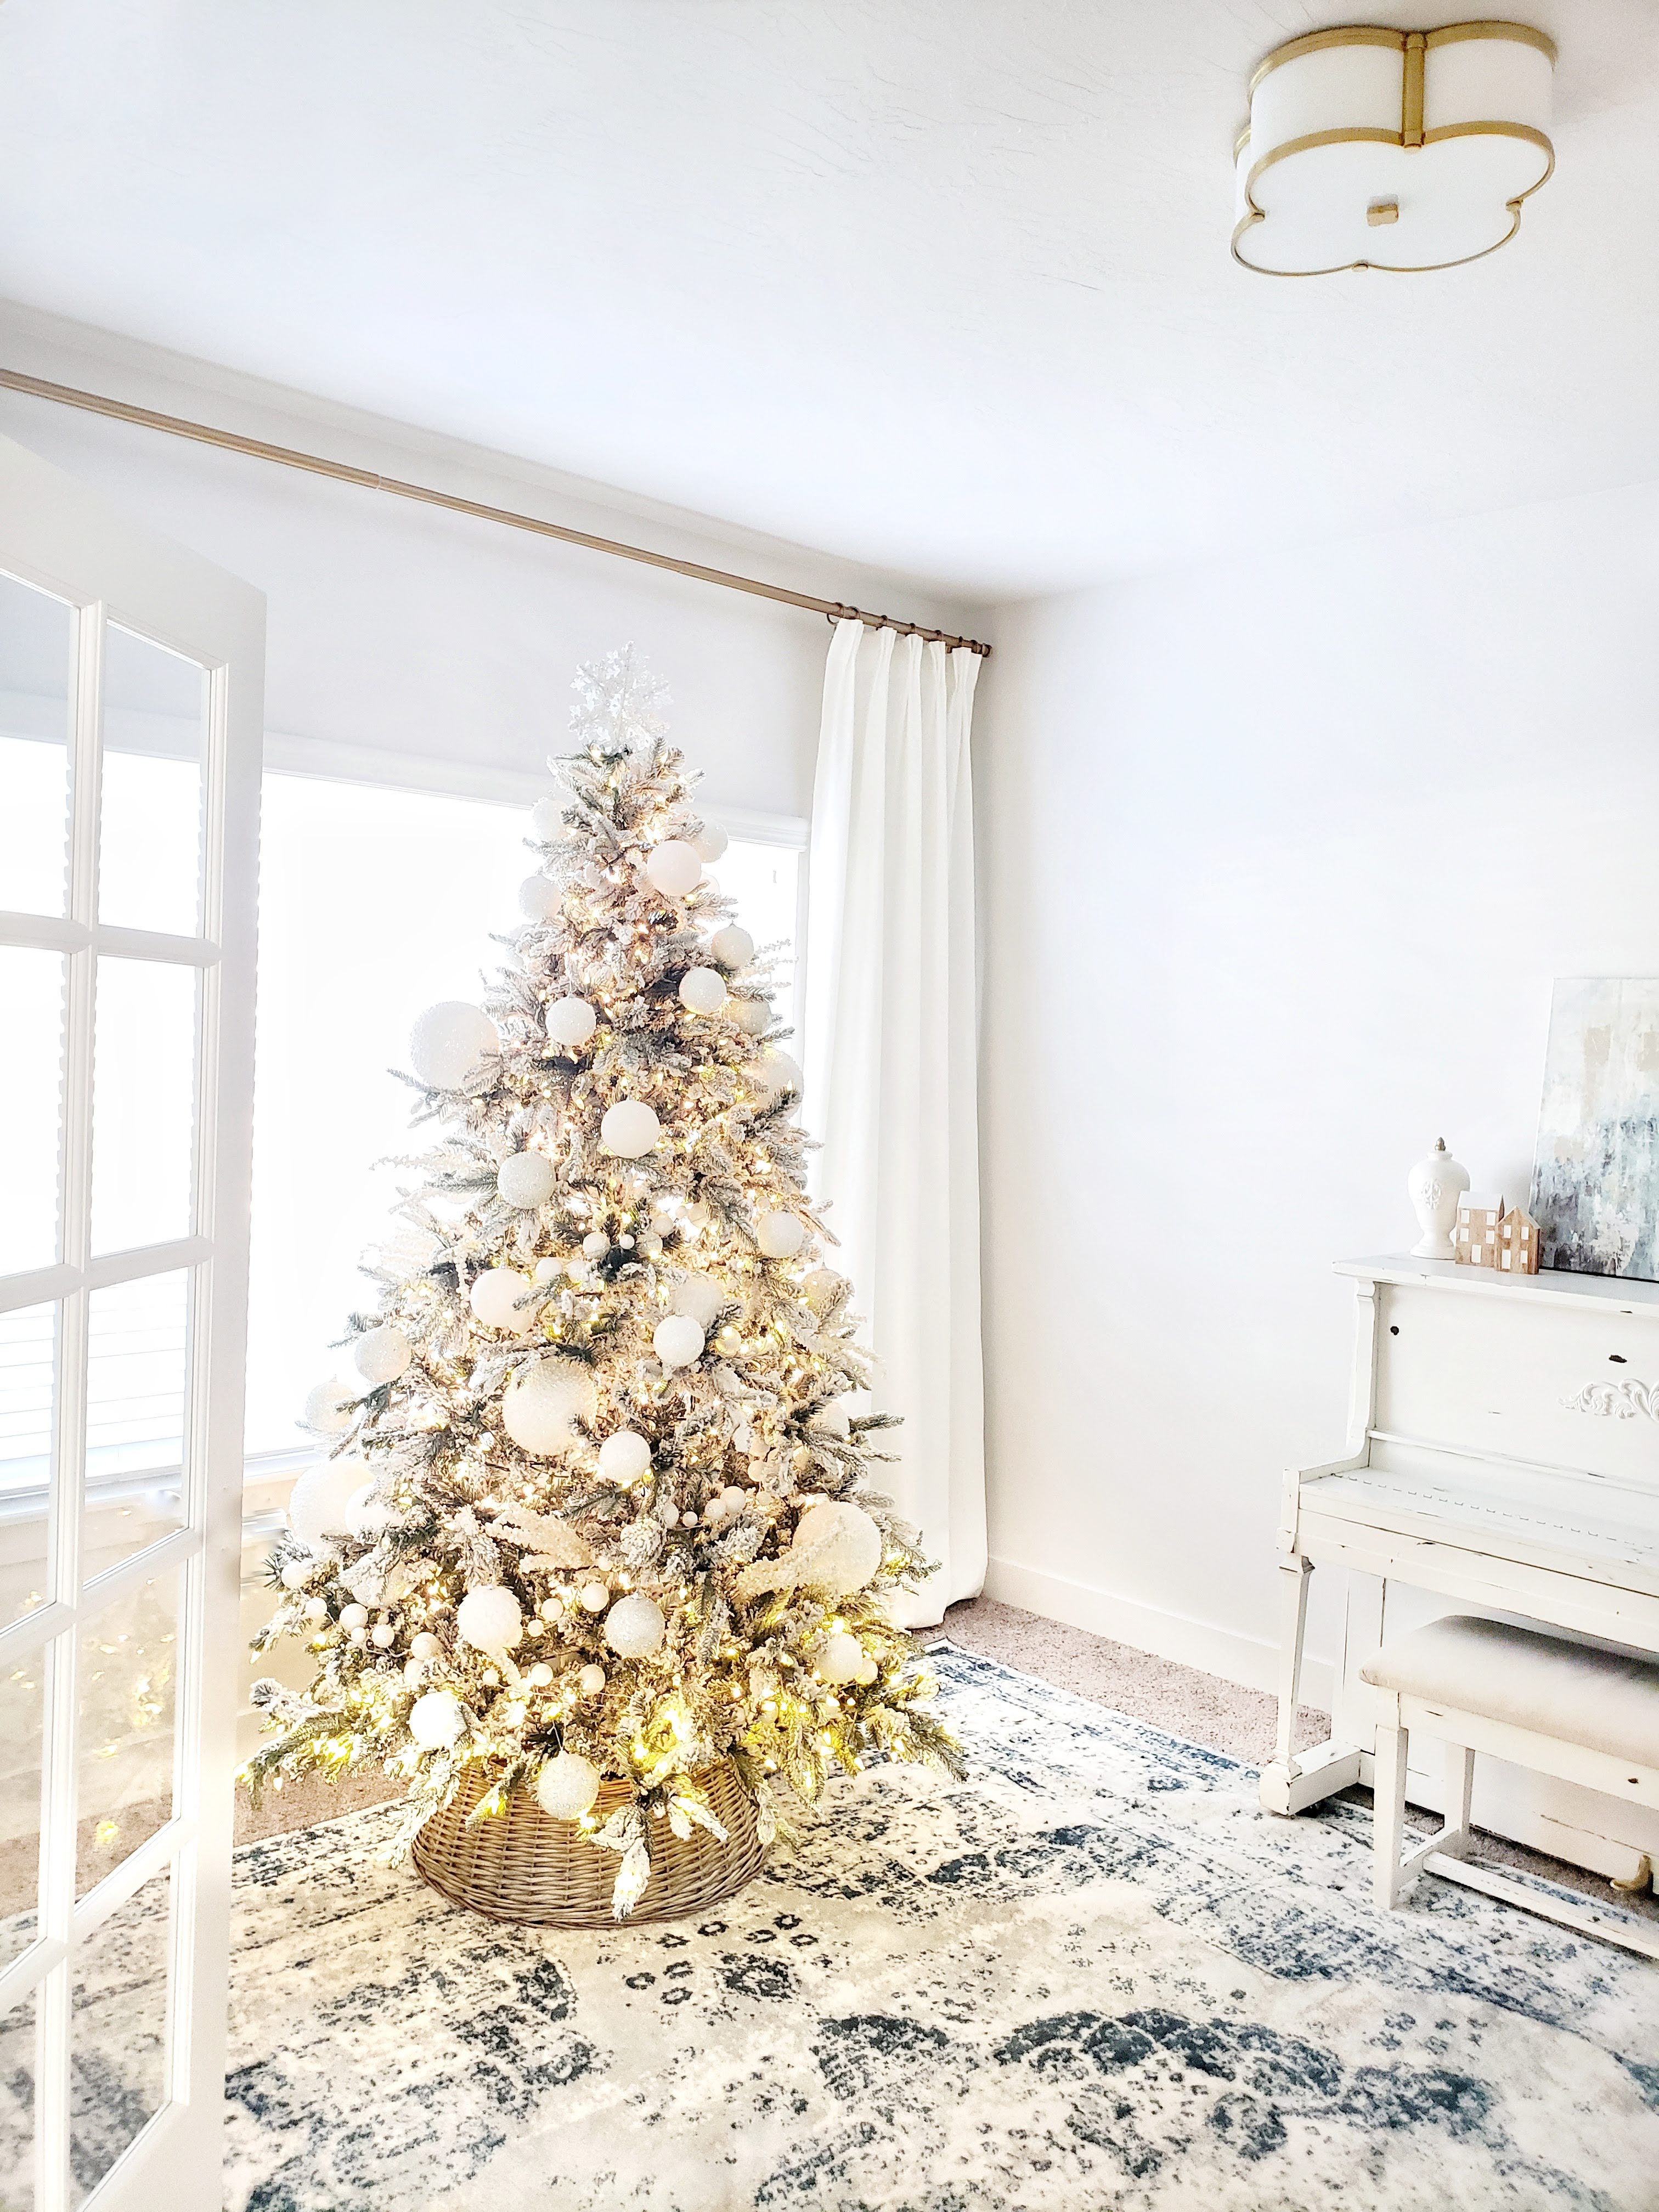
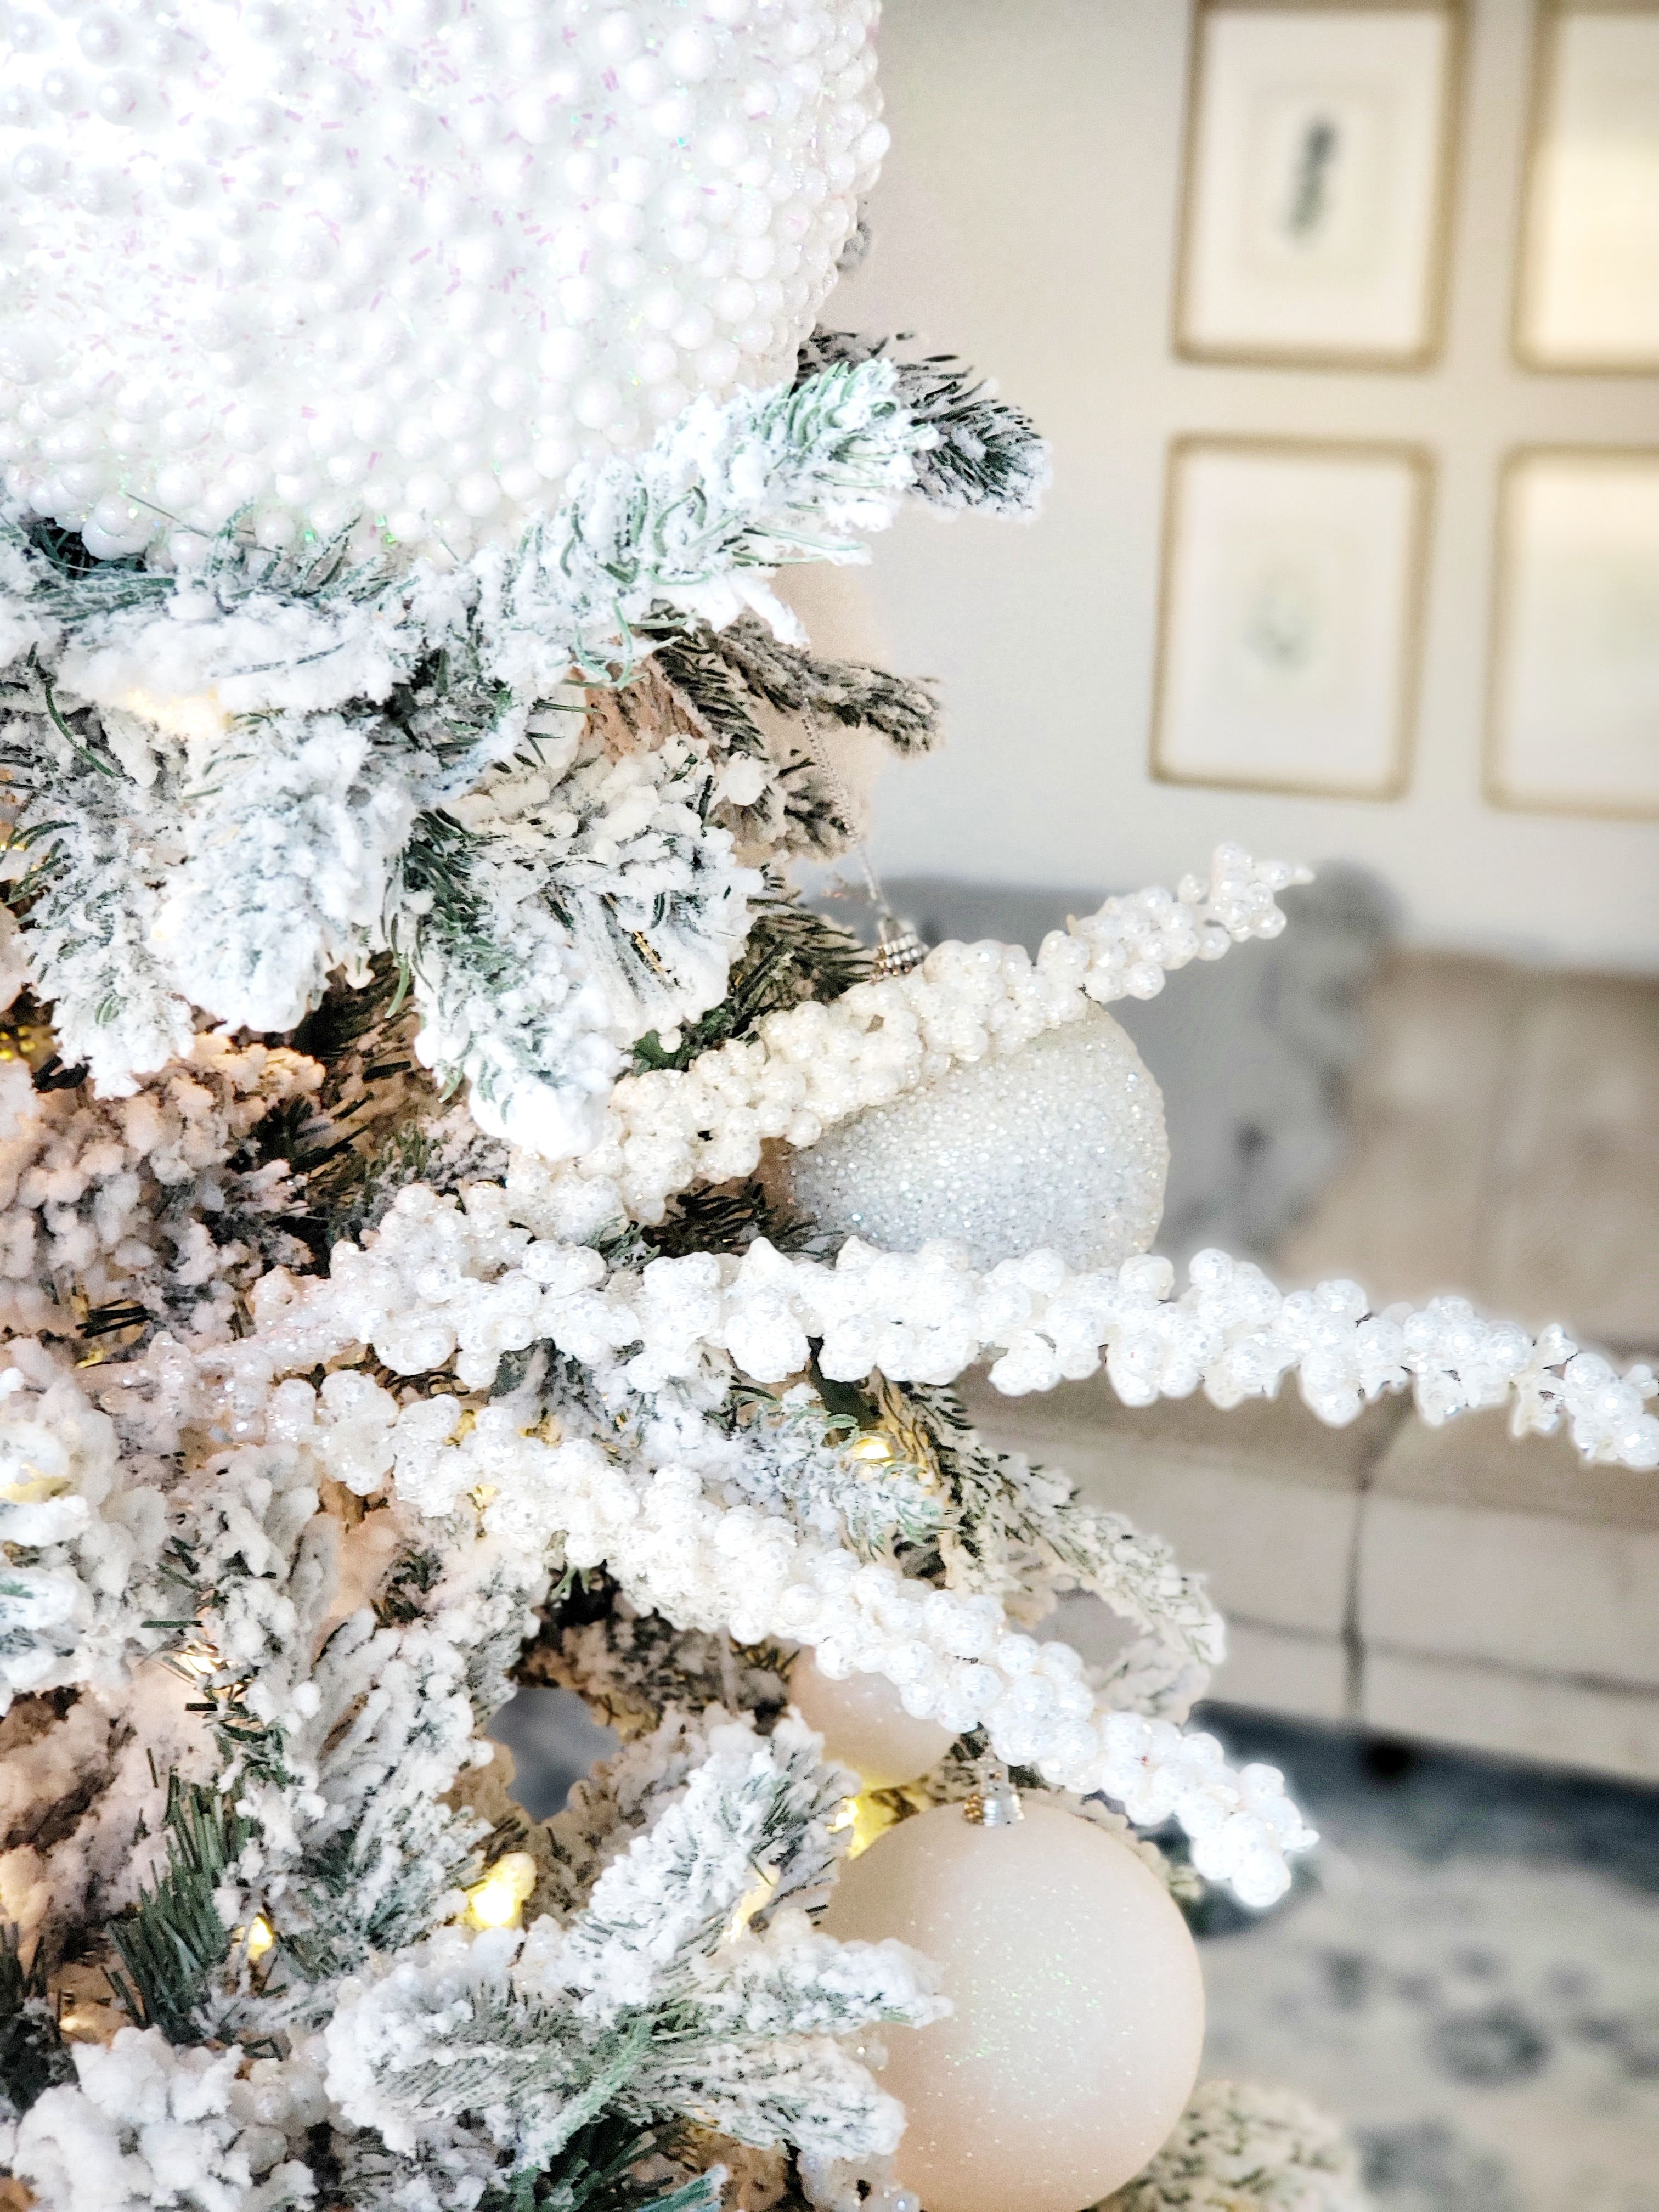
I am so proud of myself for just using what I had when it came to the tree. I went all white and simple. I had all these white ornaments and picks. I usually have a jam-packed tree with more layers of ribbon and ornaments. This year I just wanted simple and less. It still looks very full because this flocked tree is naturally thicker. Maybe next year I will splurge for a thinner and simple looking tree. I did find this tree collar basket and like it much better than a skirt.

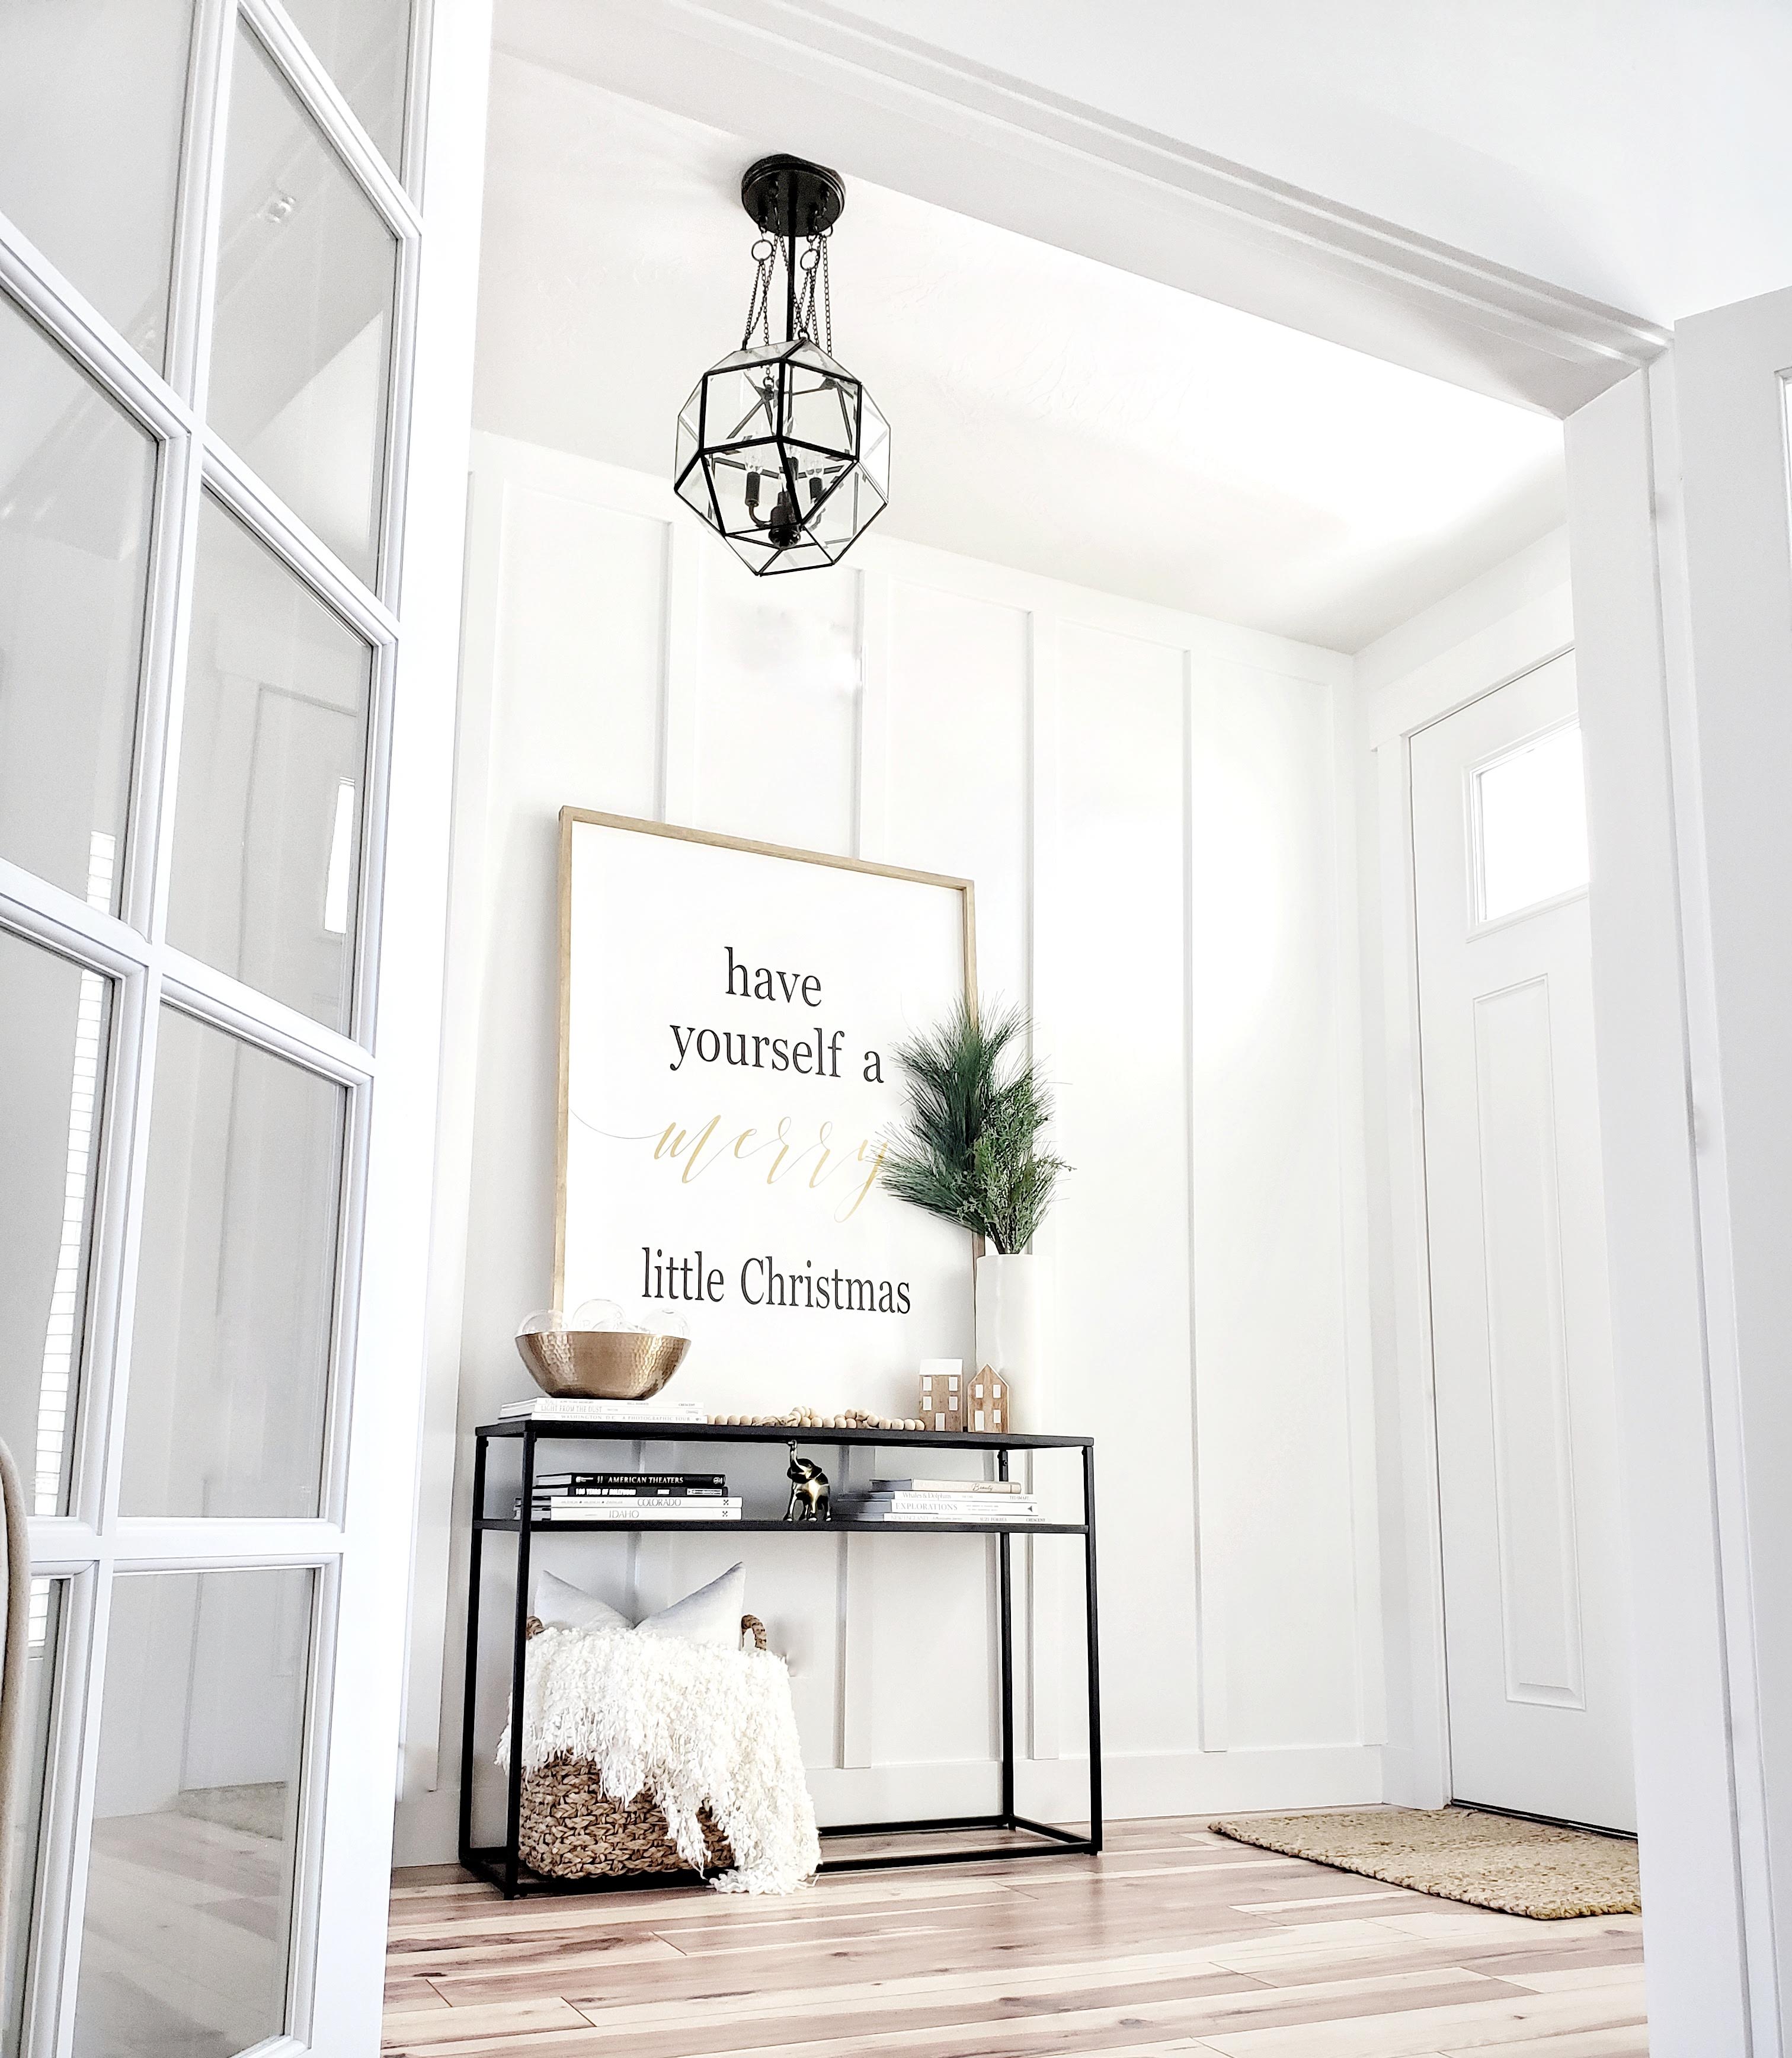
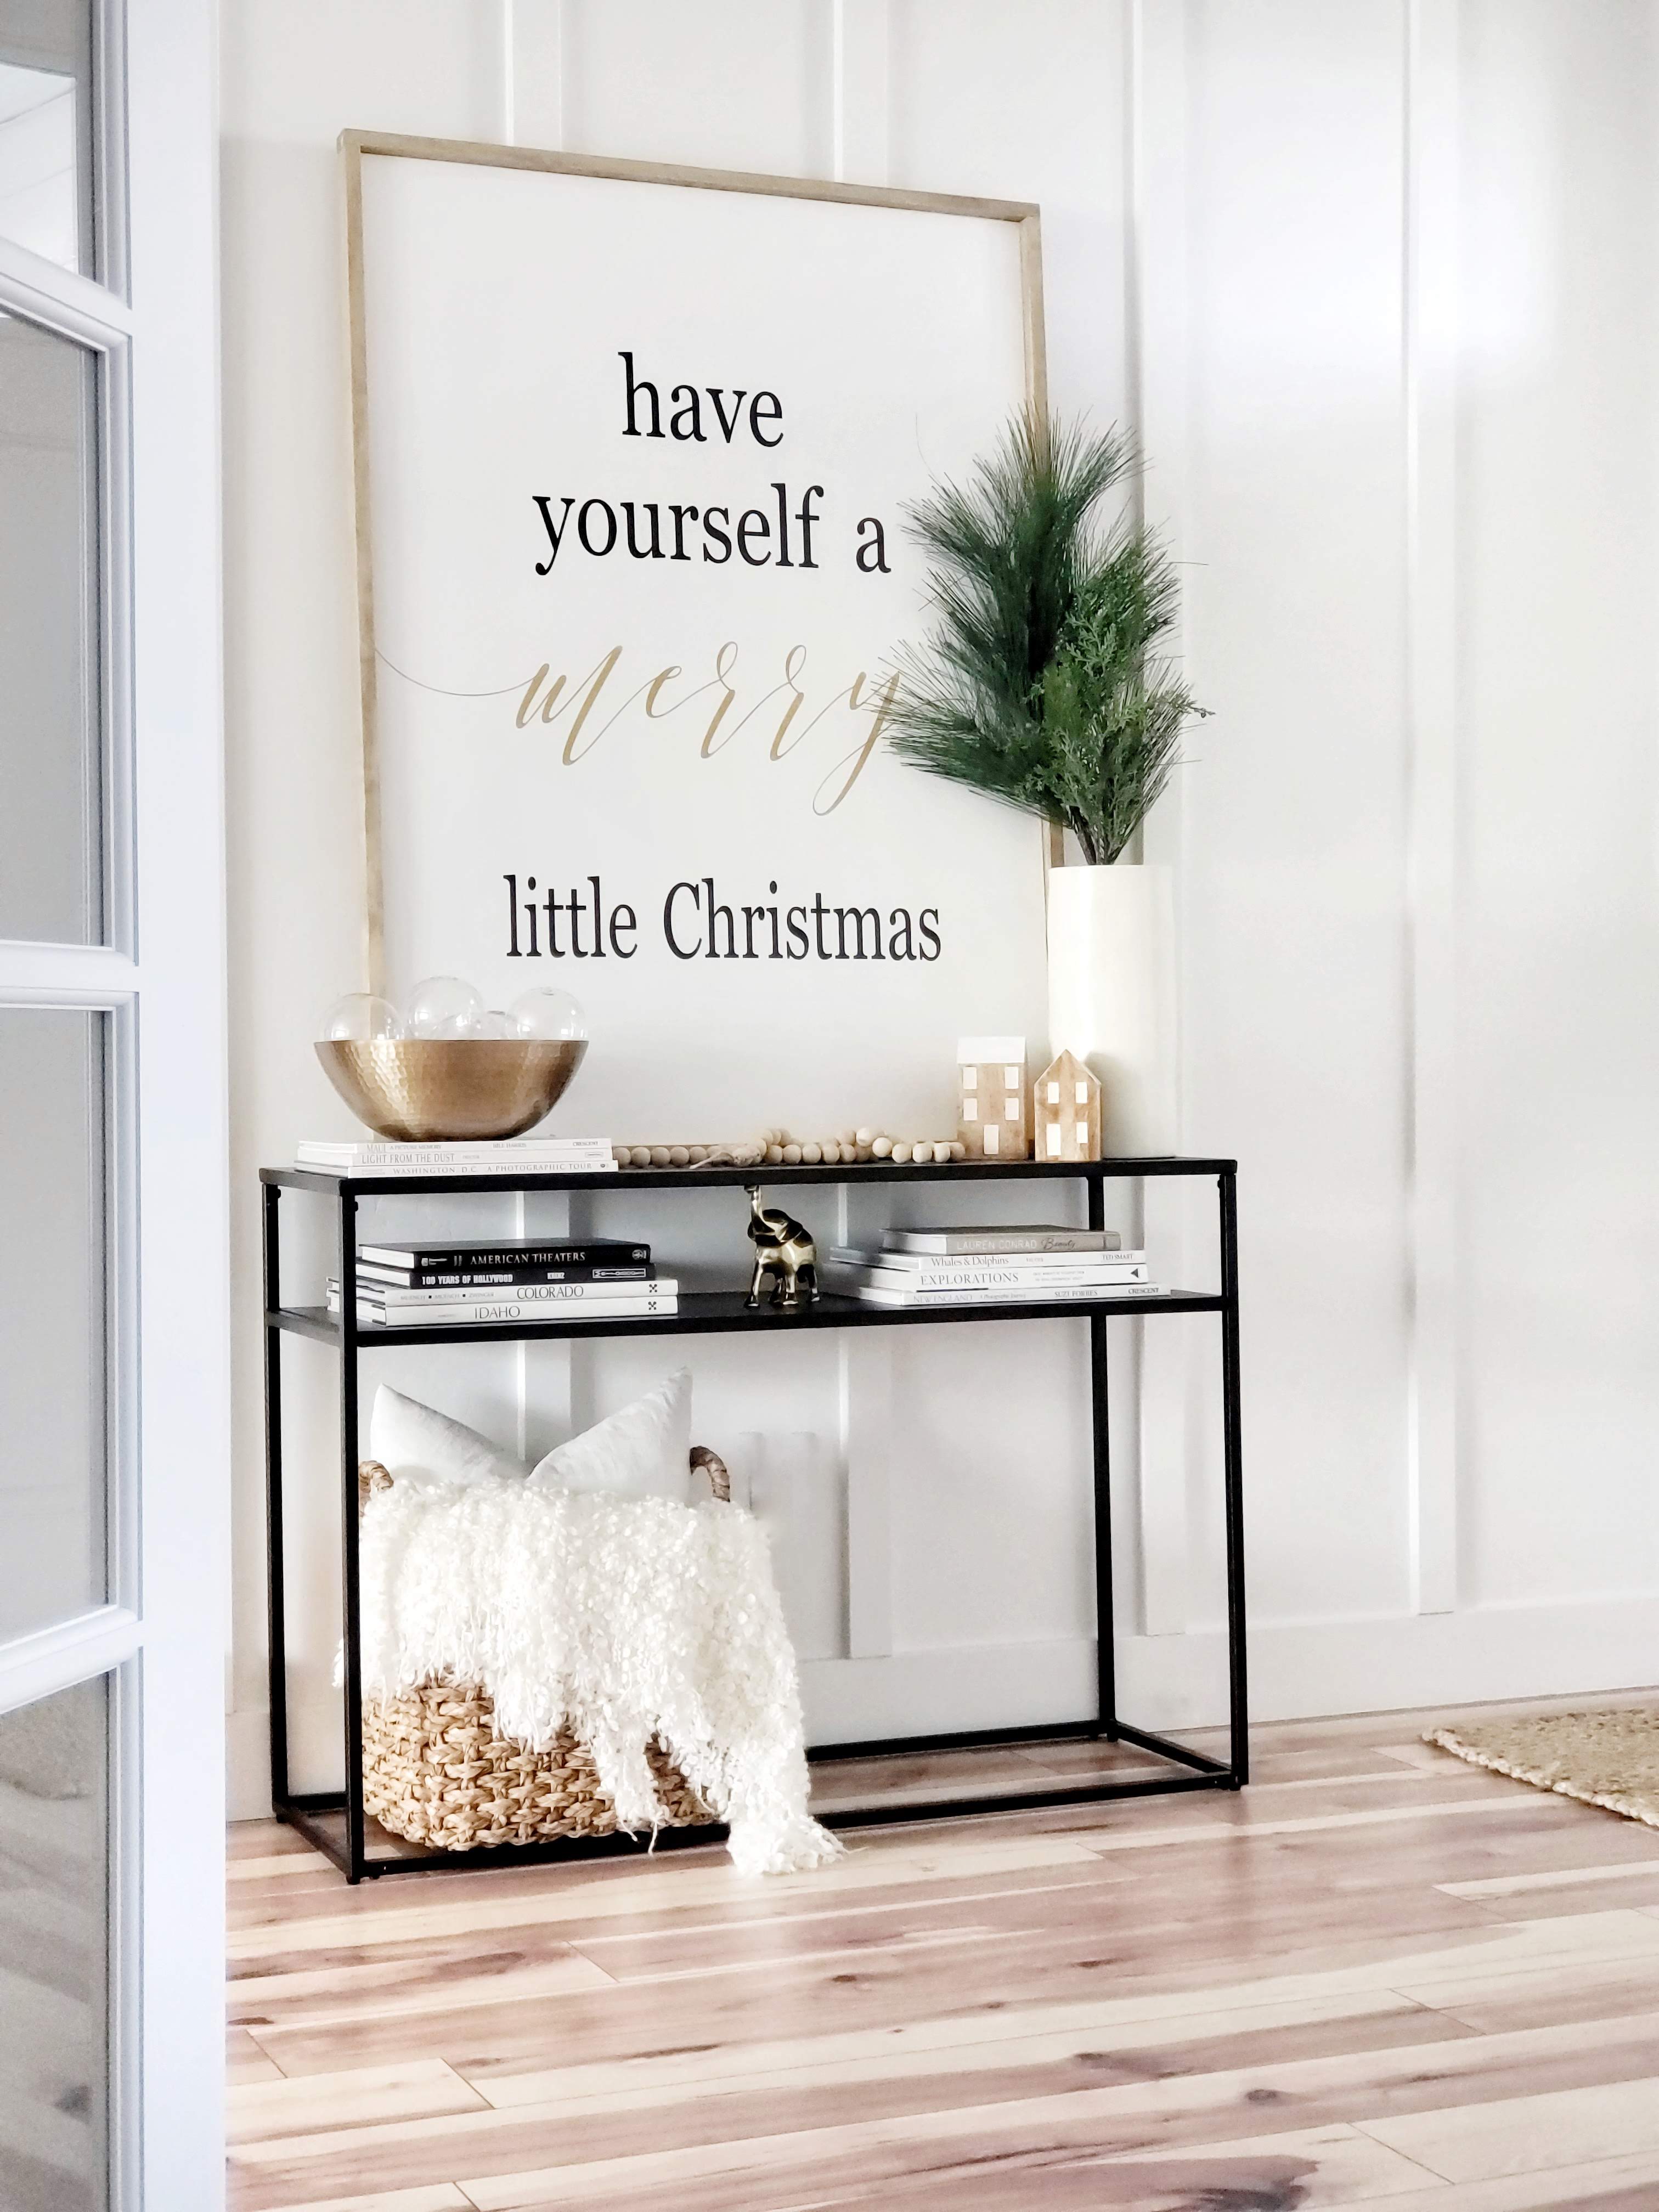
The entry was also simple with a bowl full of clear ornaments and some greenery. I snagged the $5 houses at Target. The white and wood were just what this little spot needed. I also got the most amazing wood sign from Craft Me Up Decor. This sign is such a statement. I was beyond impressed with the quality. You can customize size, frame color, paint color, and choose from tons of designs. I really just love everything about it! Be sure to go check out Jaesie’s cute little shop.

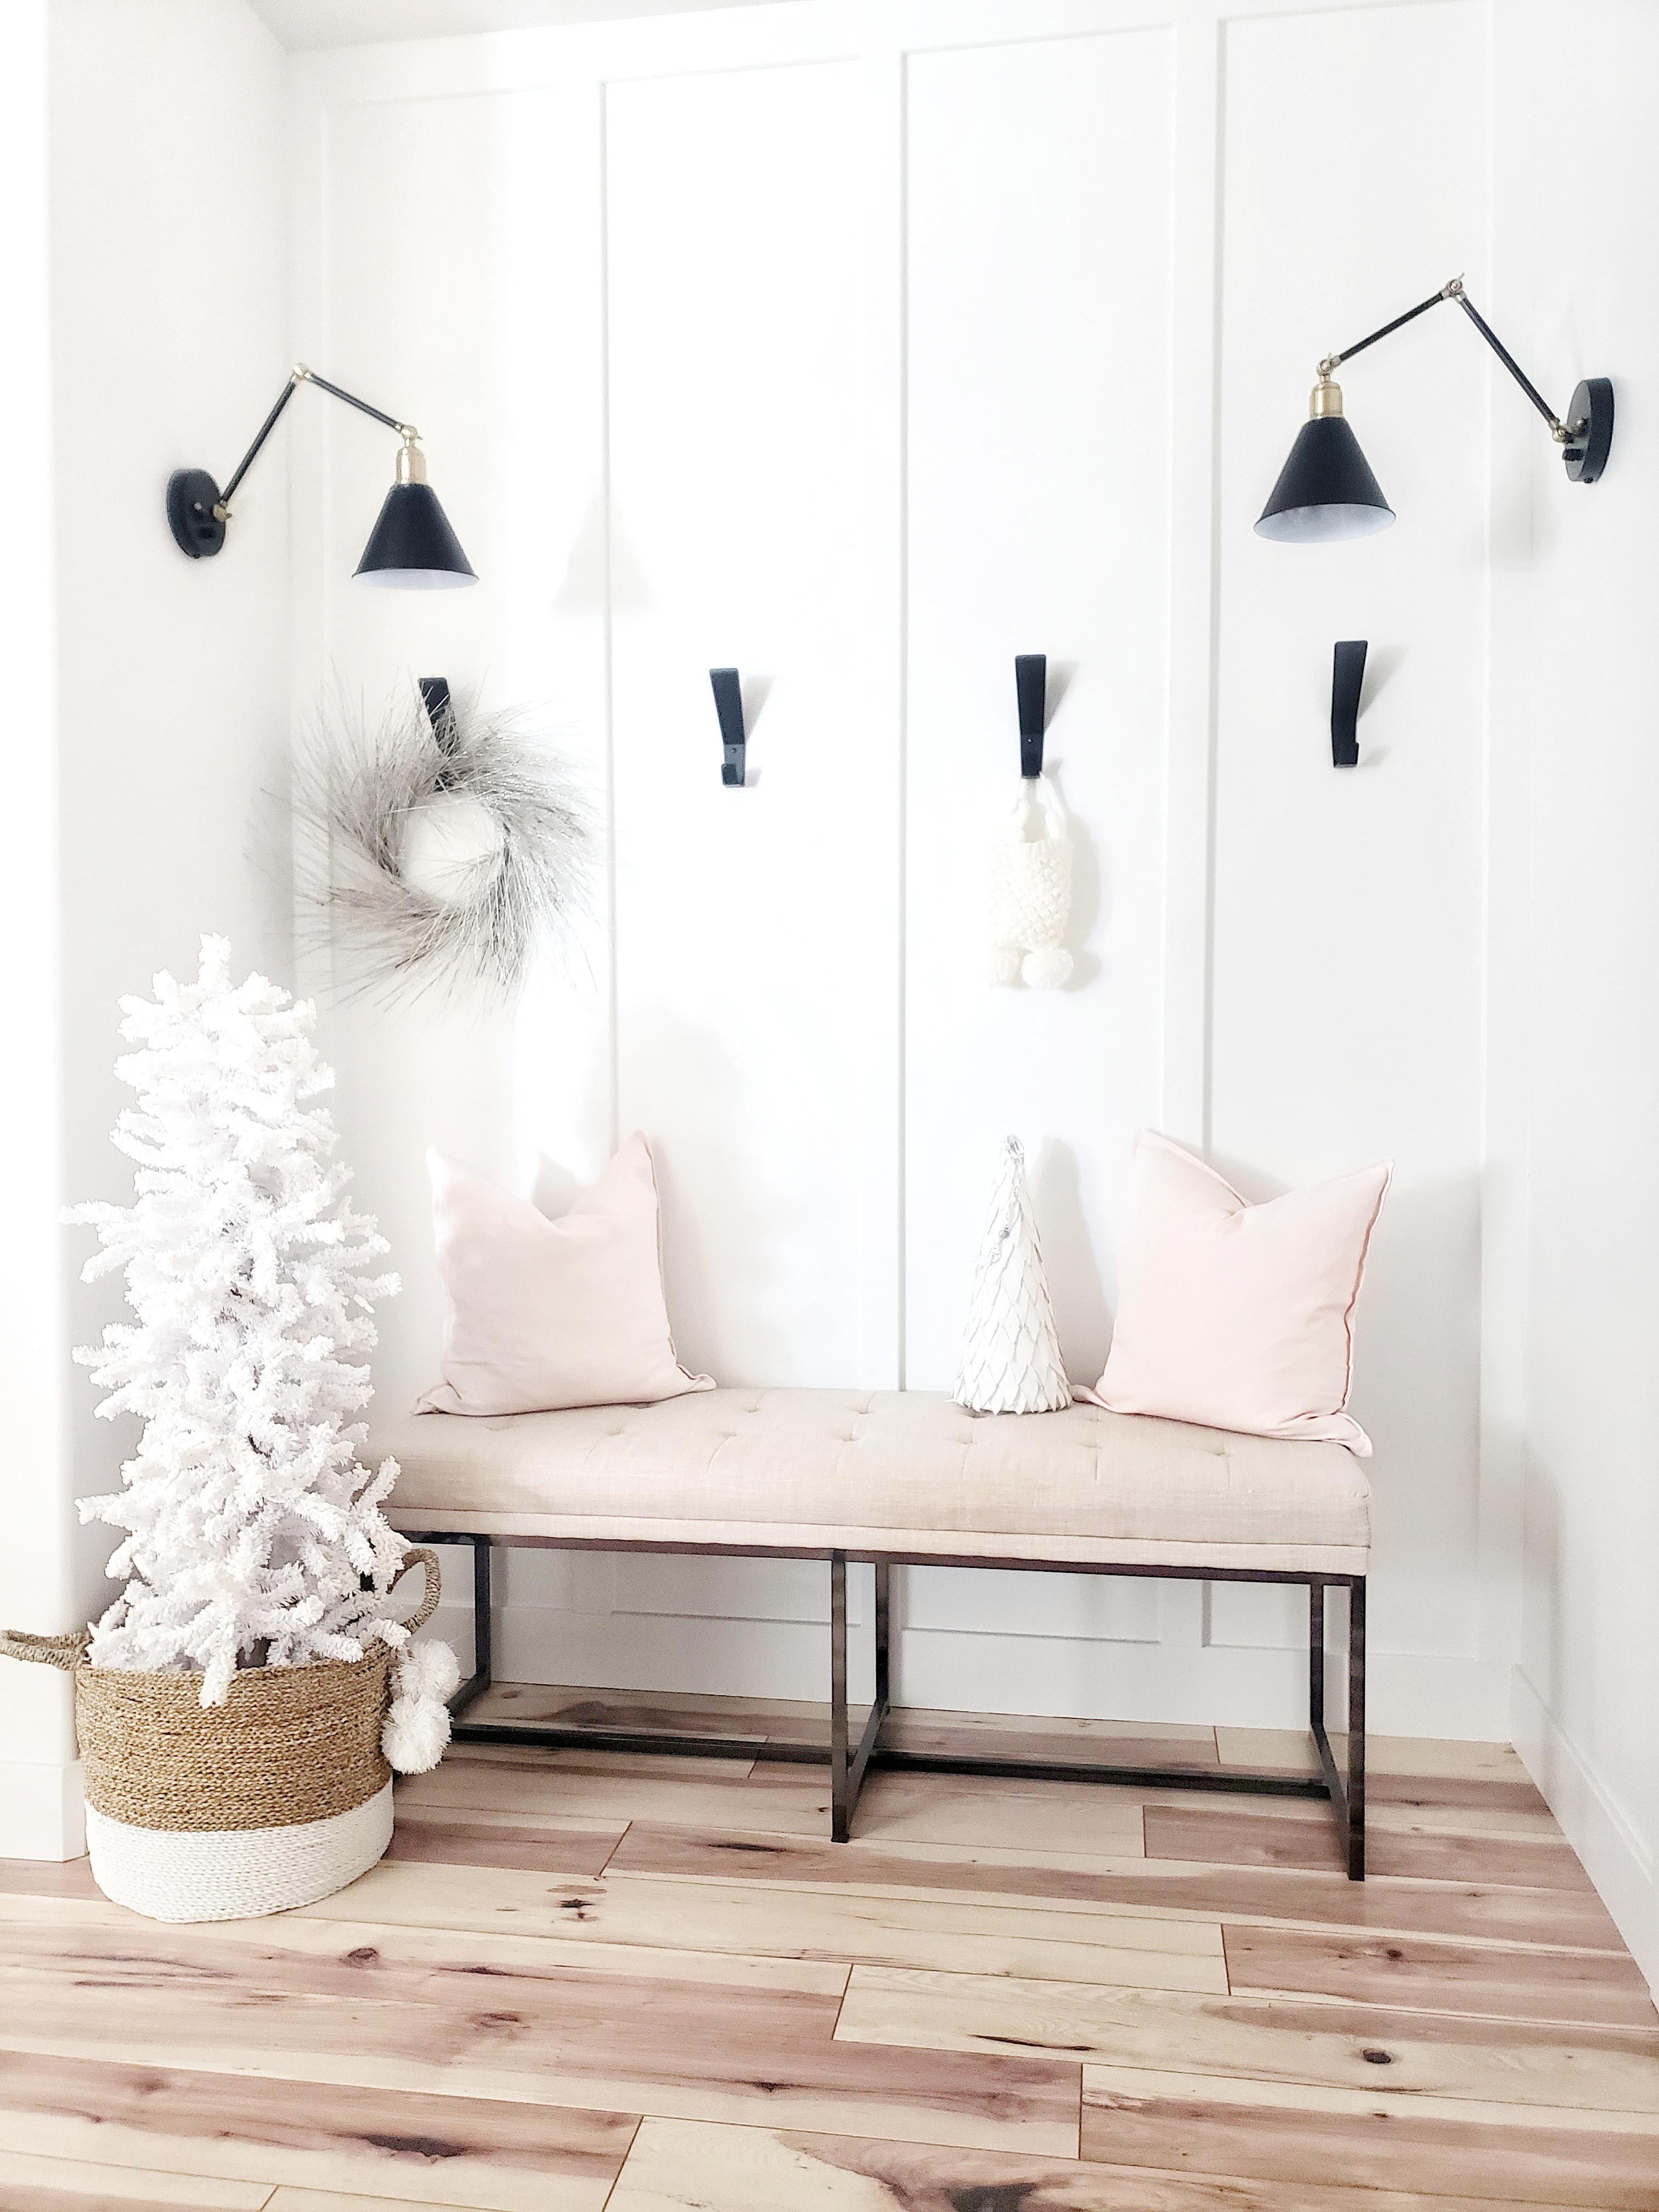
The mudroom is the only spot I kept some pink. The pink pillows from fall stayed while I added a simple white tree. I opted to leave it undecorated and just enjoy the simplicity. The fun wreath and small tree on the bench were some of the only glitter pieces I used this year. I limited the sparkle mess to the mudroom. 🙂

I hope you enjoyed seeing what Christmas looks like around here. It was actually a really simple year. I feel like over half of my decorations are still in boxes in the garage. It really doesn’t take much to get in the spirit of things for Christmas. Be sure to go see more of the gorgeous home tours below.

Tour of Homes for Christmas

Delightfully Noted

A House With Books

Lemons to Lovelys

JorDecor

White Lane Decor

Meaningful Spaces

The Porchlight Cottage

Christmas Houses (similar)

Christ Picture

Clear Ornaments

Tree

Tree collar (similar) 

Decorating a Christmas Tree in 5 Steps

If you caught my segment on The Place yesterday, you may already know these tips for Christmas tree decorating. I am just going to recap those ideas. Decorating a Christmas tree can be overwhelming and daunting to think about. With so many holidays in a row, it can get exhausting trying to switch out all the decor. I wanted to share my five easy steps to decorating a Christmas tree.

Step 1- First, I always start to fluffing out the tree and branches. It is usually out of shape from being in a box or storage. I like to start from the bottom and work my way up all around the tree. I extend the branches out arrange them to fill as much space a possible.

Before the extra strands of lights, I added.

Designer Tip: If your tree is very sparse after fluffing, you can add in extra pieces of garland or greenery that match your tree in empty areas. This gives a false allusion of fullness to your tree and will make it seem like your tree came that way. You can also find a lot of really inexpensive Christmas tree options that look high-end at Wal-Mart.

Great option at Wal-Mart

Step 2- Next, I take any garland or ribbon the I want to drape around the tree. This is assuming you have a pre-lit tree. If not, you will want to wrap your lights before you do this step. I like things as easy as possible. So, I always choose a pre-lit tree. Also, if our tree is in a corner or area where only part of the tree is visible, only decorate the visible parts. The wall doesn’t care if the back side of your tree is decorated. 🙂 It will save time and ornaments. Even if the back of your tree faces a window, you can go “light” on the decor for that window side. People driving by will not be able to tell that you didn’t put as much decor on that side. They probably will not be able to see much of anything except a pretty tree all lit up.

Designer Tip: Wrap a few extra strands of lights around your pre-lit tree. The extra lights on the tree make it glow more and seem more vibrant.

After the extra strands of lights.

Step 3- Now, I take my fillers and spread them through the tree. I use decorated sprigs, flowers, and twigs. I sometimes bend the end or just stick it straight into the tree. Super easy and it can fill the empty spaces on a sparse tree making it look fuller.

Designer Tip: Cut pieces of ribbon layered together and pinch the center into emptier spots with the long ends draping down. It will look like the end of a bow coming out of that spot without making an actual bow.

Step 4- Then I start putting on my Christmas ornaments. I like to start with my largest ones first. I spread them out to my liking. Then I fill in with my medium and small ornaments. The tree should start looking pretty good by this point.

Designer Tip: Add a new color to your tree for a whole new look. Choose a color of ornaments that coordinate with what you already have. You don’t have to buy everything new by just adding a new accent color that matches your old decor. A whole new look for just a new pop of a few different colored ornaments.

Step 5- The final touch is adding a topper and tree skirt. The topper can be a bow, star, decorative sprigs, angel wings, or anything you want. Don’t be afraid to think outside the box when it comes to this. The same goes for your tree skirt. If you can’t find a traditional tree skirt you like, use a blanket, scarf, tablecloth, or fabric. Anything can be draped around the base to give it the finished look. You can even use a large basket or galvanized bucket for your base. 

Designer Tip- Leave up a tree for Valentines and just take down the Christmas ornaments. Add some valentines garland and decor to the tree instead. An easy decoration that can transition to a new holiday. You could even put up your tree earlier and add Halloween or Fall decor before you put on the Christmas decorations.

That is all! Five easy steps and you are done. Now got get started on that tree and have fun. Keep it simple and enjoy!