Stay Connected With The Latest Posts

  • This field is for validation purposes and should be left unchanged.

Stay Connected With The Latest Posts

The Perfect Rug With FLOR

The following post contains affiliate and sponsored links with FLOR. Read my full disclosure here.

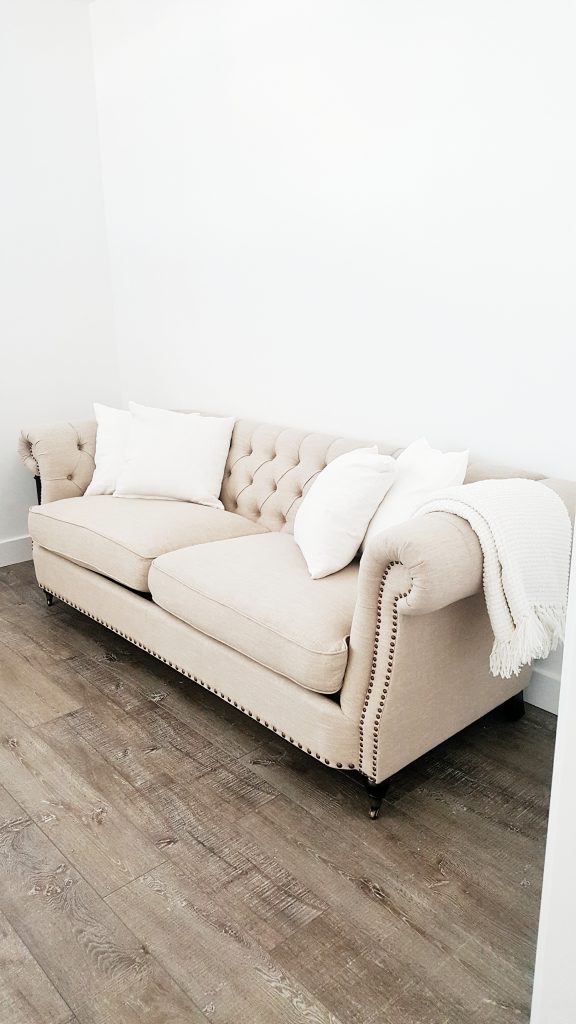
I have mentioned a few times about trying to find a rug for my front living room. It is the room right off the entry that has our piano and a sitting area. I have mostly jute rugs through the house. I love jute because it is neutral and easy to hide stains with kids.  I did not want to put jute in this front room because too much of good of thing is not good. It would be a little overkill. Also, this room is a little more formal. It needed a rug that was durable, different, and just the right amount of elegant. I was so excited when FLOR carpet tiles reached out to me. I knew exactly where I needed to put them (my front room).

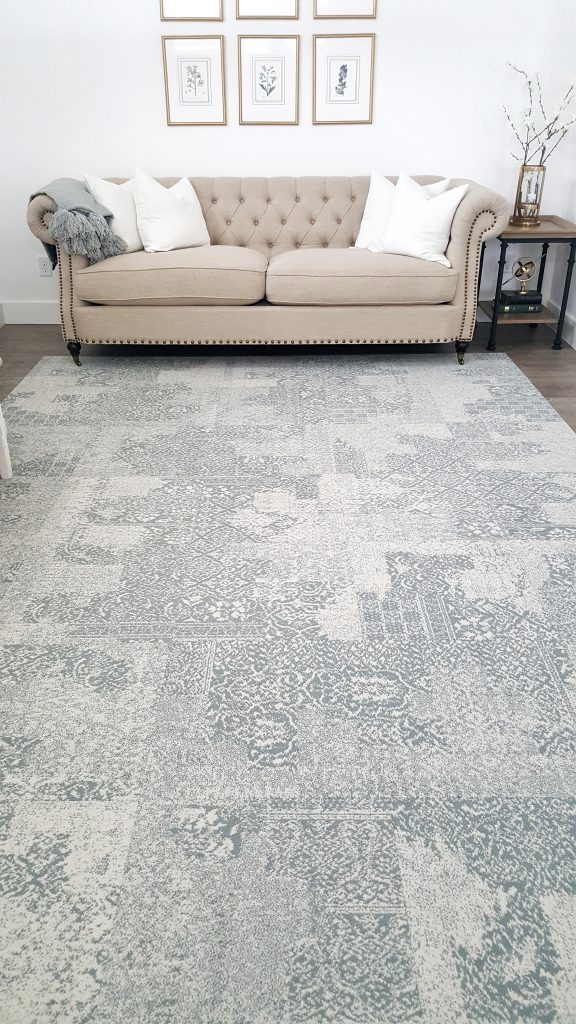
I know what your thinking…..carpet tiles? Really? I was little hesitant at first too. Don’t worry, they are amazing. These eco-friendly and innovative carpet squares fit together to create beautiful rugs of any size. I needed a 10′ by 12′ for my front room and immediately started browsing the FLOR selections. They even have a cool custom design studio on their website. You can play with all the different options to build your own custom look. As I was browsing, I came across the Kensington Gardens rug system. I immediately fell in love with the vintage look of these carpet tiles. I knew this was the style I wanted for my front room.

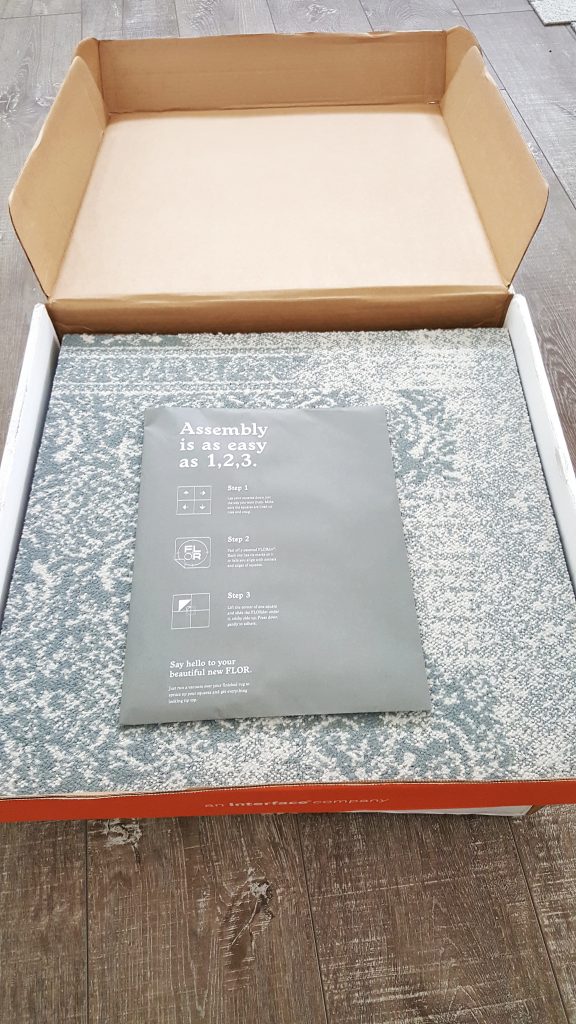
I ended up ordering Kensington Blend in Flannel Blue. I stepped out of my neutral comfort zone with this blue rug. Let me tell you, it pays to branch out. The color was exactly like the picture online. The softest blue that is exactly what I was hoping for. The carpet squares came directly to my front door. The boxes were marked telling me which one to open first. The directions were so simple. Mr. Whitelane and I had the rug put together in no time.

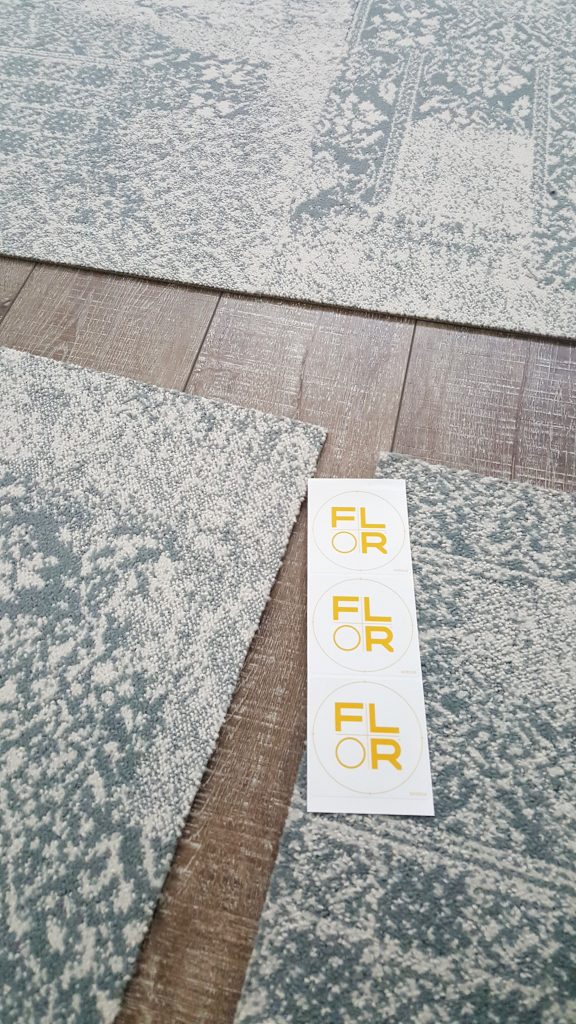
A few super cool things about these carpet tiles: 1. You can put them together any way you want. Once we had them all laid out, we switched a few around to fit the flow/pattern better. 2. I ordered a 10′ by 12′ (42 tiles). However, when we got it put together, we actually ended up liking an 8′ 5″ by 13′ 5″ rug for this room. Because of the versatility of the squares, we were able to customize the rug to any size we wanted. 3. When my kids or pets get any part of the rug dirty, I can remove that one square to clean the dirt. I can wash the durable carpet tiles in my own sink.

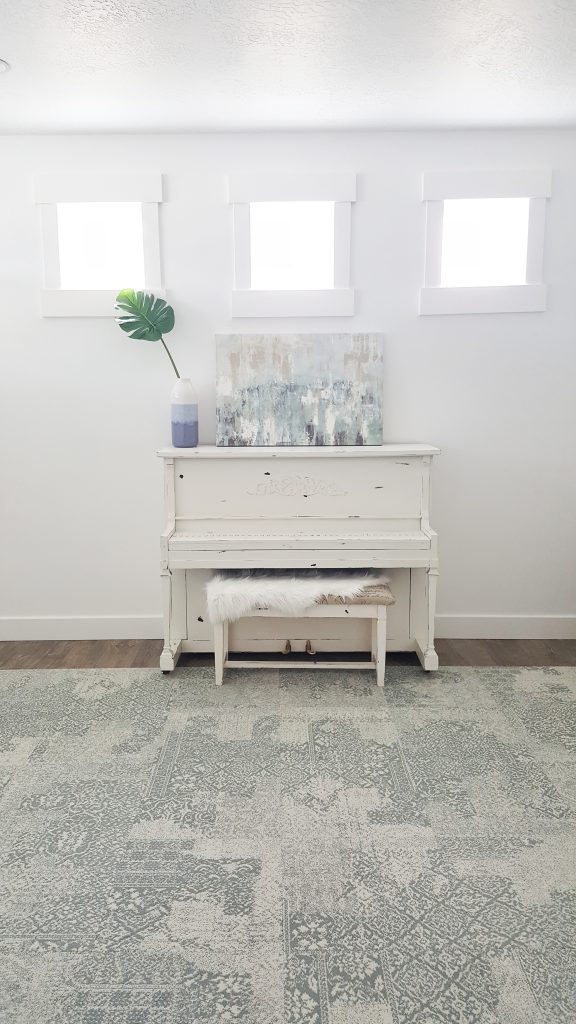
I was worried that my rug was going to look like a bunch of individual squares next to each other. As you can see, it looks just like a normal rug. I could not be happier with how these carpet tiles turned out. I love the color, the look, and the durability. The perfect rug for my front living room.


Botanical Print Gallery

The following post contains affiliate links. Read my full disclosure here.

Once upon a time, I had a lot of plans for a new house. Then we moved into the house. The projects were everywhere. It took a lot longer to get them done than I thought. For instance, this gallery wall. I knew I wanted to hang a grouping of botanical prints in my front living room. However, It took me forever to find the right frames and actually hang them.

My front room looked like a blank canvas for a long time. I didn’t mind because I like clean and simple. Over time, I knew I had to get something on the walls. When I was working on my son’s Star Wars room, I came across Home James Art. She had the perfect patent prints for his bedroom. When I came to pick them up, Jo also has some lovely botanical prints. I knew they were perfect for my front room.

I now had the perfect prints and no frames. I started to look everywhere for something brass or gold. I needed six of the frames. Everything was getting really pricey and over budget. I then decided I would have to find something in any color and just spray paint them. IKEA always has affordable frames. I wanted the frame to be thinner and dainty for an elegant look. I found these in black and knew I could make them work. The best part of all, they were only $4.99 each. Yes, those are pumpkins on the table all the way back from the fall (told you this took forever to complete). Those are also my super trendy mom leopard house shoes. Be jealous people, be very jealous of this mom uniform.

When I got them home, I went straight to priming the frames with my KILZ primer. You can see my full spray painting tutorial here. I made sure to let them dry for a couple hours. Then, I used my favorite brass spray paint. I have used this color all over my house. It really is the perfect brassy gold color. 

I put my new botanical prints back in the frames, once they had dried. Then, I sat them on the couch, right below where they would be hung. That is where they sat for months, months people! I don’t know why I never got around to hanging them sooner. They were done enough and I had a million other things to do, apparently. 

Then my son got his tonsils out. I was home playing nurse for weeks. In between taking care of him, I was finally able to get these hung. I guess the trick is being stuck inside, for days at a time, to get anything done around here. I really like how they look, especially for the price. No more blank wall in this room. However, the other side of this room still needs chairs and a rug. I hope to show you more at the Joyful Spring Home Tour in March!