Stay Connected With The Latest Posts

  • This field is for validation purposes and should be left unchanged.

Stay Connected With The Latest Posts

Board and Batten Dining Room

Kate

Hi there, I’m Kate. Welcome to White Lane Decor. Thanks for stopping by. I love neutral, bright, and airy spaces. I’m always looking for new ways to turn our house into a home. Have a look around and find inspiration for your next project.

Disclosure

Some of my blog posts, ads, and banners contain "affiliate links." This means if you click on the link and purchase the item, I will receive an affiliate compensation. However, I only recommend products or services I use personally and truly feel you will enjoy too! I am disclosing this in accordance with the Federal Trade Commission's 16 CFR, Part 255: "Guides Concerning the Use of Endorsements and Testimonials in Advertising.” White Lane Decor is a participant in the Amazon Services LLC Associates Program, an affiliate advertising program designed to provide a means for sites to earn advertising fees by advertising and linking to amazon.com.

Shop My Home

Board and Batten Dining Room

Oh Hey! It’s been a few days but I’m back. First, my son got strep throat on Sunday and then I got strep throat on Wednesday ( haven’t been that so sick in years). Thursday was Christmas Eve and then Christmas so it has been a little cray cray around here.

Board and batten! My favorite stuff to add character to a house! I just love all the trim, white, and depth that it gives to a room. In the townhouse, we were able to put some in the entry, half bath, and dining. In our new house, I want it in a lot more places! Hopefully, my little tutorial will help you decide to go get some board and batten going in your house too

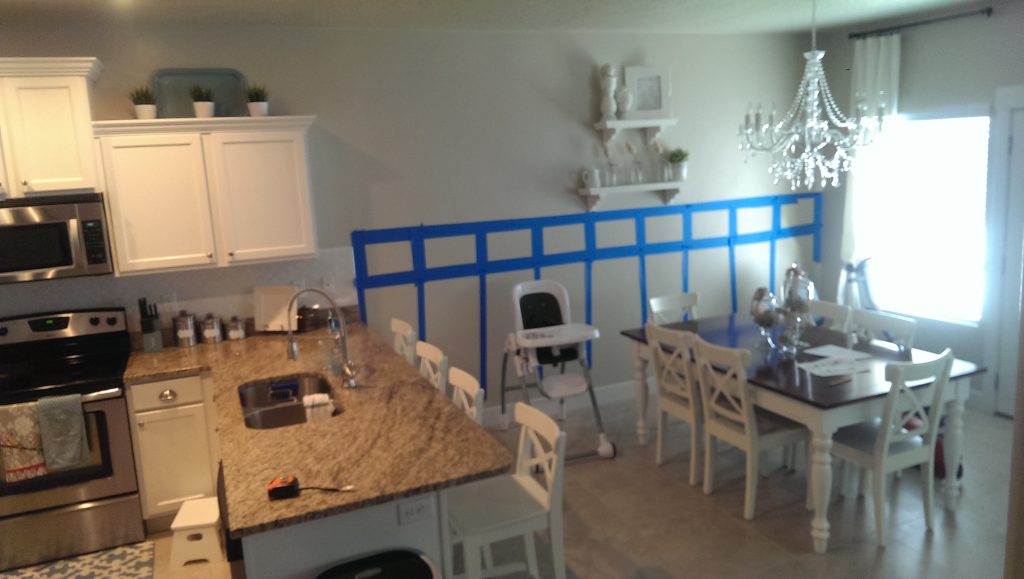
First off, I used painters tape to give me a visual of how it would look. I use painters tape to do this with almost all my projects. I measured out the length of the wall to figure out how far apart each board should be. My wall length with my boards meant that one space would be a little smaller than the others. Two inches isn’t a big enough space for the common eye to notice the difference so it would be fine. I also had my backsplash that would run right into the board and batten. At first, I thought the board and batten should be higher. I know it’s dumb because then you have the end of your backsplash and a step up where the board and batten starts. I don’t know why I thought this ( this is why painters tape is so handy to visualize). Mr. Whitelane was adamant that the height of the board and batten be flush with the height of the backsplash. After taping it all off I realized he was right! Now I knew the height of where I wanted the boards and I was ready to go buy them at Home Depot.imag1161

We used primed MDF because it makes painting so much easier. My baseboard was 5.5” tall/wide. I chose my vertical boards to be 3.5” wide. My top horizontal board, I wanted to be bigger but not as big as the base board so we chose a 4.5” for the top. The regular simple board and batten is great. So, that’s what we did in the half bathroom. For the dining room (and entry) I wanted a little more interest so I went with a double row. After all the boards were cut to the lengths I measured on the wall it was time to take them all home and get started. 

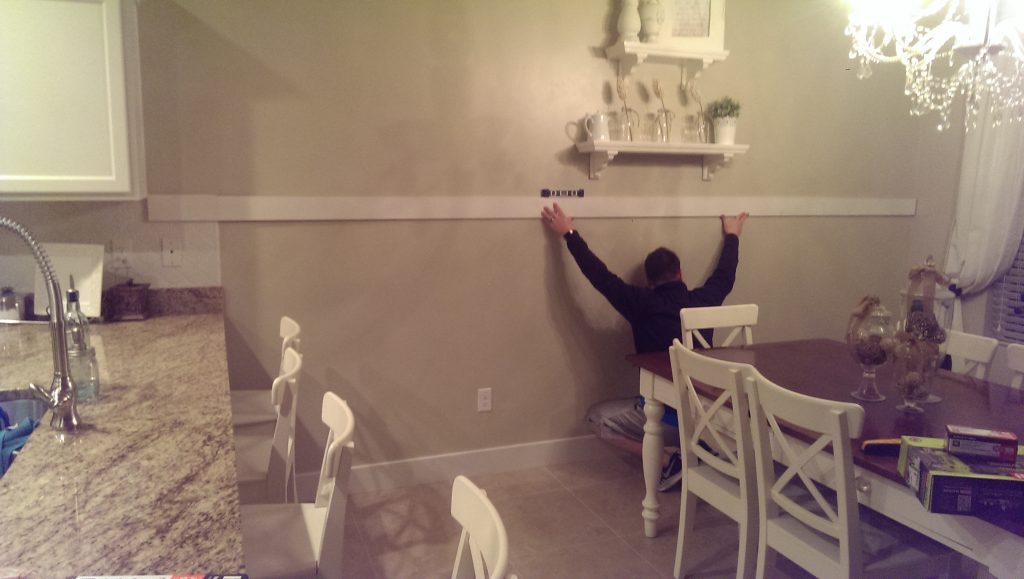
We nailed up all the vertical boards about 20” apart. I also put a little bit of liquid nail on the back of each board before we nailed it up. Using a cordless pneumatic nail gun was so amazing for this project. No compressor or cords was just awesome! Ryobi Air Strike really made this easy. After we got all the vertical boards up, it was time for the top horizontal piece. You can see Mr. Whitelane holding up the long top piece before we cut it to length. This top piece we cut at home with a jigsaw to make sure we got it right. We also marked where all the studs were with a stud finder to make sure we were getting the nails in a stud where possible. Between the liquid nails and the nail gun, these boards aren’t going anywhere!

Now it was time for the cute second row of boards. These are super easy and just fit right between the vertical and top pieces that are already in place (if measured and cut right). We chose to have our board about 14” down from the top horizontal board. It creates a little square at the top and I really love that!

After all the boards were nailed into place we had to fill them with wood fill or putty. After that dried we sanded smooth in the areas that were filled. Ok, I seriously hated caulking everything. It was the worst. It took forever and was messy. UNTIL….one day Mr.Whitelane said he had an idea about something that would make it easier. He went to WAL-Mart and came back with the tool that changed my life! I’m not joking! It’s called a caulk finishing set or caulk remover. It is this little arrow looking tool with a handle that will work wonders.(Here is a picture of the one I used I found on Lowes website) It saved me so much time, not to mention gave the smoothest caulk lines I have ever seen! So easy ( I used this tool to caulk the trim in an entire basement with ease). After the caulk and spackle was all dry I used a foam roller and got to painting three coats of white. I probably could have stopped at two but I like to be sure and drag things out 😉 .
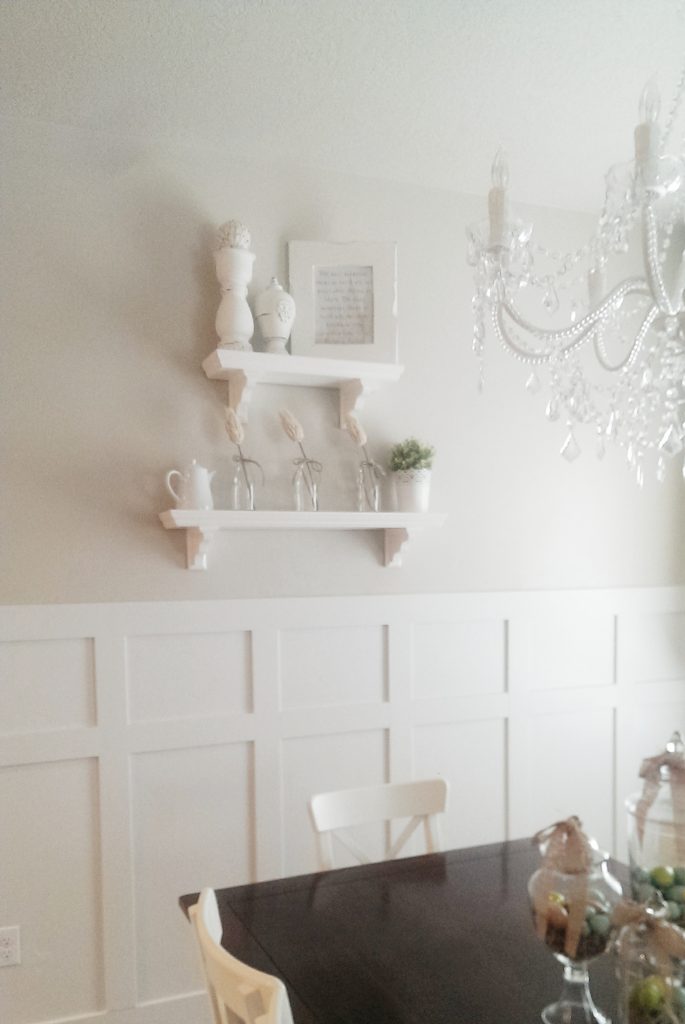
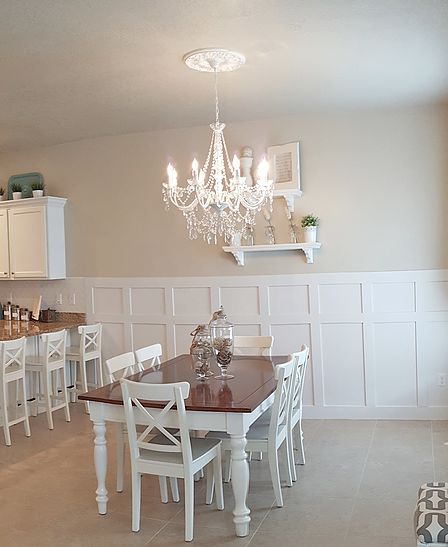
Boom, all done. I can’t wait to add tons more of this board and batten at our new house! P.S. yes those are my toddler’s clothes on the table….we keep it real around here. I’m a mom and there is nothing more important to me than my family. I love the little reminders of my sweet kids all over the house and sometimes they make it into my imperfectly perfect photos 🙂 .

double-duty-dining-table

Kate

Hi there, I’m Kate. Welcome to White Lane Decor. Thanks for stopping by. I love neutral, bright, and airy spaces. I’m always looking for new ways to turn our house into a home. Have a look around and find inspiration for your next project.

Disclosure

Some of my blog posts, ads, and banners contain "affiliate links." This means if you click on the link and purchase the item, I will receive an affiliate compensation. However, I only recommend products or services I use personally and truly feel you will enjoy too! I am disclosing this in accordance with the Federal Trade Commission's 16 CFR, Part 255: "Guides Concerning the Use of Endorsements and Testimonials in Advertising.” White Lane Decor is a participant in the Amazon Services LLC Associates Program, an affiliate advertising program designed to provide a means for sites to earn advertising fees by advertising and linking to amazon.com.

Shop My Home

Spray Painted Christmas Ornaments

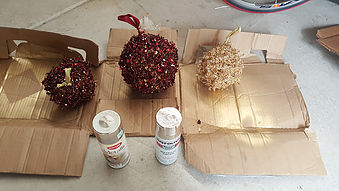
What do you do when all your Christmas ornaments are red and you want them to be gold? SPRAY PAINT! Don’t go buying all new ornaments just because you want to change your decorating scheme/color for the holidays. I’m telling you, just about anything can be spray painted. I have a trusted brand of spray paint and primer that I use for all my projects. Not all spray paints are created equal. Don’t buy a cheap off brands because you will regret it, and it won’t get the job done right. I always use Krylon brand spray paint and I have found it is almost always the cheapest at Wal-Mart. For my spray primer, I only use KILZ. (I will be posting a full spray paint tutorial and video soon).

tree-2
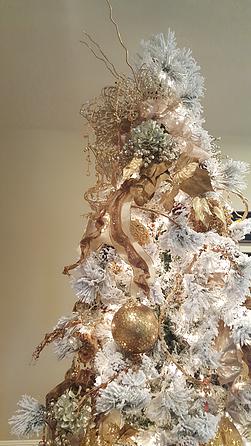
These ornaments were red and some were brown. They are all now beautifully gold on this amazing flocked tree. Don’t they look dreamy? Ok so start by laying down some cardboard or plastic so you don’t get paint on your garage floor. Next, grab a can of Krylon metallic gold spray paint. Use a back and forth motion. Don’t just spray all over the place like its hair spray (Im making a youtube tutorial on my technique and I will post soon). You may want to invest in a spray paint can grip handle. Its only a few dollars and it fits right on top of your spray paint nozzle. It will save your finger from dying while pushing the nozzle the whole time. WORTH IT! These ornaments weren’t even primed first. Just use nice even strokes back and forth with the gold spray paint. Let the area you paint on the ornament dry. Once it is dry then roll it over to the side that didn’t get paint and cover it with spray paint. Once it is nice and dry (12 to 24 hours) , you can place them on your tree.  And just like that, you have brand new color scheme for Christmas while only buying some spray paint. Also if you want to add some glitter while the spray paint is wet (it will dry and the glitter will stick) on the ornament; it will look great too!

tree-3
So there are these sticks that are used for decorating trees sold by a lot of stores. They just poke out and add interest to the tree. A lot of places sell them for $8-$12 a stick or branch. Well,people, let me tell you, that is way too much. Go to Wal-Mart and buy these unfinished ones( around $4) and SPRAY PAINT them. Just use the same method as the ornaments. If you have a place where you can stick them in some dirt to spray paint; it makes it a lot easier. As long as you don’t mind gold dirt :). They look just as good as the expensive store bought ones at half the price.

tree-7  tree-6
Now, what are you waiting for? Your Christmas tree decor can be any color you want. Pick out your spray paint color and go to town!

Kate

Hi there, I’m Kate. Welcome to White Lane Decor. Thanks for stopping by. I love neutral, bright, and airy spaces. I’m always looking for new ways to turn our house into a home. Have a look around and find inspiration for your next project.

Disclosure

Some of my blog posts, ads, and banners contain "affiliate links." This means if you click on the link and purchase the item, I will receive an affiliate compensation. However, I only recommend products or services I use personally and truly feel you will enjoy too! I am disclosing this in accordance with the Federal Trade Commission's 16 CFR, Part 255: "Guides Concerning the Use of Endorsements and Testimonials in Advertising.” White Lane Decor is a participant in the Amazon Services LLC Associates Program, an affiliate advertising program designed to provide a means for sites to earn advertising fees by advertising and linking to amazon.com.

Shop My Home

Entry Bench Makeover

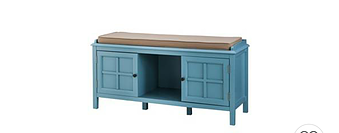
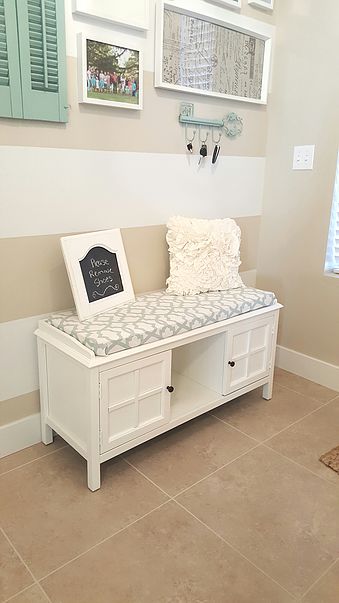
One time I bought a bench. A brand new perfectly good bench. It was great! There were doors to hide shoes, a cushion for sitting, and it fit perfect in my entry. Until one day, I decided I should have bought the white bench. Go figure? I should have just gone with my favorite color to start with but noooooo. I wanted to mix it up. That only led to me spray painting a perfectly good bench. Well once it was spray painted I had to change the fabric on the cushion too.

bench

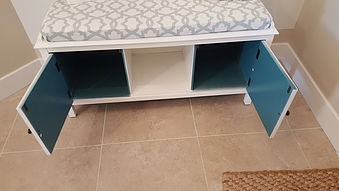
This is what happens when you first move into a house and try to decorate all at once. (In the next house I will be taking my time.) Target had this cute turquoise bench that I just HAD to have. It was a great accent to my entry. But my decorating was all over the place when we first moved into our townhouse. After a few months, I realized the color just wasn’t working for me anymore. I went to my trusty spray paint Krylon white glossy. I was lazy and didn’t paint the inside as you can see. But I actually like having the pop of turquoise when you open the doors.

bench-3
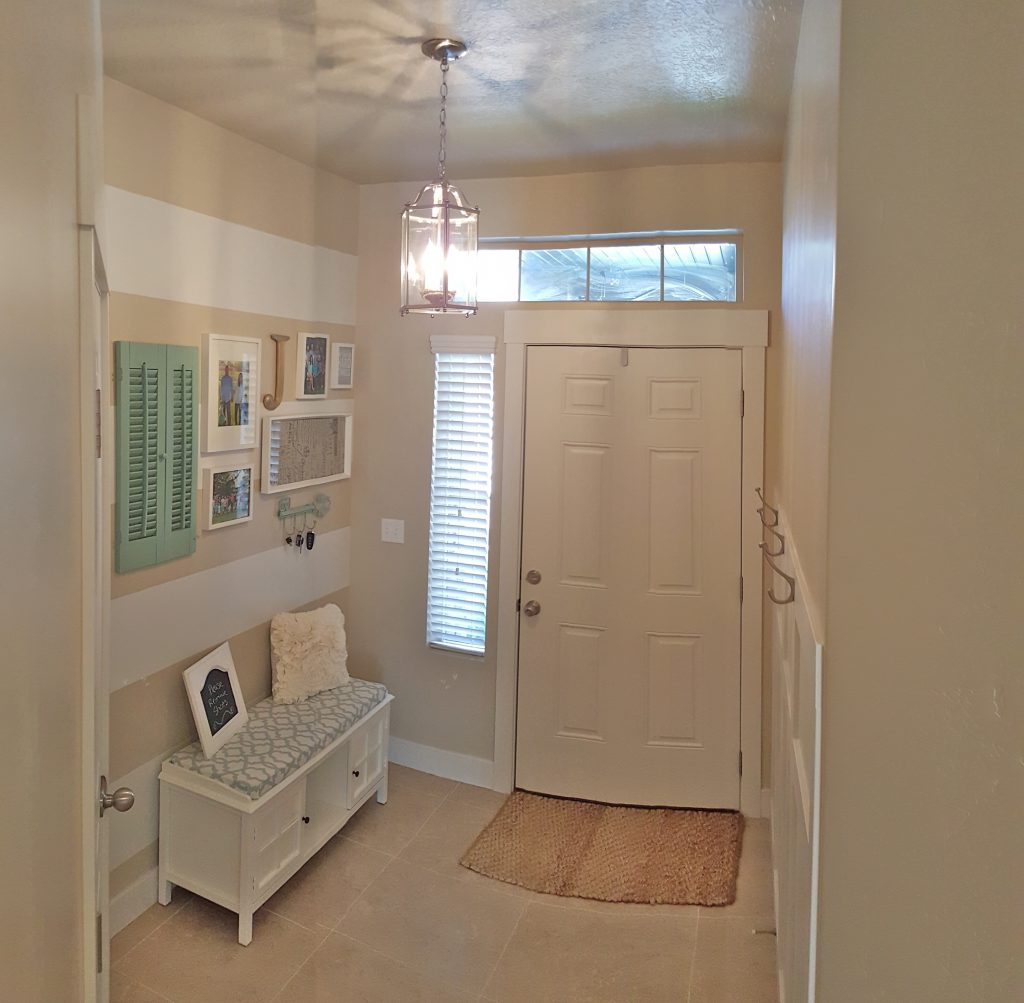
I used the same fabric I got from fabric.com for my sewing machine cover, to recover the bench cushion. I’ll let you in on a secret. I really just safety pinned the fabric to the cushion because I didn’t want to take the time to sew one. It worked and makes it easy to change it up.  The cute creamy white ruffle pillow is from Target too.

Ok, there is this place by where I live called Habitat For Humanity Restore.  It’s like a second-hand store for unwanted house stuff. I’m talking, old door knobs, doors, vanities, sinks, paint, anything you would find in a house or on it. I picked up this old cabinet door because I like the shape and lines it had. I gave it a quick coat of white spray paint. Then I used chalkboard paint on the inner panel. It turned into the perfect “no shoes” sign for my little bench. Come back for tomorrow post all about spray paint and Christmas ornaments. I promise they really do go well together :).

bench-last
First picture from Target.com

Kate

Hi there, I’m Kate. Welcome to White Lane Decor. Thanks for stopping by. I love neutral, bright, and airy spaces. I’m always looking for new ways to turn our house into a home. Have a look around and find inspiration for your next project.

Disclosure

Some of my blog posts, ads, and banners contain "affiliate links." This means if you click on the link and purchase the item, I will receive an affiliate compensation. However, I only recommend products or services I use personally and truly feel you will enjoy too! I am disclosing this in accordance with the Federal Trade Commission's 16 CFR, Part 255: "Guides Concerning the Use of Endorsements and Testimonials in Advertising.” White Lane Decor is a participant in the Amazon Services LLC Associates Program, an affiliate advertising program designed to provide a means for sites to earn advertising fees by advertising and linking to amazon.com.

Shop My Home

Design Center

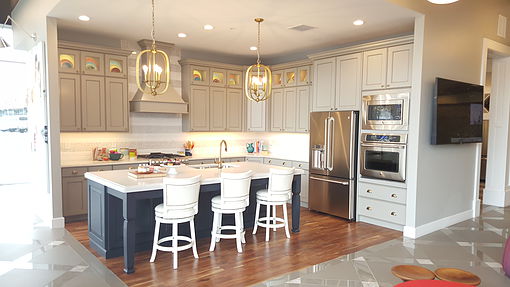
We did it! We finished our final design appointment for the new house (after signing our lives away and writing a big check). I’m so excited to keep moving forward and get closer to moving into our house. Usually, you only need two design appointments. We had four that lasted about four hours each. YIKES! But I guess it is not really a big surprise there; since I wanted to make sure everything was right and would look good. Spending that much time really wasn’t bad because Oakwood Homes design center is UHHHH-MAZING! haha. From the moment you walk in the front door you are greeted with a huge open space and on the left a dreamy kitchen with brassy gold accents. We actually are using the same cute egg knobs on our cabinets, in our house, but in brushed nickel.

2nd-oakwood

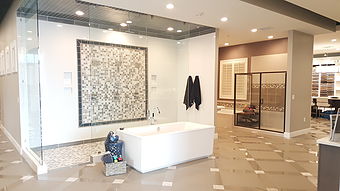
As you walk further in you see the amazing soaker tub and tiled shower. I mean, you kind of want to stop and take a bubble bath right in the middle of your appointment ;). It is fun to walk in the shower and bath displays so you can really get a feel for how big your space will be in your own house.4-oakwood

Take a look at this shower, most of all, the small marble hex floor. Just beautiful. Now I know a lot of people have marble floors and love them. However, I just have read so many horror stories about discoloration in a shower, because it is a natural stone. Over time where the water hits; changes can occur in color. It is very high maintenance to have marble and requires frequent sealing and care. I wanted marble so bad but I just didn’t want to always have to worry about maintenance. So I went with ceramic octagon and dot in the master floor and subway tile for the shower. Don’t worry, I still got a little bit of marble around my fireplace. I figured it would be the easiest place that won’t be high traffic or be walked on.5-oakwood

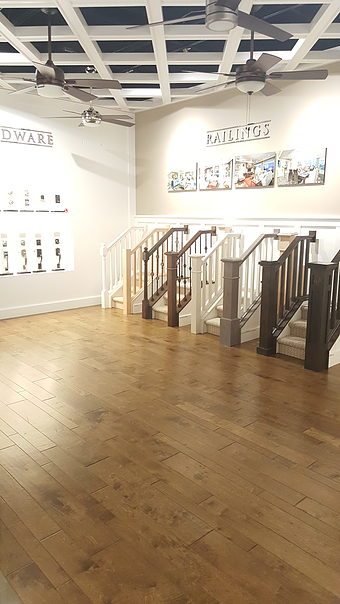
Check out all these railing options. Can you guess which one we went with? It is toward the end (right of picture). It will ,of course, be painted all white! The door and casing options were fun to browse too. Right next to the door options are all the door knobs. WOW…little overwhelming. Inside doors, outside doors, and all kinds of door knobs. We kept it simple with a round brushed nickel option here.

6-oakwood

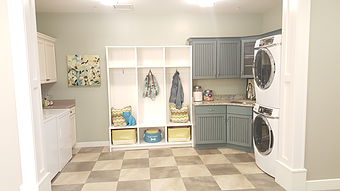
Ok. I am sooooo excited for this built in locker bench in the mudroom. I know I could have built this after but honestly there are so many other projects we have to do after. I figured this is one less thing we have to worry about. This will be my go-to spot for all the kid’s stuff. We are going to build another wall treatment hook system in the mudroom to go with it. They will be on opposite walls so there will always be plenty of places to put everything away or hang up stuff.

10-akwood

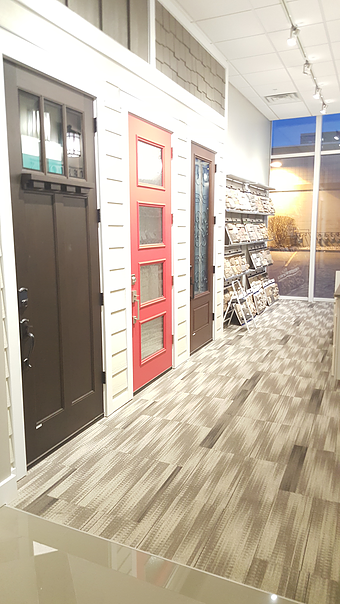
There is also a picture of all the exterior options with front doors. I picked the first one that is craftsman style with three windows on top (it will be painted of course). I just love this style and have seen it in several houses and it never gets old to me. The exterior of the house will be my favorite color. WHITE! That’s right people; the entire house will be white. I couldn’t be more happy about this. There will be black accents but you will just have to wait and see. I promise. It’s going to look fabulous.

11-oakwood

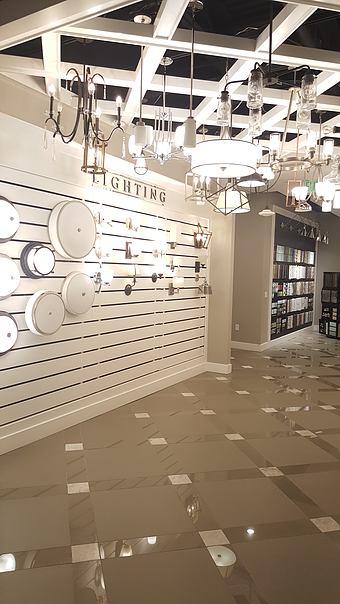
Ok, let’s talk about lighting. I have changed so many boob lights (dome lights) in my houses. It is easy to do and can make a big impact to a room. However, I want all can lights in this house, except for in a few areas where there will be pendant lighting. Most of the time you can find cute pendants and chandeliers online. A lot of builders are very overpriced on lighting. Guess what??!!! I got the cutest entry and stairwell lantern pendants for a steal of a deal at the design center. So that makes two fewer lights that I will have to swap out when we move in.12-oakwood

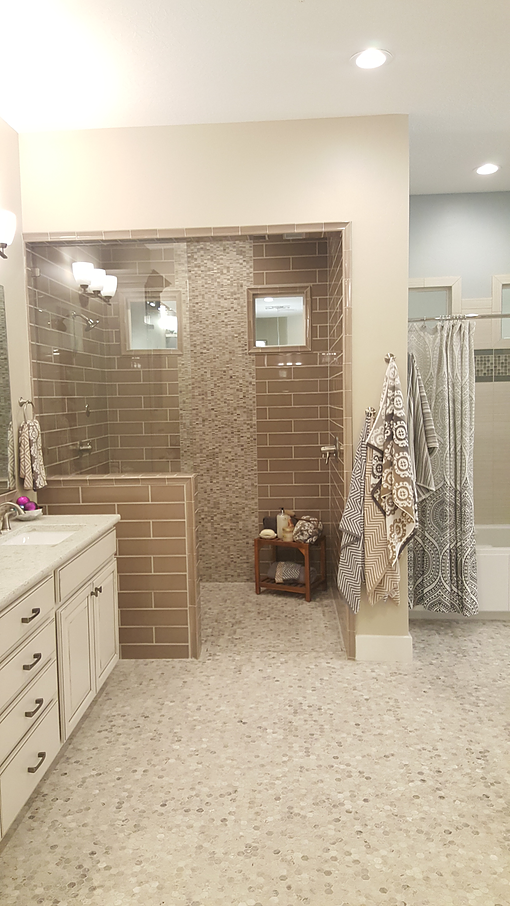
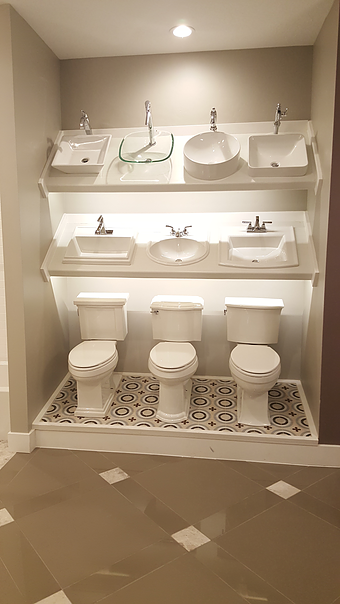
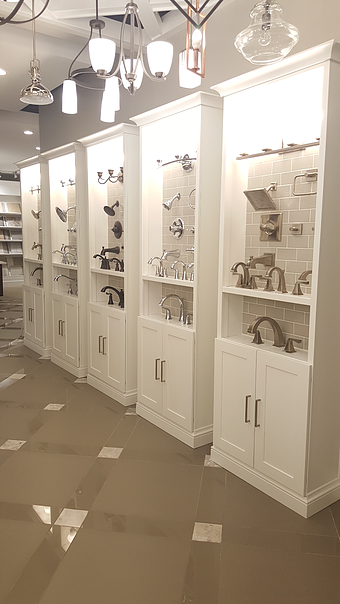
From faucets, countertops, cabinets, and sinks, to vanities, toilets, and tile. You can see why it took all four appointments to sort it all out. There was so much to see and it is nice to have it in front of you to check out. I can’t wait to show you how all my options turn out in the new house!
14-oakwood  13-oakwood

Kate

Hi there, I’m Kate. Welcome to White Lane Decor. Thanks for stopping by. I love neutral, bright, and airy spaces. I’m always looking for new ways to turn our house into a home. Have a look around and find inspiration for your next project.

Disclosure

Some of my blog posts, ads, and banners contain "affiliate links." This means if you click on the link and purchase the item, I will receive an affiliate compensation. However, I only recommend products or services I use personally and truly feel you will enjoy too! I am disclosing this in accordance with the Federal Trade Commission's 16 CFR, Part 255: "Guides Concerning the Use of Endorsements and Testimonials in Advertising.” White Lane Decor is a participant in the Amazon Services LLC Associates Program, an affiliate advertising program designed to provide a means for sites to earn advertising fees by advertising and linking to amazon.com.

Shop My Home

Basement Part II

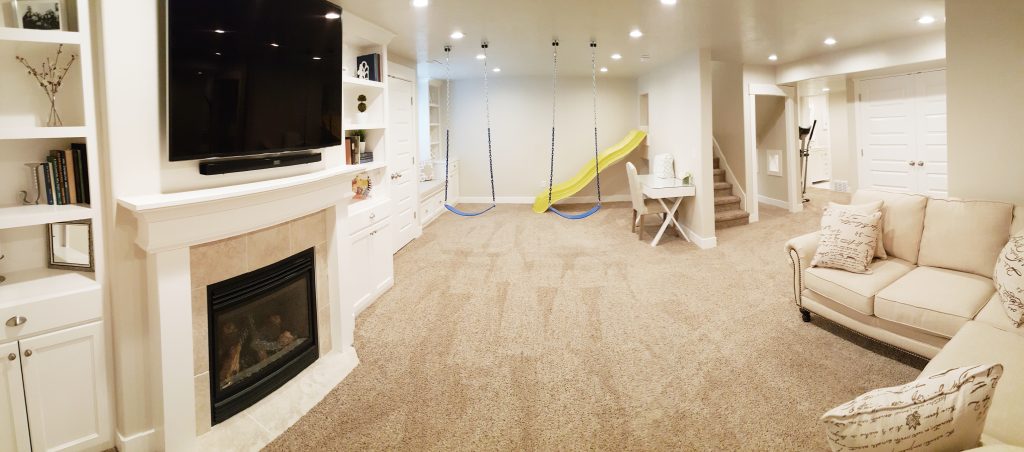
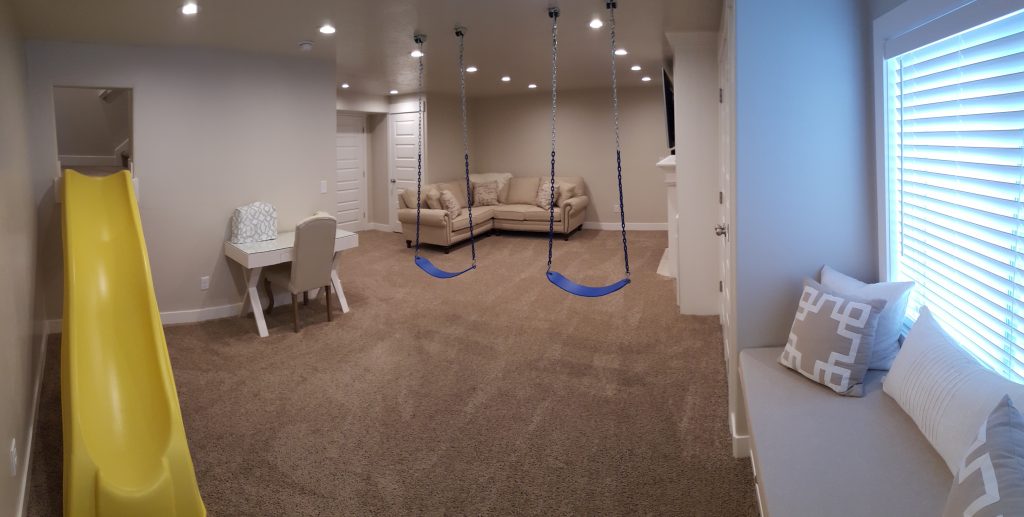
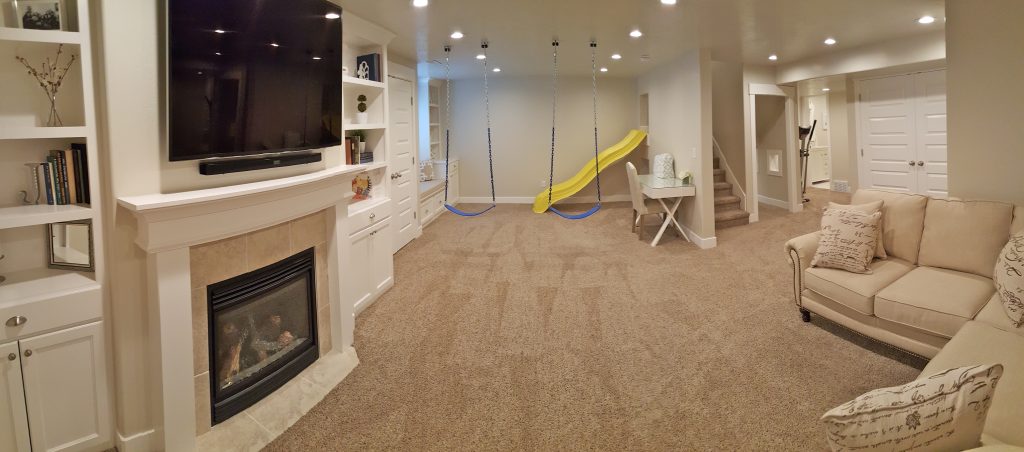
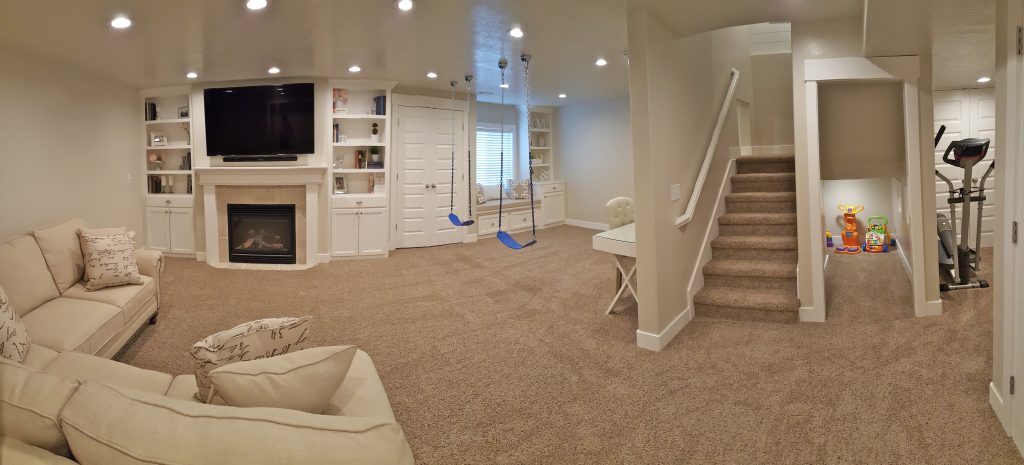
Ok, today I’m showing you how the basement in our townhouse turned out all finished. I absolutely loved being down there and so did the kids. As you can see from the pictures, the kids were most excited about having a slide and swings in their basement. That is one of the first things they would tell people. They just loved having friends over to play. Even without friends they enjoyed playing together on the swings and slide. It was actually convenient because I also loved the space and being down there so much too. All of my craft and sewing stuff was hidden in the closets. I could just pull out my stuff and work while they played. Functional, beautiful, and kid friendly is exactly what I wanted and that is what I got!

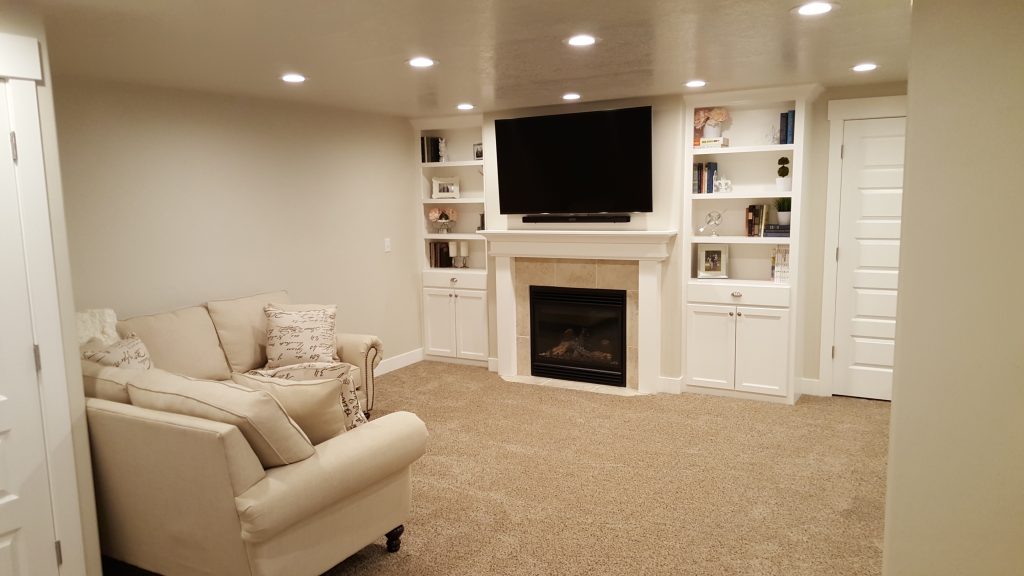
Mr. Whitelane also loved the 60” television mounted above the fireplace. Perfect movie spot at night! We just loved sitting on our beautiful couch from Best Deal Furniture and Mattress and watching a movie. If you haven’t been to their store, stop what you are doing and go check out their website or store. Best prices we found and the furniture is all beautiful.

I styled the bookshelves mostly with books I already had. I also made a few trips to HomeGoods for some cute knick knacks. The greek key pillows on the window seat are from Target. The white ones behind them are from IKEA. The bench seat cushion was actually made by me. Simple project. I just had a piece of plywood cut into a rectangle the exact measurements of the bench. Then I had foam cut to that same size as well. I used spray adhesive to glue the foam to the plywood. Once it was dry I found a cute neutral fabric from Hobby Lobby. I upholstered the fabric with my handy dandy staple gun.  Ta Da…all done. I also already had lot of random decor items like that “&” sign, “love” sign, picture frames, and bookends that I just spray painted to match.20150722_132254-1-1

The cute X leg desk is from World Market and the chair is from HomeGoods. Now as I mentioned before, my sewing skills are slim. My sewing machine is my Mom’s old one from the 80’s.  So it is not very good looking at all. I couldn’t have this beautiful desk with this ugly beast sitting on top (especially when I hardly use it). So I made a cover for it in that cute turquoise and white color you see. I ordered it from fabric.com and I was very pleased. Let me be honest, I was quite proud of myself for being able to make this cover from scratch. I can’t believe it actually fit and turned out usable. I would tell you how I sewed it but it was a bit of “fly by the seat of my pants” type project.Haha.

20150722_132215

The slide we ordered online from Target. We also ordered the swings online from Walmart. The awesome hooks the swings hang on are from amazon.com. If you want the exact name of them send me a message or leave a comment and I will get that to you. They are rated to hold a ton of weight and Mr.Whitelane and our son could swing at the same time with no problems. The swings easily clip on and off of the hooks and we just loved how easy it worked.

20150722_132144-1
You can see all the cute toys tucked under the stairs in the kids play area. It was nice to keep all the clutter tucked under there. We kept toy bins in there for easy clean up. When the kids were finished playing, they could easily put it all away themselves (thanks to that cute door frame under the slide).20150722_132017-1-1

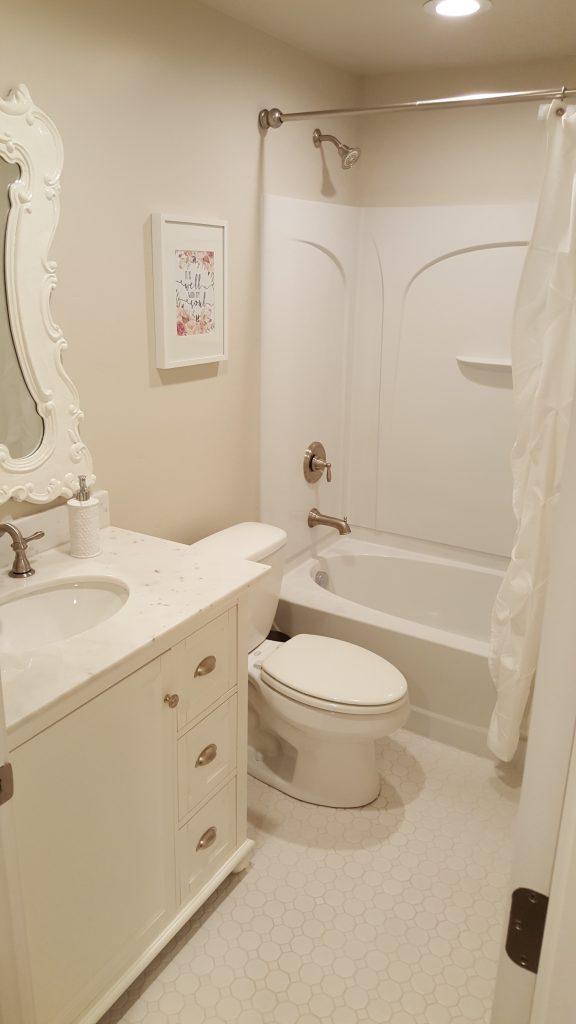
You will also see my elliptical poking out in a few pictures. Hey, a girl has got to work out sometimes too. The bathroom was probably my favorite room in the house. The octagon and dot tile was from Home Depot. I chose white grout because it was going to be a bathroom that didn’t get much use. I also sealed the grout to be safe. The vanity and faucet also came from Home Depot. That cute framed print came from a seller that was on groupdealz.com. I printed it straight off my computer and it was only two dollars. The shower curtain also came from Target. I will probably use it in the kid’s bathroom at the new house (I can always bleach it, right?). However, I don’t think I will get away with using those pink towels (also from Target) in the kid’s bathroom. It would work for my daughter but not my son. I will have to find something gender neutral since they will be sharing a bathroom at the new house.

20150722_131813-1
That about wraps it up. If you have any questions or want any more information , please just ask! Leave a comment or send me an email. I would love to hear what you think.

Kate

Hi there, I’m Kate. Welcome to White Lane Decor. Thanks for stopping by. I love neutral, bright, and airy spaces. I’m always looking for new ways to turn our house into a home. Have a look around and find inspiration for your next project.

Disclosure

Some of my blog posts, ads, and banners contain "affiliate links." This means if you click on the link and purchase the item, I will receive an affiliate compensation. However, I only recommend products or services I use personally and truly feel you will enjoy too! I am disclosing this in accordance with the Federal Trade Commission's 16 CFR, Part 255: "Guides Concerning the Use of Endorsements and Testimonials in Advertising.” White Lane Decor is a participant in the Amazon Services LLC Associates Program, an affiliate advertising program designed to provide a means for sites to earn advertising fees by advertising and linking to amazon.com.

Shop My Home

Basement Part I

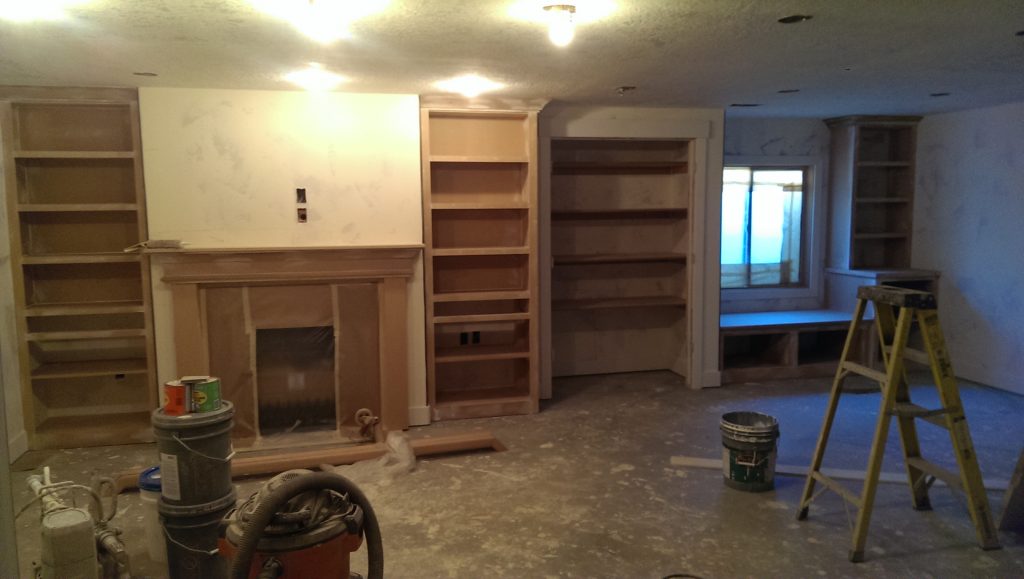
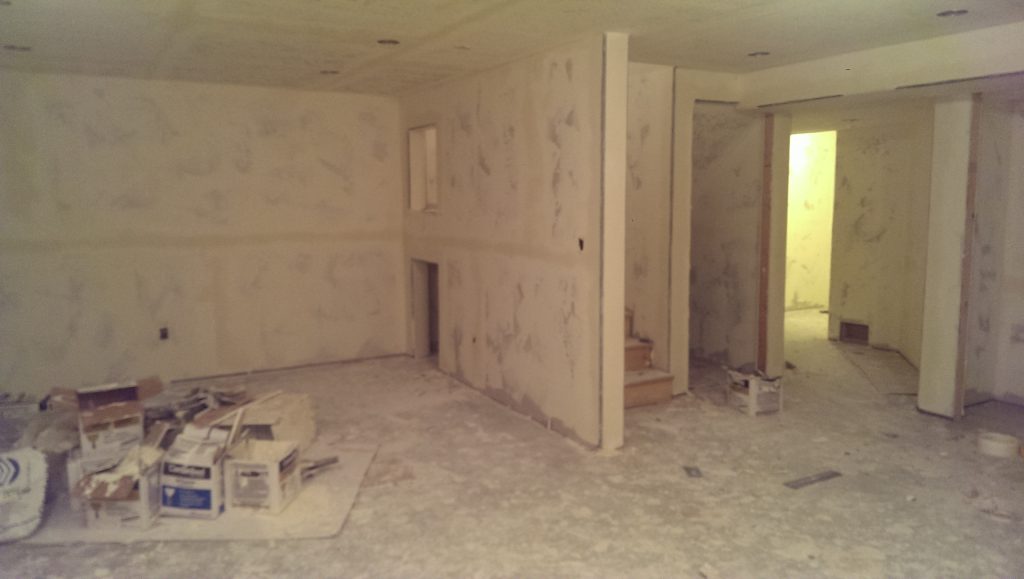
We bought our townhouse is 2013. After about a year, we decided to finish the basement. We found a contractor that we liked to do all the work. I still got to design and pick everything out.  It  was only a little under 800 square feet , so I had to maximize my space. I knew I wanted built-in shelves and tons of storage to hide all my junk (I mean very important stuff). A fireplace is a must have for me so that meant bookcases on each side as well. We had a cute little area under the stairs that we knew would be perfect for a little play area for the kids. Mr. Whitelane came up with the idea of putting in a slide for the kids. I wasn’t sure how it was going to work out but he was sure about it working! He also wanted a cut out under the slide. This was so the kids could run around the entrance under the stairs and get out on the other side under the slide. It sounded good and the contractor said he could do it so everyone was happy.

imag1014
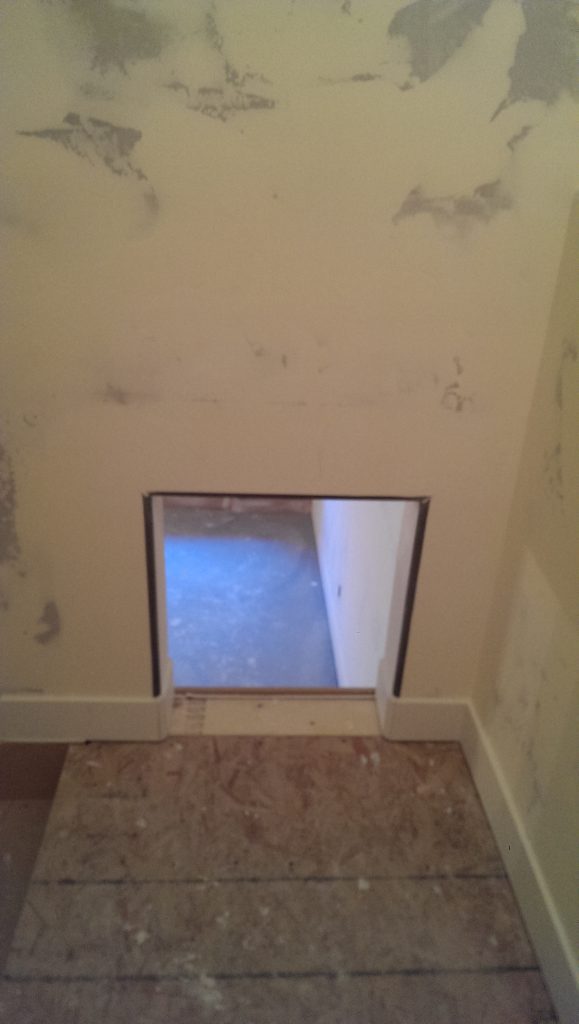
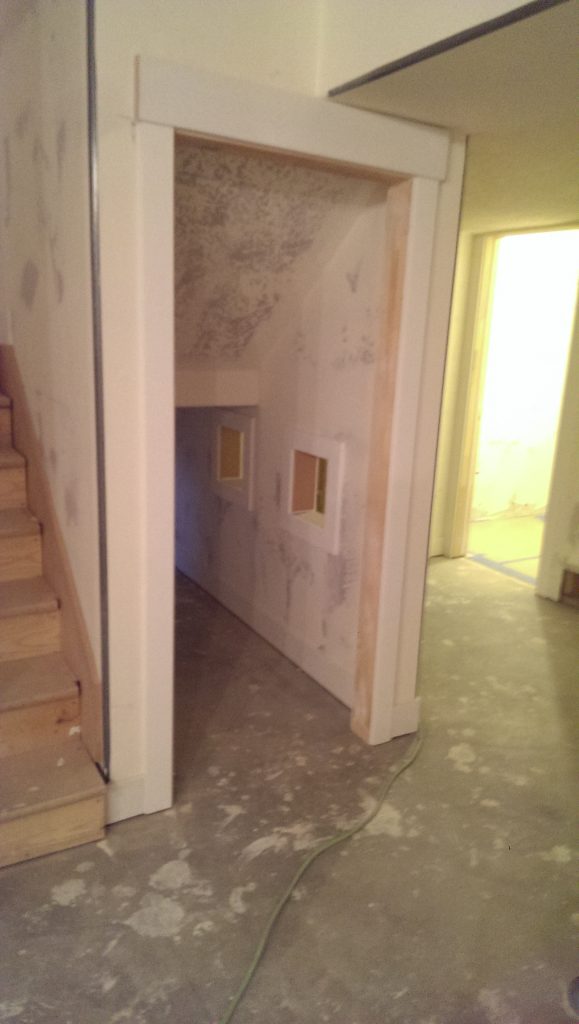
Let’s talk about how we made this slide work. When you came down the first set of stairs you would reach a landing. Right off the landing, we had them cut an opening out of the wall, big enough for an adult to sit down and go through as well as kids. The slide attached to the landing floor with screws and bolts. Easy-peasy right? Underneath the slide, there was another opening cut for kids to come out. It looks just a like a cute door frame for kids. We also knew we wanted swings down there for the kids. I know crazy fun! We had the contractor attach extra two by four pieces of wood to the floor joist in the ceiling. This is where we would mount the swing hooks that would hold the swings.

imag0575

imag1020 imag1009 imag0588

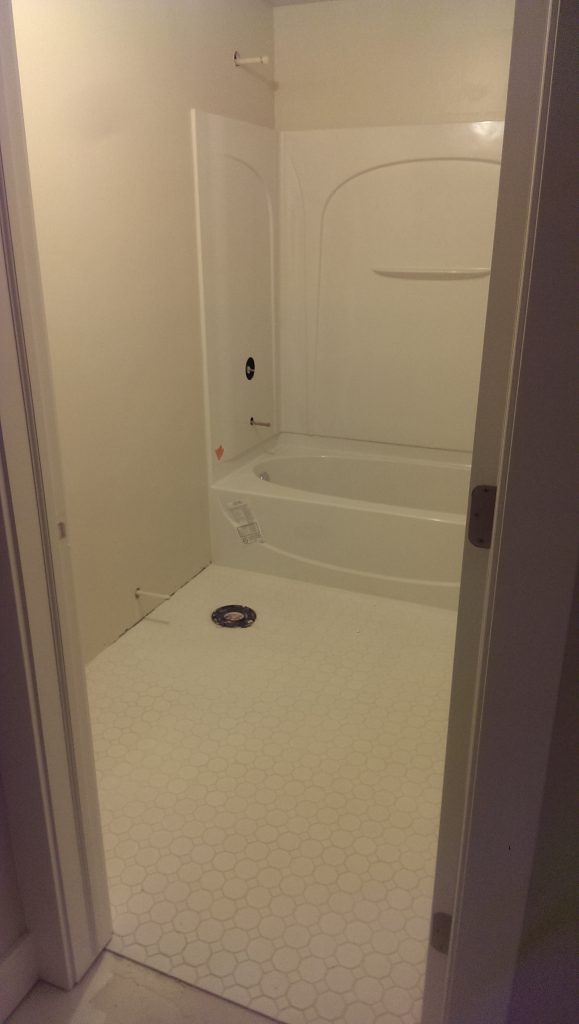
We also had a full bath that was my favorite bathroom in the house. I just love all the white starting from the ground up. The octagon and dot tile, the vanity, the Target shower curtain and towels, and the soap dispenser. The vanity we got from Home Depot. It has a marble top and the faucet is also one of my , giving an old charm look.  But you will have to wait for my after pictures in part II to see all that :).

imag1140
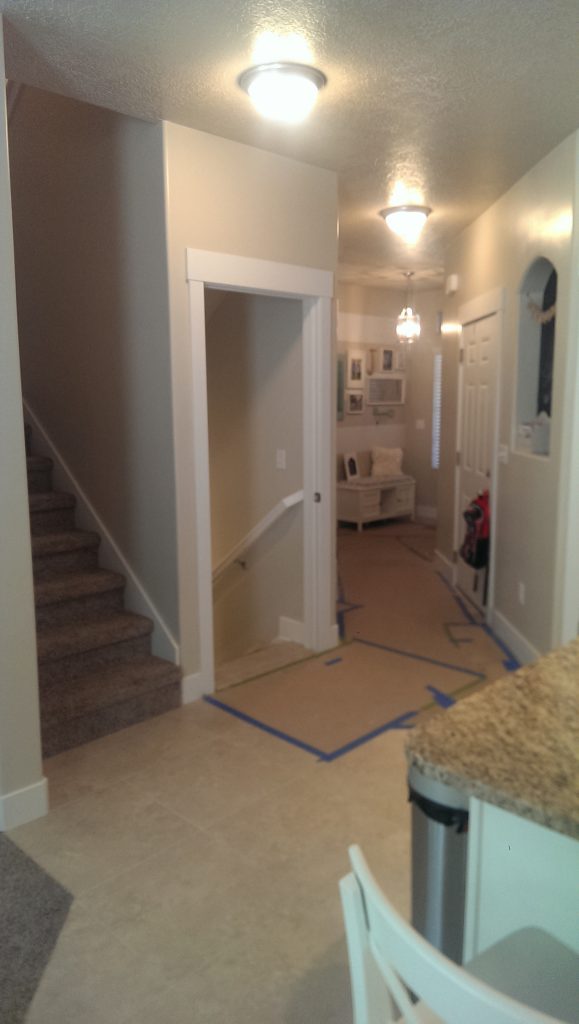
Living upstairs while all this construction is going on downstairs is no big deal right? WRONG! There was dust EVERYWHERE. I’m talking stick your finger through it and write a message on the kitchen counter dust pile. Yup, it was fun and loud during nap time for the little one. And that is brown construction paper you see taped down to the entry floor in the below picture. That’s right, I wasn’t going to let all the drywall and muck from the basement be drug across the entry. Just keeping it classy ;). But it was all worth it in the end as you will soon see in the after pictures. All the finishing details will be on my next post about the basement, part II.

imag1543
 

Kate

Hi there, I’m Kate. Welcome to White Lane Decor. Thanks for stopping by. I love neutral, bright, and airy spaces. I’m always looking for new ways to turn our house into a home. Have a look around and find inspiration for your next project.

Disclosure

Some of my blog posts, ads, and banners contain "affiliate links." This means if you click on the link and purchase the item, I will receive an affiliate compensation. However, I only recommend products or services I use personally and truly feel you will enjoy too! I am disclosing this in accordance with the Federal Trade Commission's 16 CFR, Part 255: "Guides Concerning the Use of Endorsements and Testimonials in Advertising.” White Lane Decor is a participant in the Amazon Services LLC Associates Program, an affiliate advertising program designed to provide a means for sites to earn advertising fees by advertising and linking to amazon.com.

Shop My Home